I recently had the honor of appearing on Wyse Talk with Jan Doyle. I met Jan through my quilt guild. She's a really fun and sweet lady. Jan hosts a show on Branford Community TV in Connecticut. Jan interviewed me about my career in quilting. We talk about my designs and show off a few quilts that I've had published. You check out the interview below. It was a little scary at first but it's easy to be interviewed by Jan. She did an awesome job!
 I have exciting news to share with you. Fons & Porter’s Love of Quilting is offering a kit for one of my quilt designs that I created for Quilting Treasures fabrics.
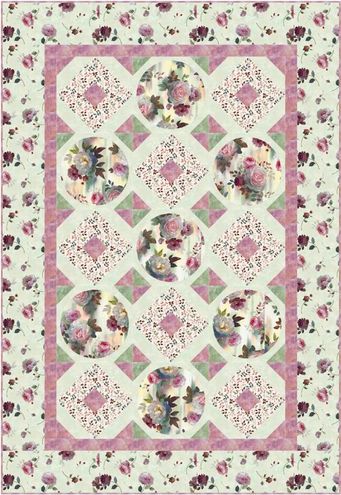
The collection used in the design is called Rosewater and it’s a lovely group of soft colored florals supported by a sweet selection of texture and tonal fabrics to complement the floral prints. Quilting Treasures offers two sizes for this design, sofa sized and queen/regular sized quilt patterns. Fons & Porter is offering a kit for the sofa size of the design. Now don’t get too excited because it won’t be available until after the beginning of July. The construction for this quilt utilizes applique for the circle motifs and foundation piecing for the alternate blocks. If you make it please send me a picture if you have a chance. Happy Quilting!
BLOCK # 1228 TILTED LILY  Welcome to my blog for volume 13 of Quiltmaker’s 100 Designer block blog tour. This is my block. I named it “Tilted Lily” because the traditional Carolina Lily block is set on-point. This one is in a square setting. I’ll explain how this came about a little further down in this blog. I will be sending one lucky blogger a free copy of Volume 13 at the end of the tour. If you would like to be that lucky person you need to do two things, please visit my Facebook page and click on the “Like” and also leave a comment below. If you have already “Liked” my page then just leave a comment below. I will remind you what you have to do again at the end. Monday, May 9 at 12:00 midnight is the deadline. P.S. if you don't do Facebook, you'll still be included. Just tack that fact onto your comment that you leave below. Congratulations to Beth T. from Oregon! I hope you find a lot of inspiration in this issue. And a big thank you to everyone who visited and left a comment! I'm glad you enjoyed my block and my explanation. 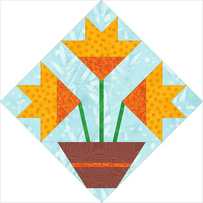 My first experience with the Carolina Lily block and Y-seams happened when I decided to enter the competition New Quilts from an Old Favorite. The theme for 2014 was the Carolina lily. I knew immediately that I wasn’t going sew a single Y-seam. No Way! I was sure that there had to be an easier way. The only idea that I came across was to make the lily from two Flying Geese units and a Half Square Triangle (HST) unit. The only problem with this technique was that it made the two opposite “V” sections of the petals too deep and the center “V” was too short. This gave the lily a distorted aspect.    I decided that I would work with the technique that uses two Flying Geese units and a Half Square Triangle unit. I figured there had to be a way to use this technique without the resulting distortion. To do this I needed to use my ever dependable Electric Quilt software (EQ). I drafted a single Carolina Lily block flower that had y-seams. I converted the block to guidelines and then drafted over the outlines and the diagonal line that creates the triangle at the bottom. Then I connected the ends of the diagonal with the “V” of the center petal. This creates a Half Square Triangle unit. Next I simply continued the diagonal line of the flower petal until it reached the side of the Half Square Triangle unit. I called these units “Tall” Flying Geese. To construct the “Tall” Flying Geese units I created a foundation paper pattern. 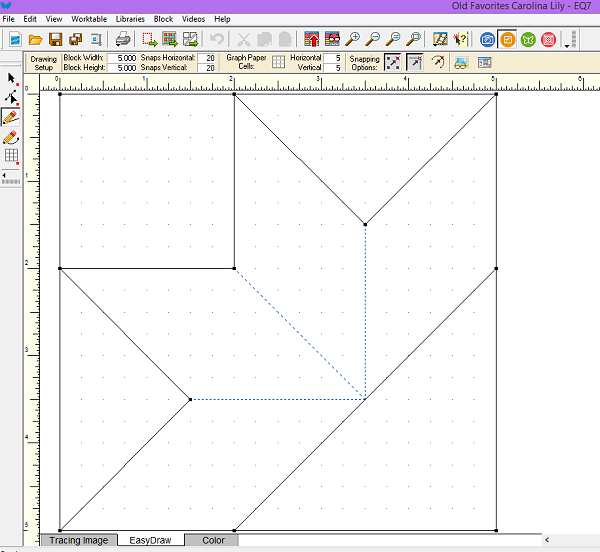   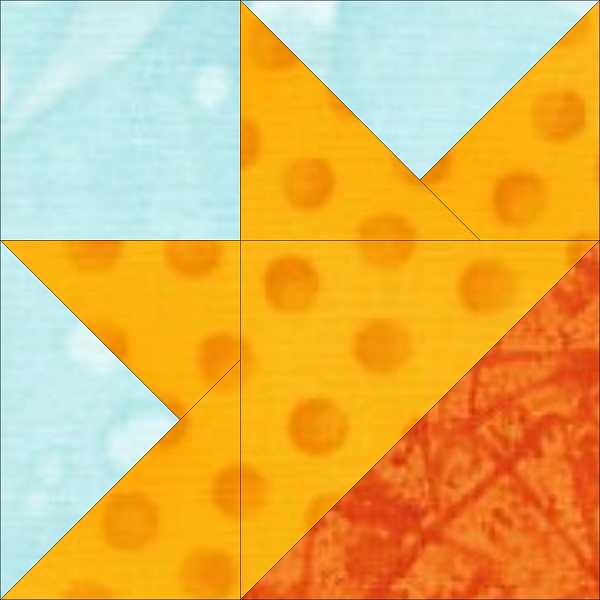 My next encounter with the Lily block and Y-seams was with our Quilt Guild’s raffle quilt. The design that we came up with was an on point setting and it included mostly non-directional applique blocks. The only problem was the setting of the lily block was directional and we felt that it threw everything off visually. After pondering this for a while a solution was found. In one of the magazines we saw a Sue Garman design, "Bed of Roses" that was set on point and included applique. In this quilt the designer used square set applique blocks around the center block. The directional aspect of the applique blocks around the center makes the design feel like a medallion quilt. 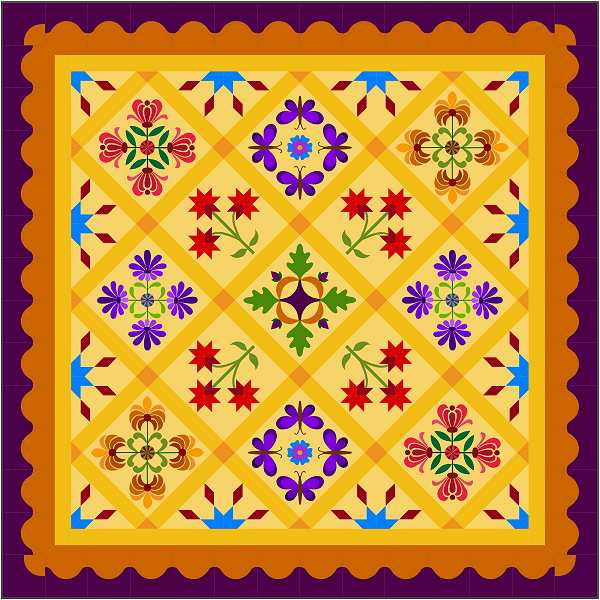 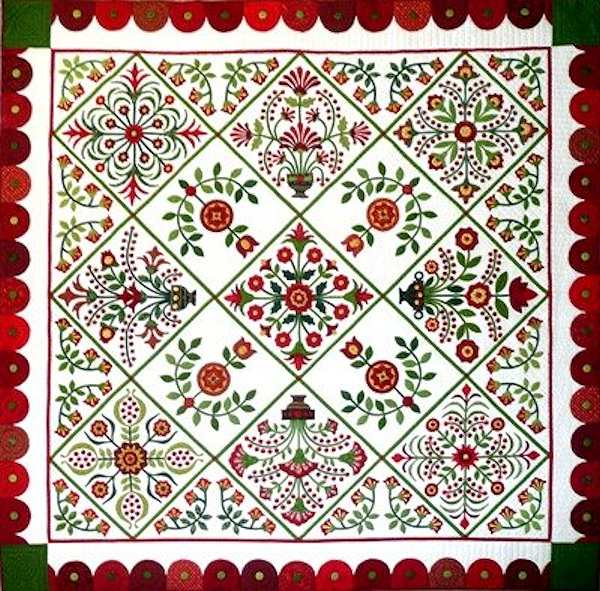 So I decided that I could do the same thing with our Carolina Lily block by adding triangles to the sides creating a square set. And that’s how the Lily became “Tilted”. I was planning on sewing “Tilted Lily” block with my “tall” geese technique when I realized that our quilt design also included a Blazing Star block which is also made with Y-seams. The Blazing Star block is used in the setting triangles as a partial block. Since both blocks include Y-seams I felt it would be confusing to use two different techniques to avoid the Y-seams. So I decide that whatever worked for the Blazing Star block would also work for the Lily block. 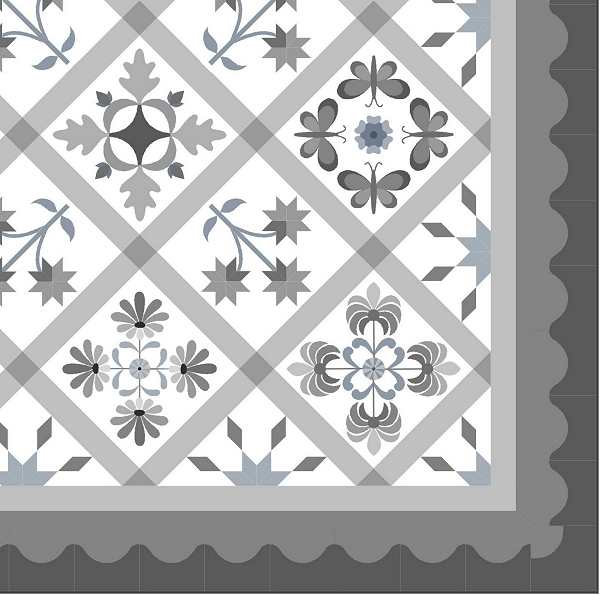 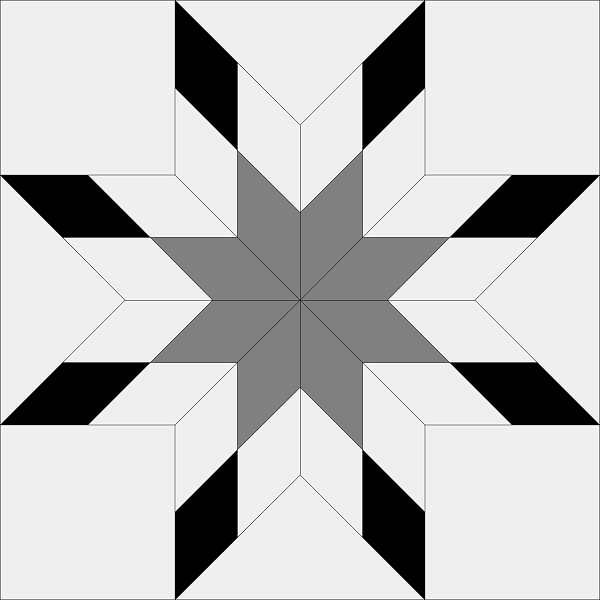   I knew that this block would be easier for me to construct if it was a foundation piecing pattern. I started by extending the seam lines to eliminate the Y-seams. I noticed that two adjacent areas contained the same color fabric, so I eliminated the seams line between those pieces. 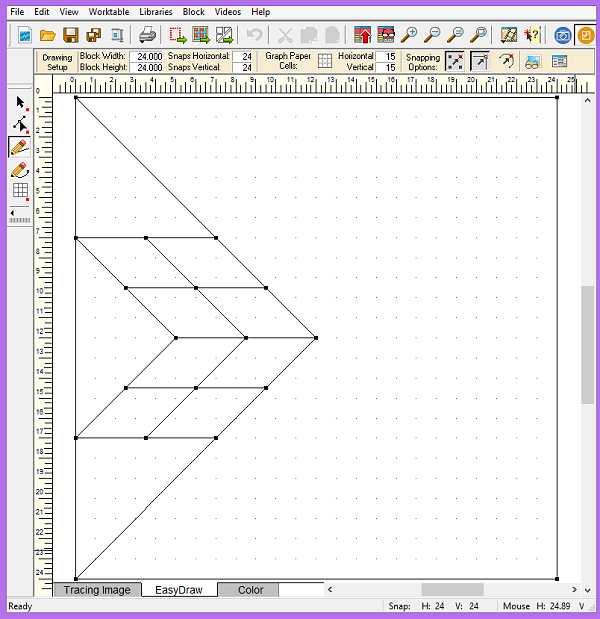 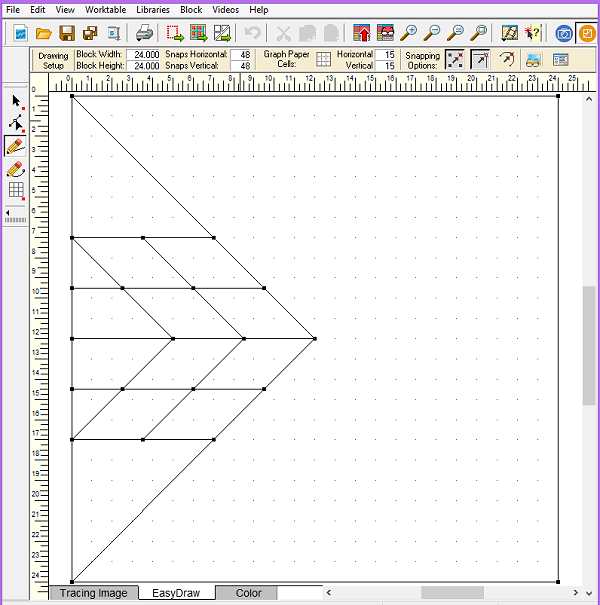 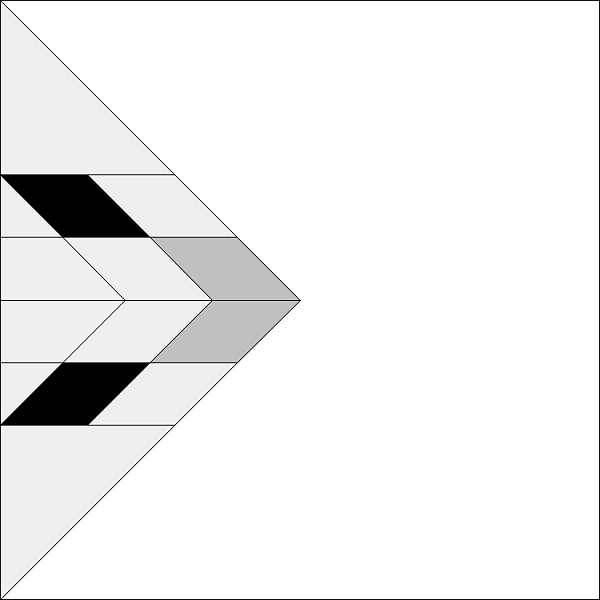 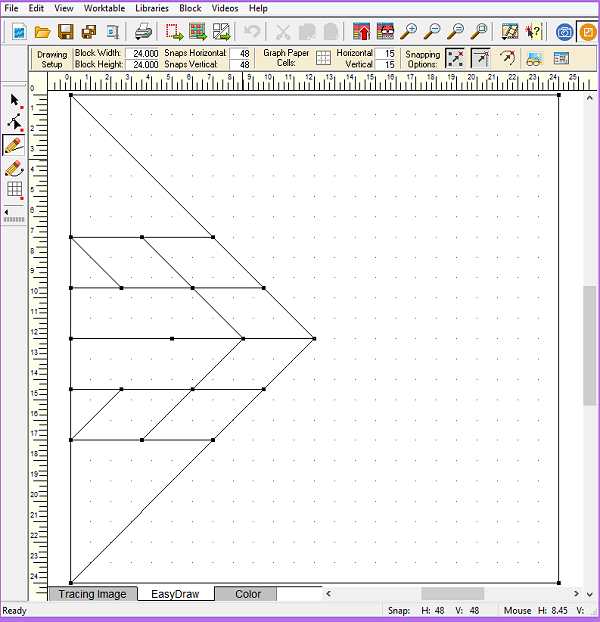  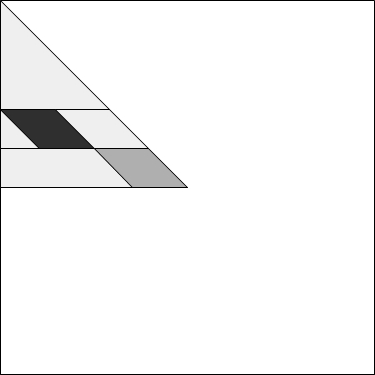 Now it was time to apply the same idea to the Lily block and here is the result. A much simpler way to construct a challenging block. 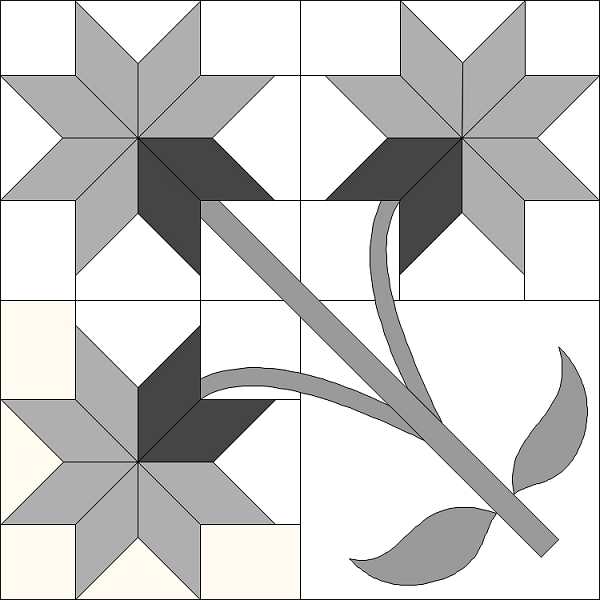   I hope you enjoyed this blog post. Don’t forget visit my Facebook page and click the “Like” button and also to leave a comment below. If you have already “Liked” my Facebook page then just leave a comment below. Do these things and you could be the lucky blogger to win free copy of Volume 13 at the end of the tour. Monday, May 9 at 12:00 midnight is the deadline
 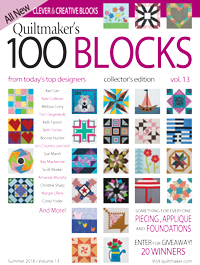 Check back here on Friday May 6, 2016. On that day I will reveal my block and I will tell you how you can win a free copy of Quiltmaker's 100 Block Challenge Volume 13
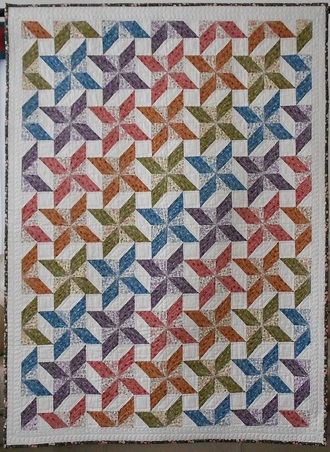
I have a new design in the May/June 2016 issue of Quiltmaker Magazine. The folks at Quiltmaker named the design Whirlpools. I think it’s a perfect name for the design because the rotation of the blocks creates the illusion of swirling water when you see it used in the quilt. I had given it the name Spinning Squash Blossoms, but I like their name better. Once again, Janice Roy of Bridgeport, Connecticut did the beautiful quilting. The lovely fabrics in this design are all from a few different Stonehenge collections by Northcott. After April 15, Quiltmaker will be offering this design in a kit and also the backing fabric sold separately.  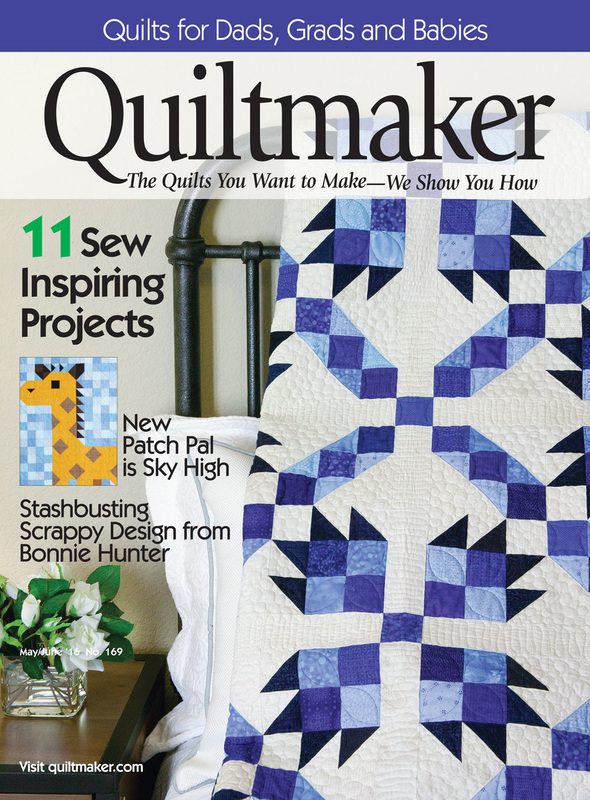  The design for this quilt began with a sketch I made in my graph pad. For many of my recent designs I have been exploring 4 way rotational symmetry using blocks that have diagonal symmetry. That means that the block reflects as a mirror of the design along the diagonal division of a square. You can see this in the butterfly block below on the left. When you place an object around a center point and rotate that object a set amount with each placement you have rotational symmetry. You can see this in the sample on the right below. Floor tiles use 4 way rotational symmetry and they are the inspiration for my design journey. 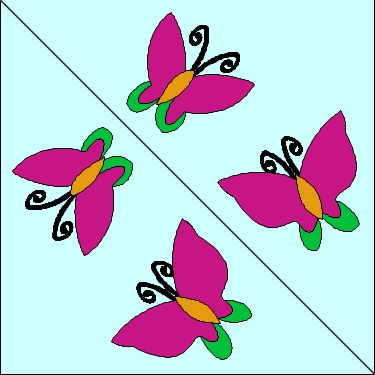  Below, on the left, you can see my original sketch for this design. As you can see from the final design on the right, this creation went through many iterations before I settled on the final manifestation of the design. 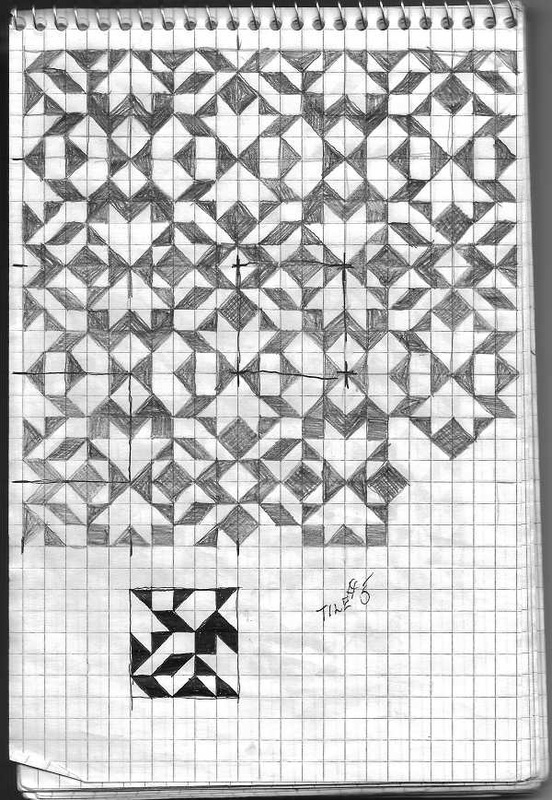 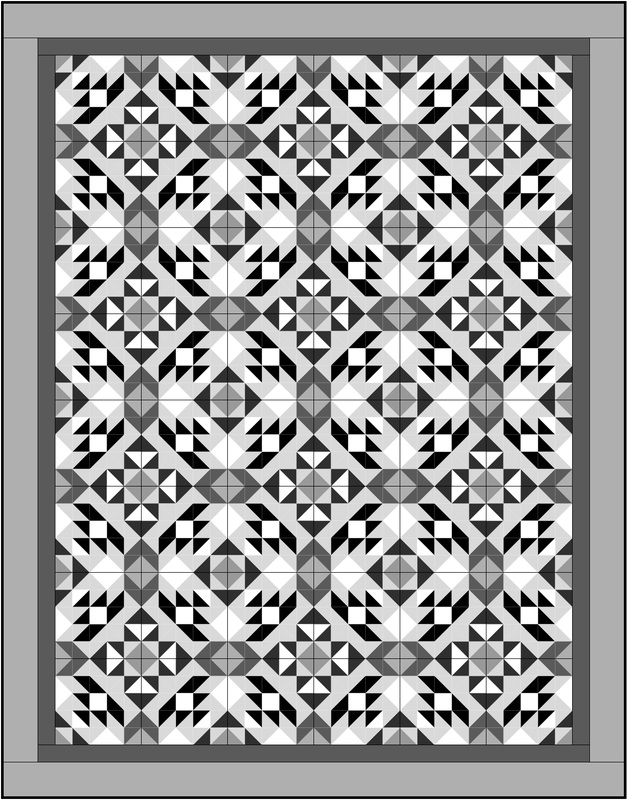 I’ll do my best to walk you through the development of this design. First I created a mockup of the original design in my Electric Quilt (EQ) design software. Even though the original block was designed with a strong diagonal element to the design, the block had no symmetry. To create symmetry I had to flip the block design to mirror itself. The horizontal and vertical red lines are the lines of symmetry.   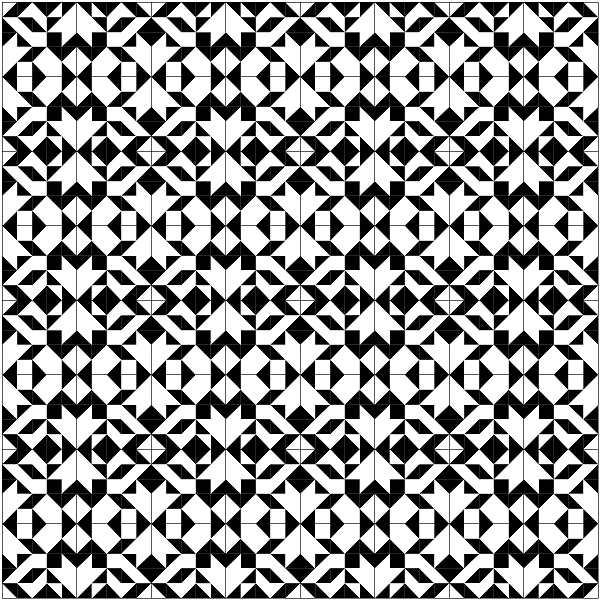 After getting a look at the whole design using this block I knew I needed to tweak the block to make it simpler. I tried to isolate the elements that I liked in the original design that I liked. Below is a sample of the path this block design took. The first block is the original block design. I have colored the elements that I kept in grey tones so that you can see them within the original block. For the next iteration of the block, I drew a diagonal line through the center unit of the 5 patch block. I did this to continue the diagonal line that already was developing through the block design. I shaded the resulting triangle in the lighter grey tone. My next idea was to color the block in reverse tones along the diagonal. Therefore the elements that are white on one side are now black on the other side and vice versa with the black elements. 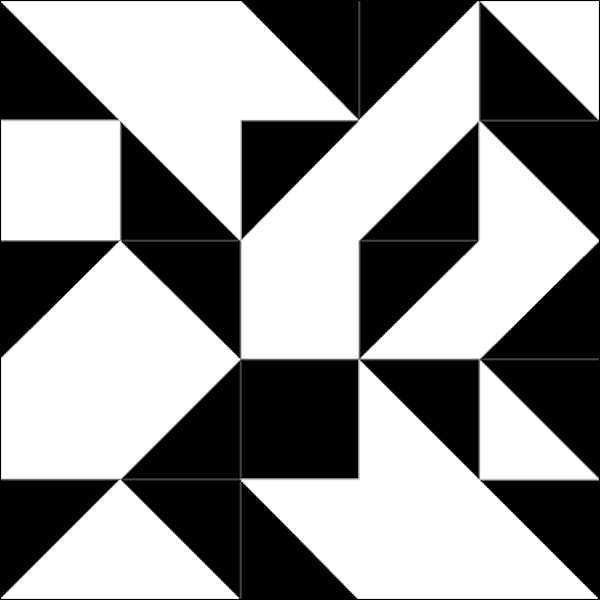  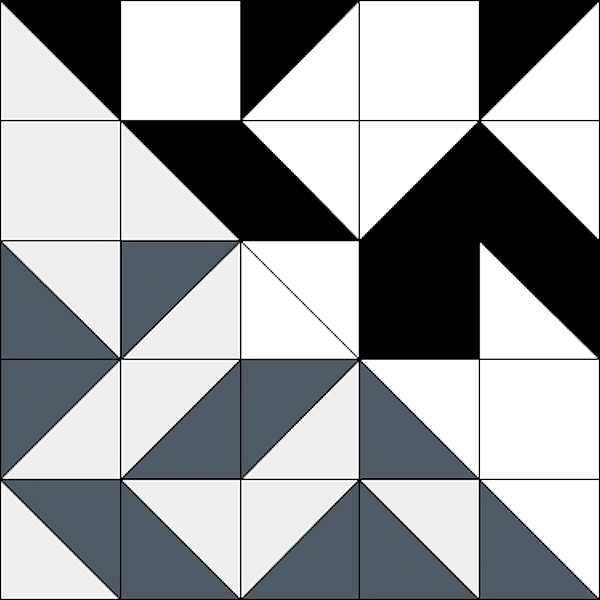  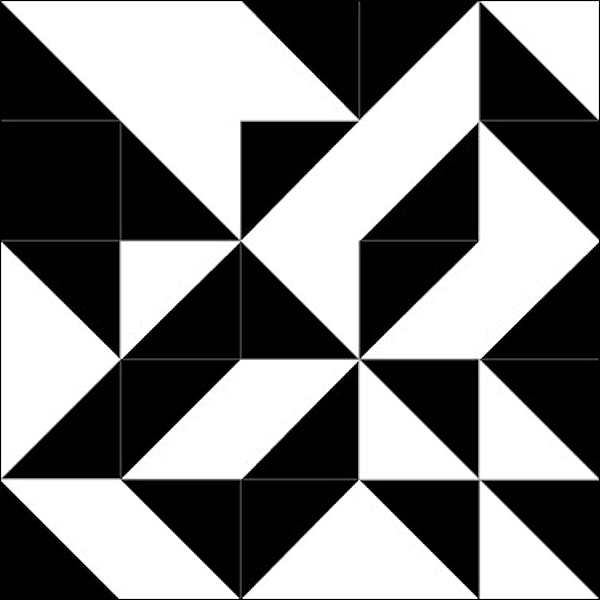 Here is what the resulting block looked like in a tiled layout with rotational symmetry.  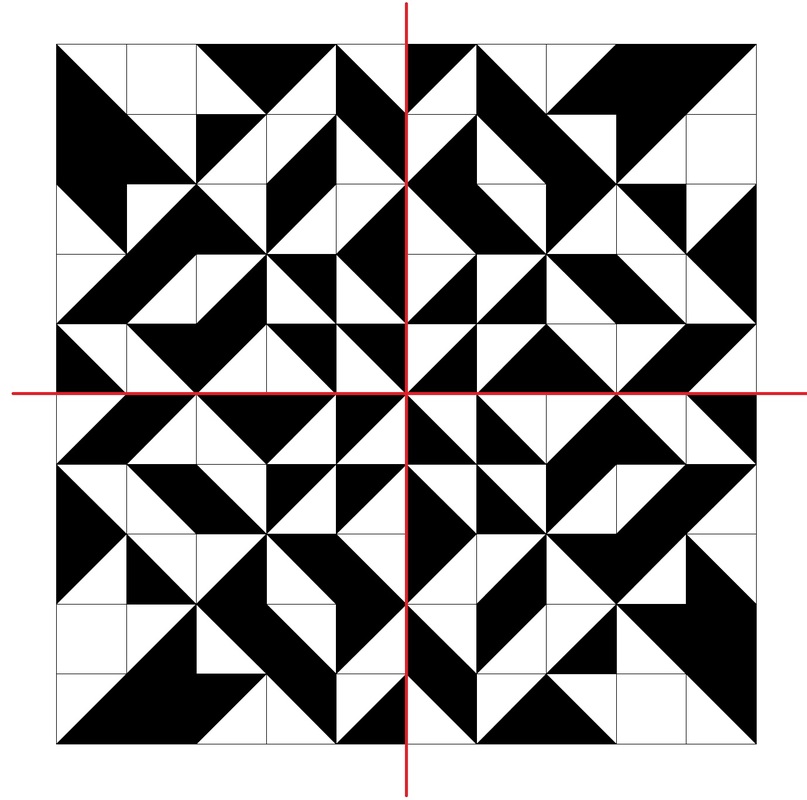 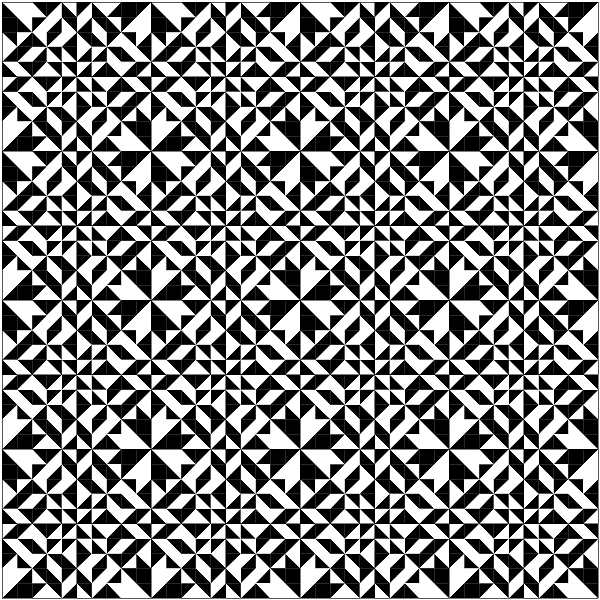 It made for a pretty cool design so I explored it further. I rotated the block and tried a mirrored or flipped symmetry in the layout.  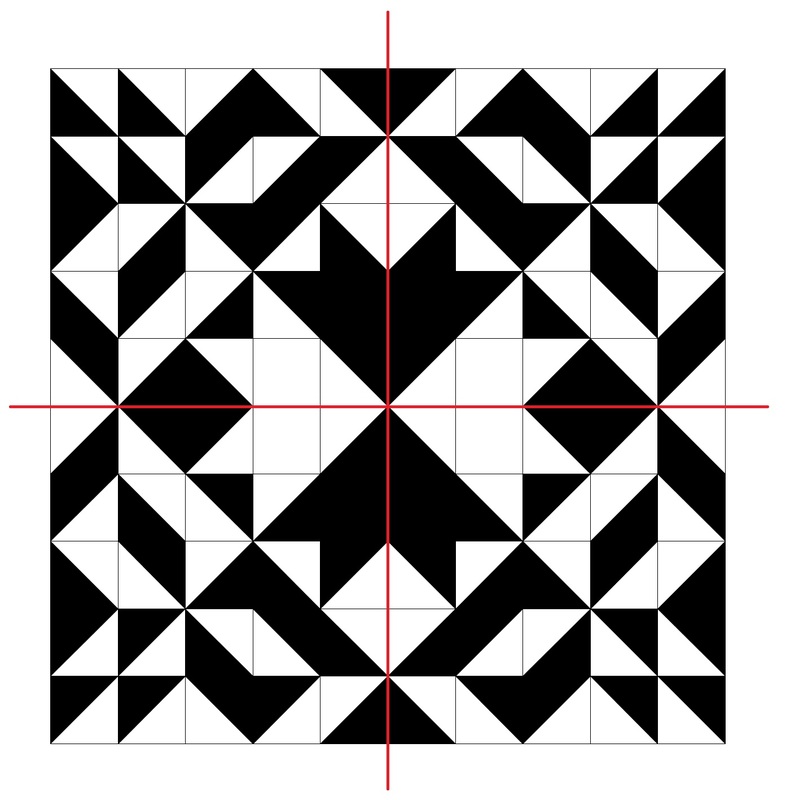 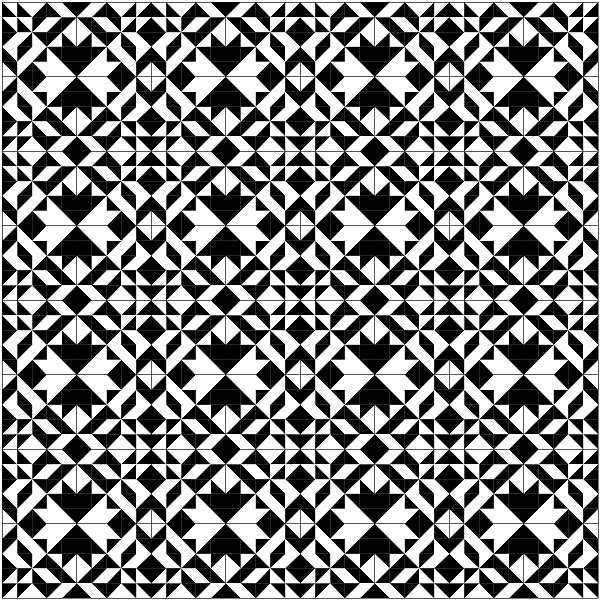 I kind of liked the design a bit and decided to explore it a bit more. So I played with the value placement in the block to see what would develop.  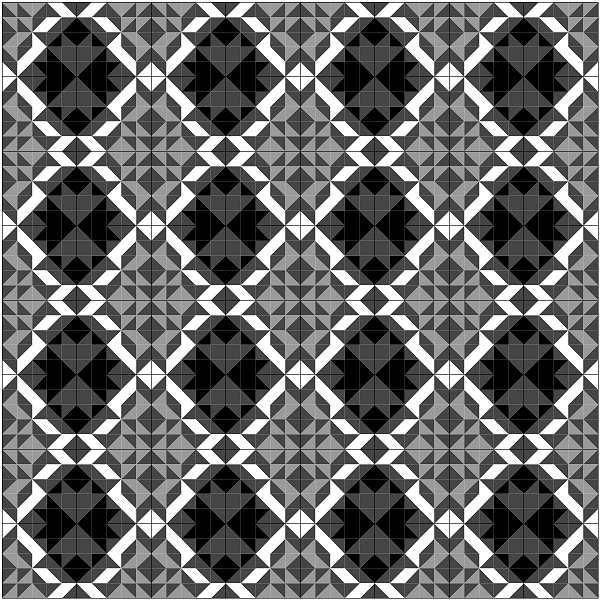 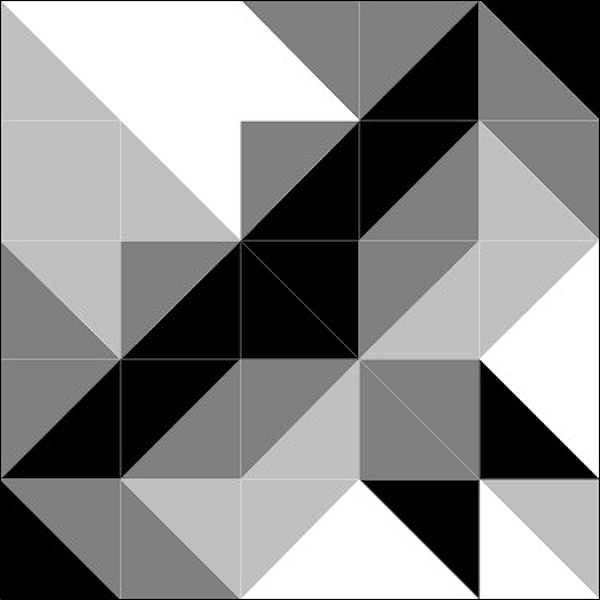 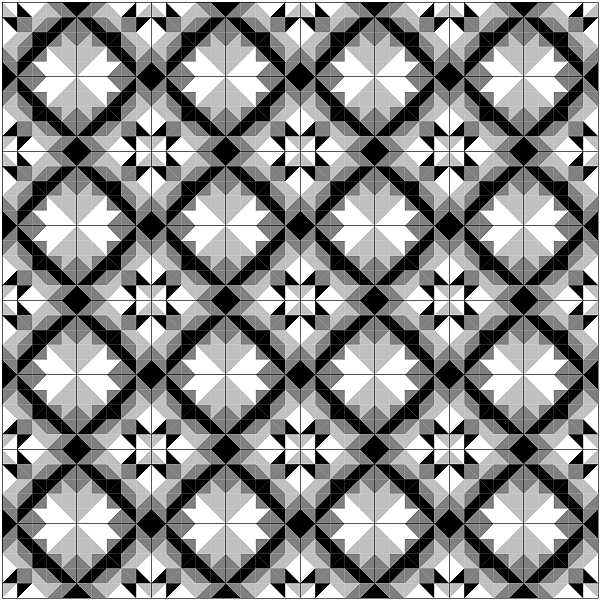 Even though I was fond of the resulting design, I felt that I needed to head in a direction that would result in a simpler block to construct. Below are examples of this direction in the design development. I took the design back to the two tone stage where I use only black and white in the block coloring. I liked how this was starting to look and continued to alter elements in the block design.    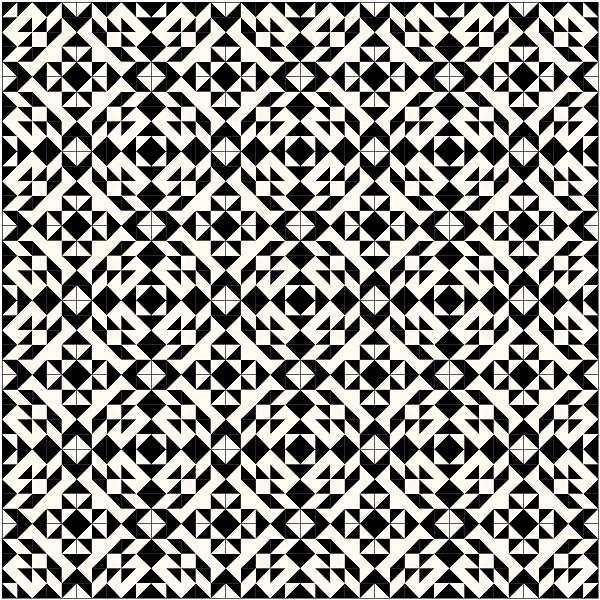 I liked what I saw and decided to explore this iteration and add more grey tones to the block design. Eventually I came to the final iteration of the design, the last one on the right below, and I was satisfied. 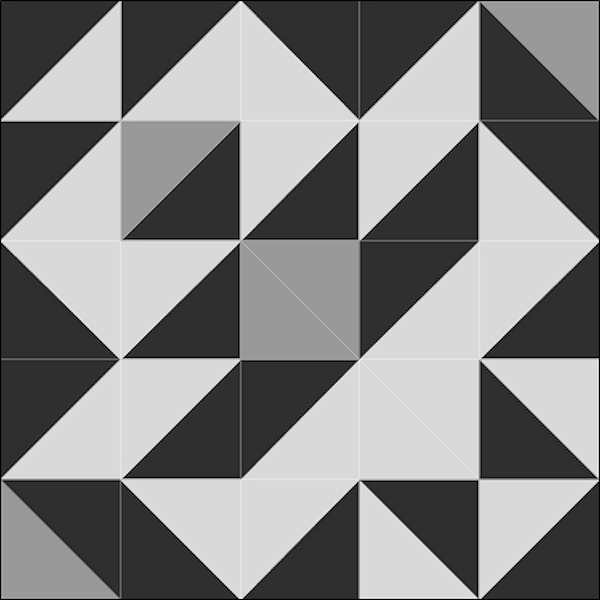 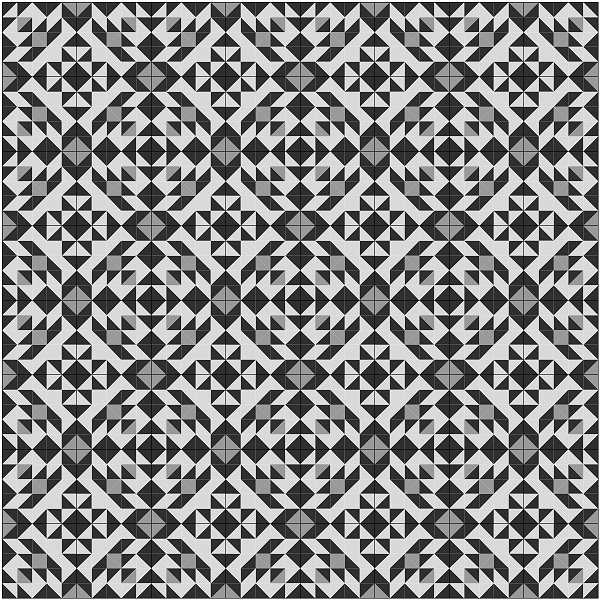 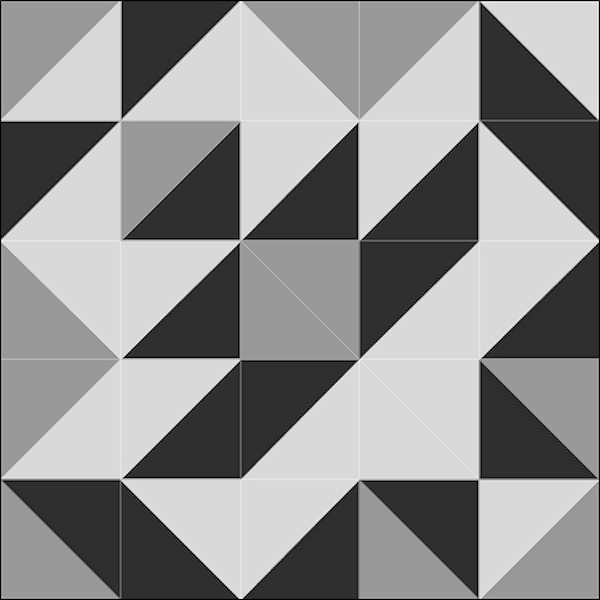  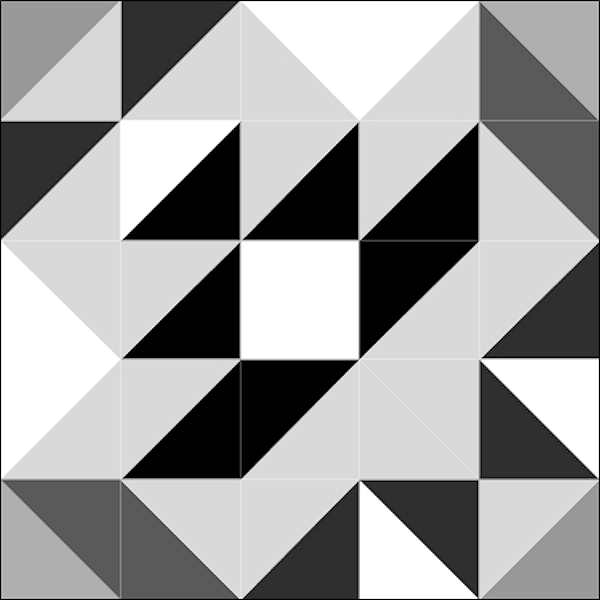 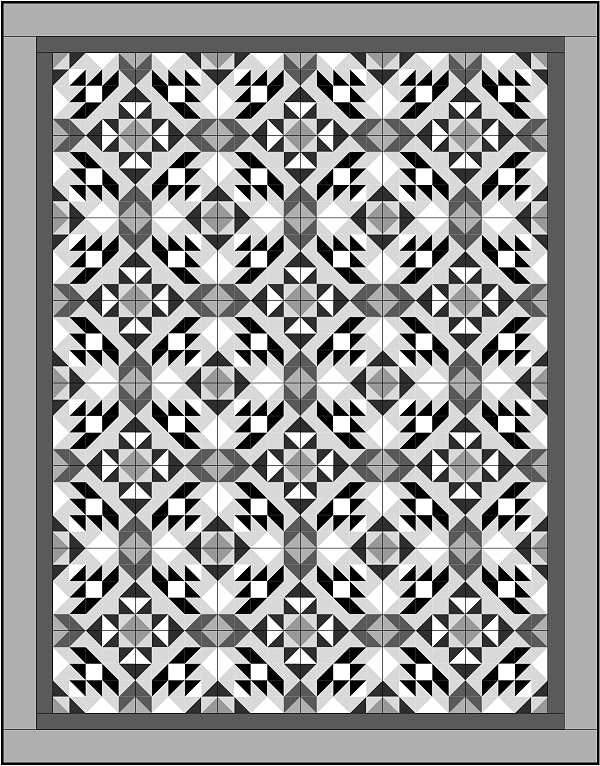 I hope you were able to follow the path of how my mind works. I hope I didn't confuse you, because I sometimes confuse myself. Thank you for reading my post. I hope you enjoyed it!
Janice Flutter By My Garden 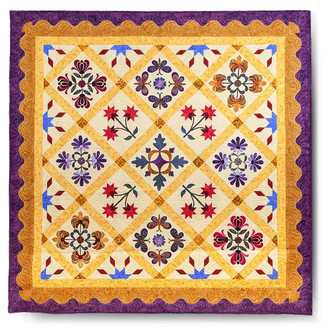 Happy spring! Spring is my favorite season of the year. There’s something about the expectation I experience waiting to see the spring flowers bloom that never grows old. It’s like Christmas morning when I was a child. This is the year for my guild, the CT Piecemakers, bi-annual quilt show. Once again I took on the challenge of leading the raffle quilt design team. I increased the number of people on my design team from 4 to 8 members. It was definitely a challenge but it helped us to create a beautiful quilt design. I liken it to trying to herd a group of cats into one place. The proceeds from the raffle of this quilt will benefit the following charities; ASRC– Autism Spectrum Resource Center, Norma Pfriem Cancer Institute, Habitat for Humanity, St. Vincent’s SWIM Across the Sound & the Girl Scouts of CT Camperships. 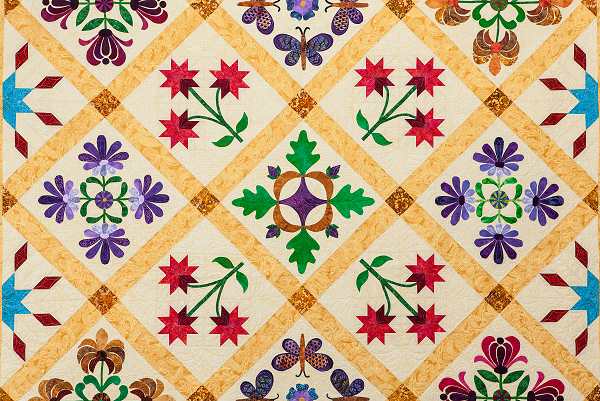  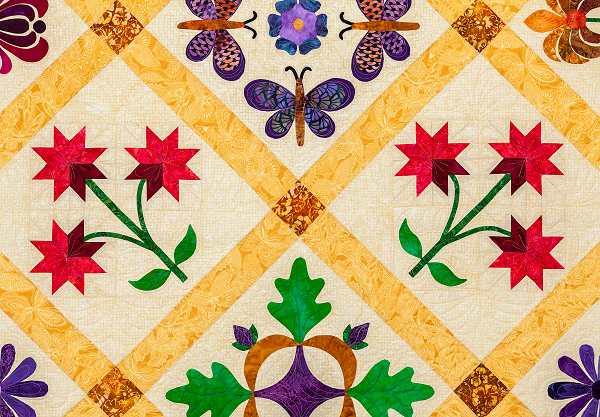 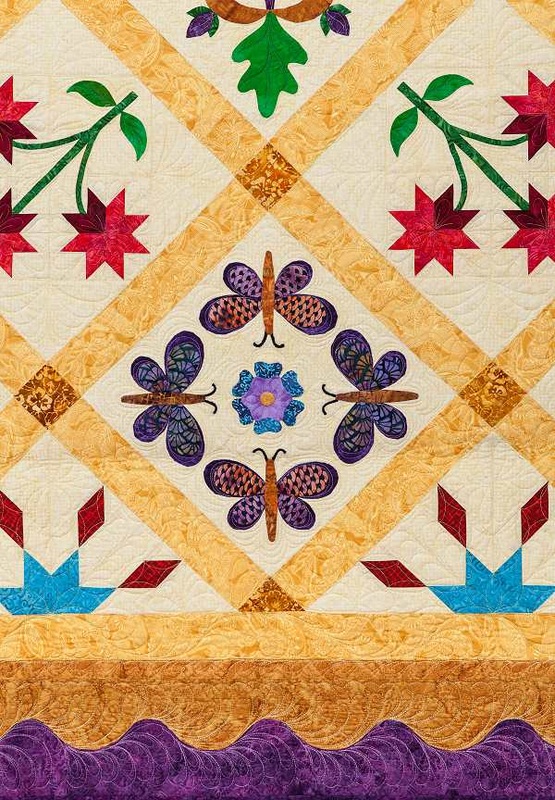 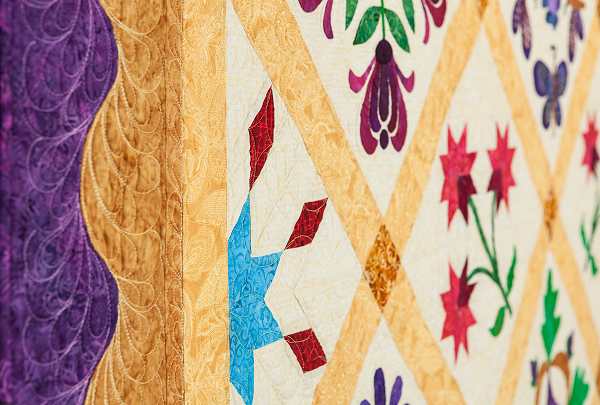 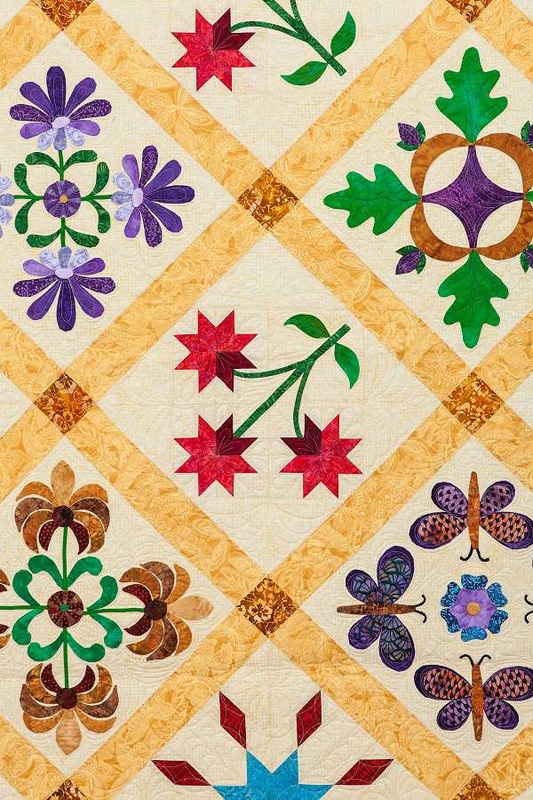 We agreed on a warm autumn palette for the colors. After coming up with the design we chose to use three applique blocks from “Aunt Millie’s Garden “quilt pattern from Piece O’ Cake Designs. The other blocks were original designs. The approximate finished size is 91” x 91”, which is considered queen size. It was pieced & appliquéd by members of the guild. It was quilted by Eileen Barchi, another member of the guild.
If you’re within driving distance you should come out and join us. The dates for the show are is Saturday April 16, 2016 from 10:00 AM—5:00 PM and Sunday April 17, 2016 from 10:00 AM—4:00 PM. It will be held at the Crown Plaza Hotel, 1284 Strongtown Rd., Southbury, CT 06488. There will be over two hundred quilts on display. Over a 100 of those were judged this past Monday. Besides the raffle quilt, we will have a SAQA exhibit, vender mall, raffle baskets, quilt appraisals, demonstrations and a bargain boutique. I’ll have a bunch of my quilts on display. I entered quilts that were published in a number of well-known quilting magazine. Also on display will be a few quilts that I designed in collaboration with my friend Janice Roy. You will have the chance to see “Psyche-Dahlia”, our Hoffman challenge 2015 entry and “Zen Lily”, which was a finalist in the New Quilts from Old Favorites Carolina Lily challenge. I hope to see you there! I’ll be at the show both days. I have a new design in the Quiltmaker magazine January/February 2016 issue. The quilt pattern is called Prairie Sky. The folks at Quiltmaker chose the name and I think it matches their fabric choice perfectly. I originally named it the “Owl Eyes” as the block looked like a large pair of eyes staring back at me.  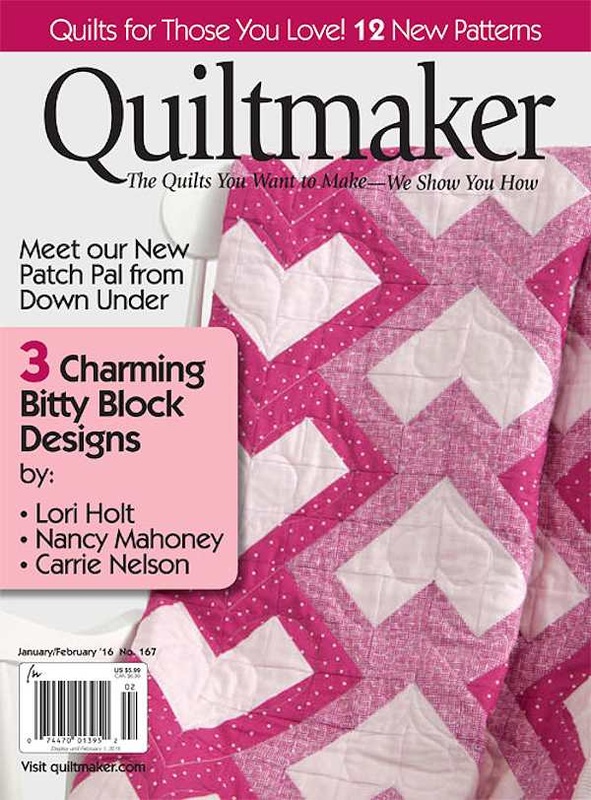 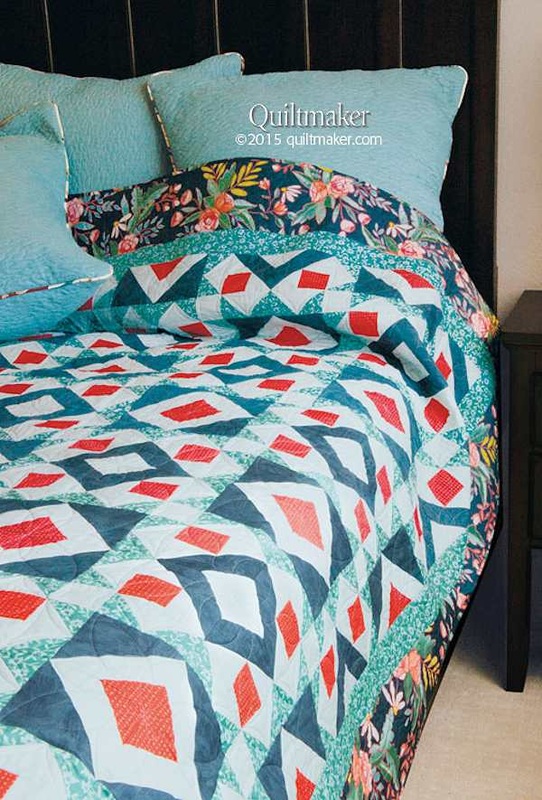 This design started as a doodle that I made while waiting for an appointment. Wherever you go, you should carry a sketch book with you. Try to find a small one that fits in your bag, as you never know when inspiration will catch up to you. I started by filing in the squares on the graph paper to create an interesting pattern. After sketching out a couple of repeats I looked for the base unit and marked with a couple of lines. 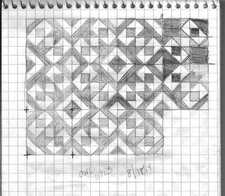 After I drafted the design into my Electric Quilt (EQ) program I colored it using only grey and black values for contrast. I next tried rotating the block in different ways to see what the design would look like. I decided I liked the original sketch best. After returning to the original version I toyed with adding different values and the placement of the values. Once I had the values and their placement decided I swapped the grey tones for a color. 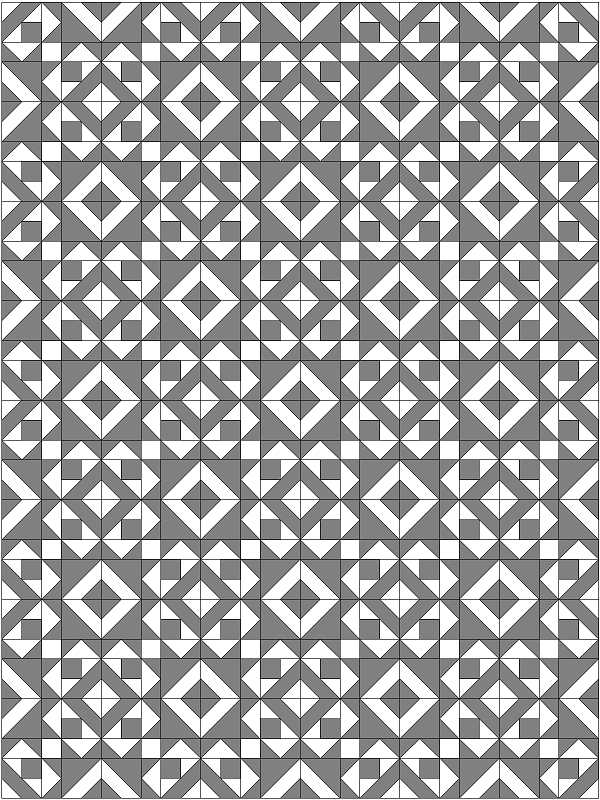 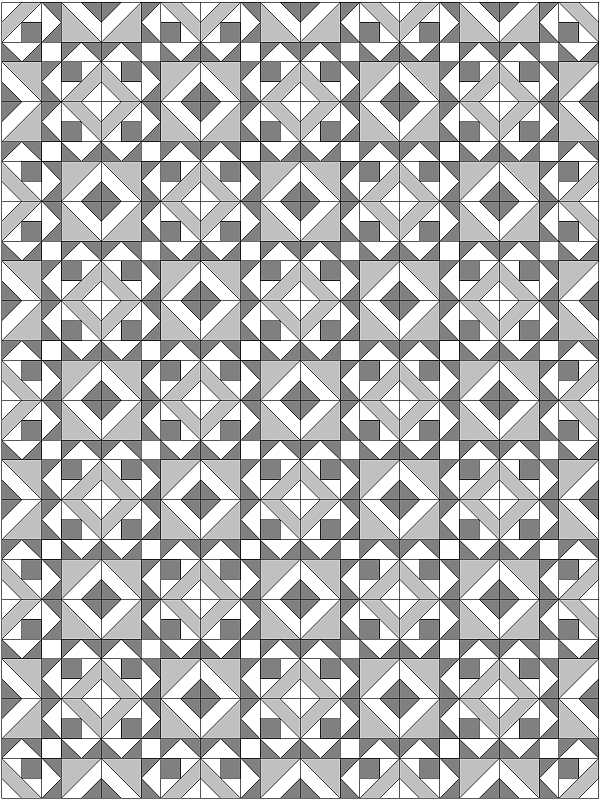 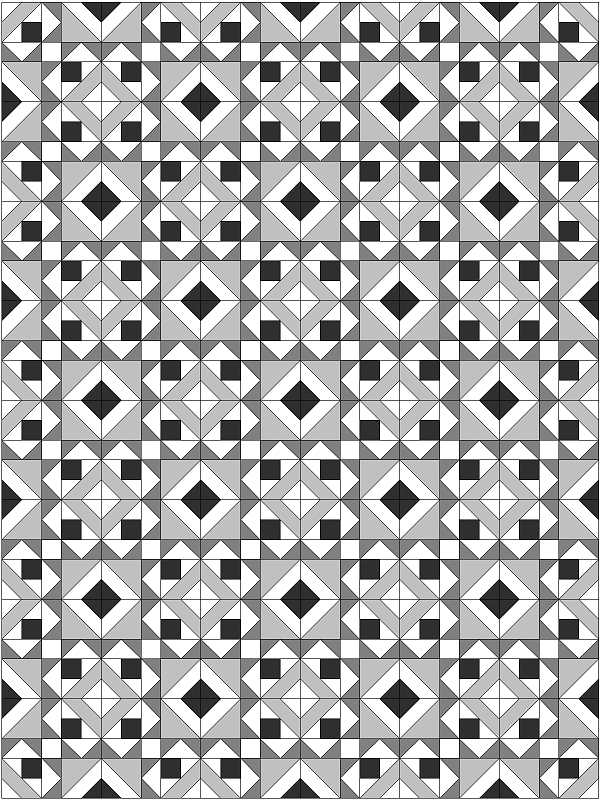  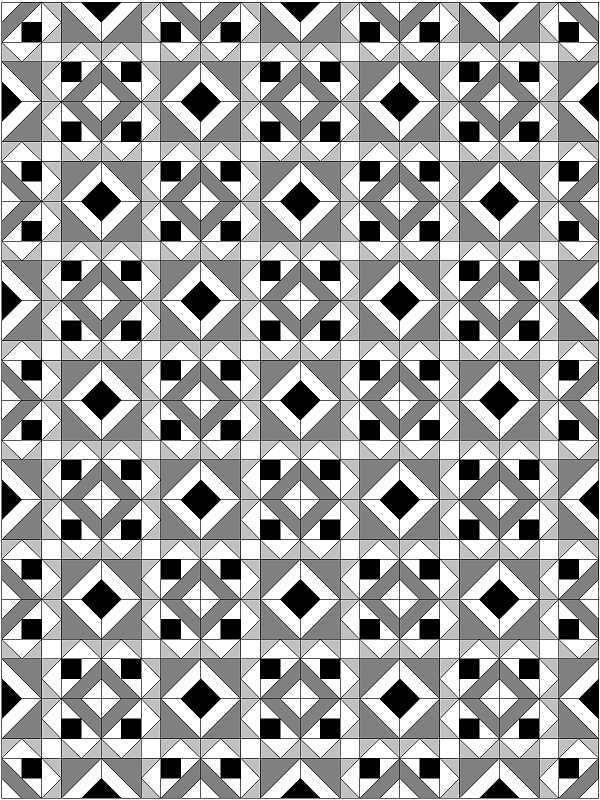  Next I added borders to the blocks that supported the scale of the design. Then I went looking through my EQ Stash files for a fun collection to audition in this design. I found a number of current collections that I liked. In my EQ program I replaced the grey values with the new fabric choices. I think this design would look great in any type of fabric. If you make one please send me the images and I’ll post it on my web site. 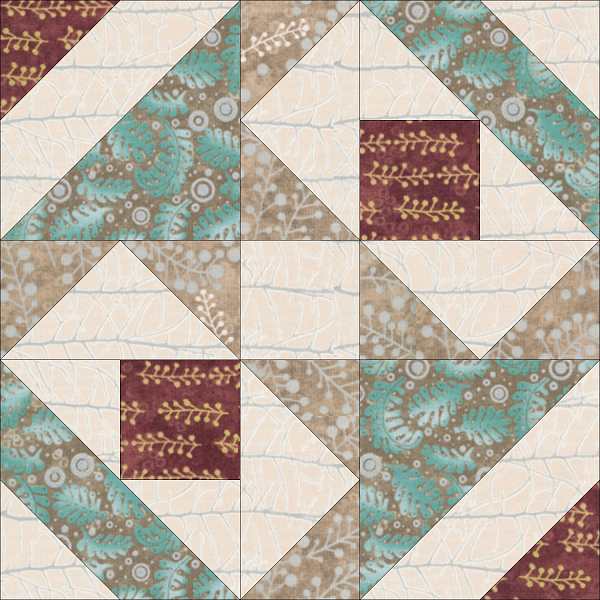 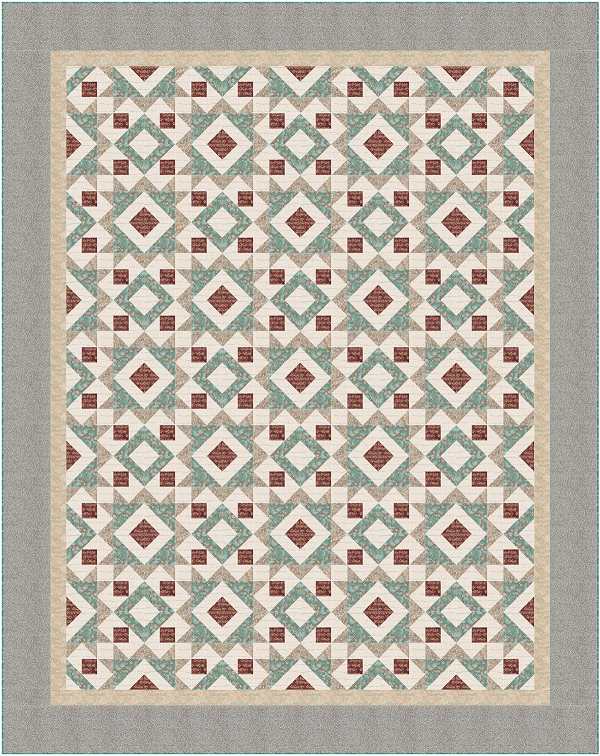  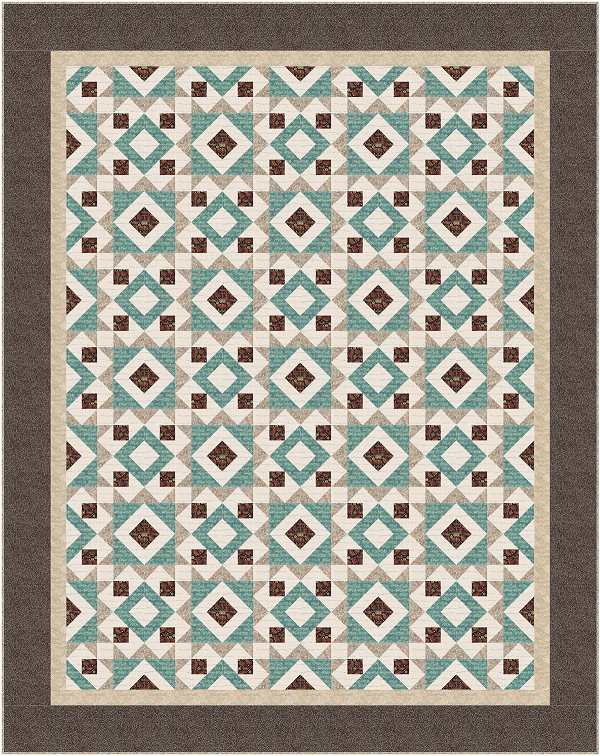 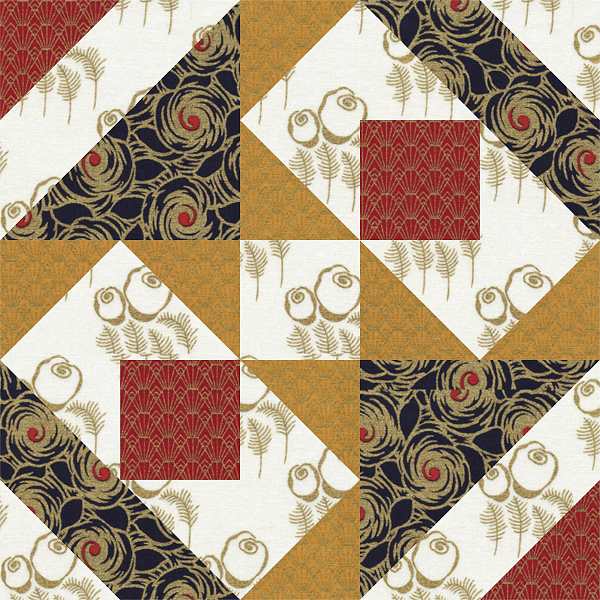 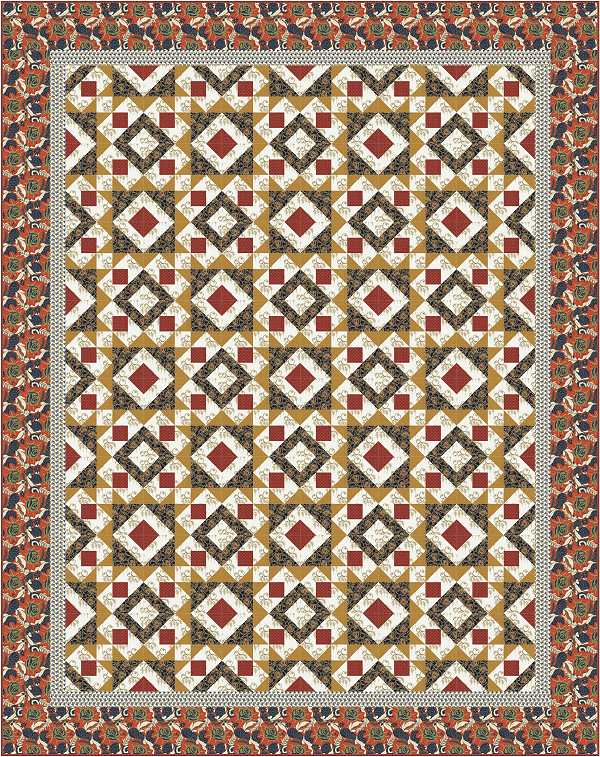  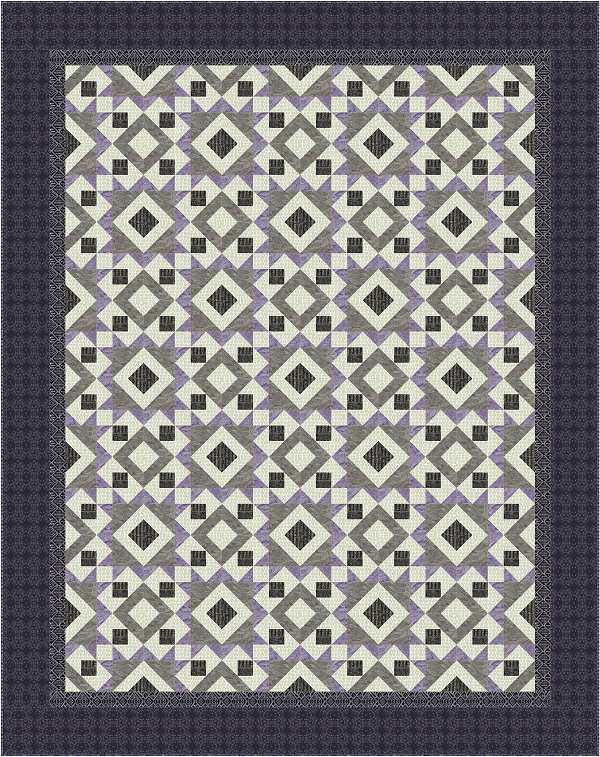 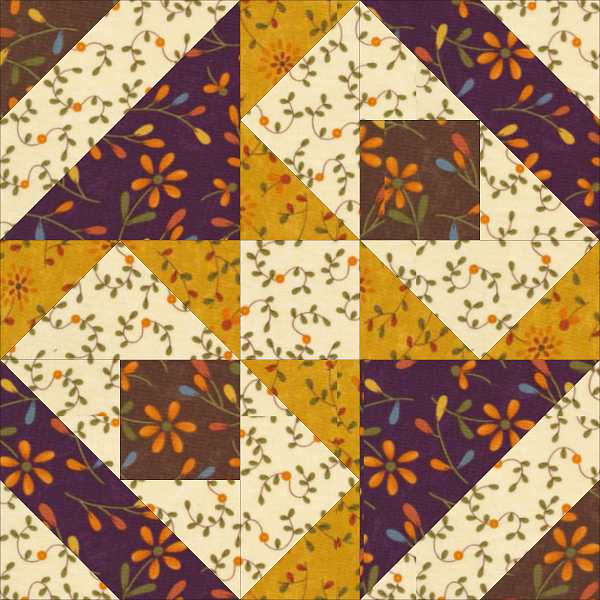   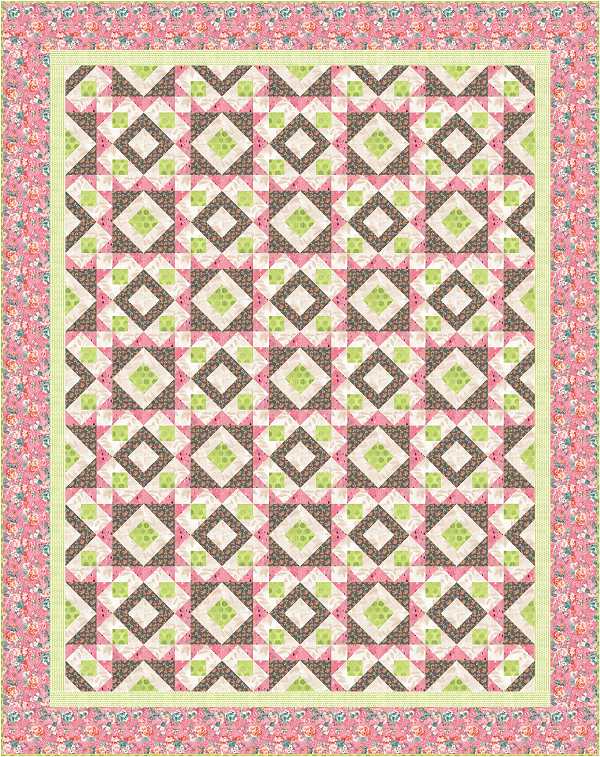 Block # 1129 Calypso  Greetings! I’m glad that you have come to visit my blog for the volume 12 Quiltmaker’s 100 designer blocks blog tour. Here is my block. I named it Calypso because of it's colors it has tropical feel to it. As you know, I will be sending one lucky tourist will go home with their very own copy of this wonderful resource at the end of the tour. In this blog, I’m going to share with you my journey to the final block design. Read it to the end to find out how to get your chance at owning this issue of Quiltmaker’s 100 blocks. Also, don’t forget to visit me on Facebook and click the “Like” button. I would appreciate it greatly. As I told you in my last post, the inspiration for this block came from Seminole piecing designs. The design the I wanted to adapt into a block is called Rattlesnake. Here are a couple of examples of the Rattlesnake band design shown in grey scale.   Originally, I had used the design in the border of a wall-hanging I made for a guild challenge. I loved the way it looked in the finished project.  I started by opening up the block I had used in the Pansy wall-hanging. For the original block I had partitioned the side of the square into 7 divisions. I used the center section as placement for the crossing part of the design.  For this project I decided that I wanted the cross element to be narrower than it was. I thought that this would make the design more striking if a very bold contrast was introduced into that part of the block.   To match this new design direction, I changed the partition from 7 to 9 and connected the center section to make the crossing element. I left the old blocks design lines in as guidelines for you to see. 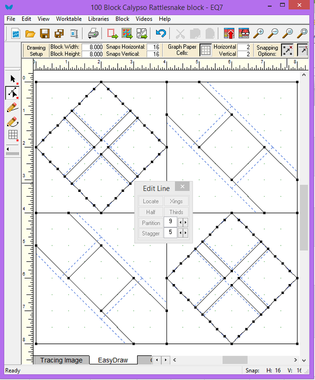 You can also see in the image above that I changed the size of satellite square from my Calypso block design during the development of the block design. I felt that the square needed to be smaller to compliment the narrower size of the cross element. It may only seem like a small change but I felt that it made a difference in the appearance of the block design. You can compare the blocks side by side below.  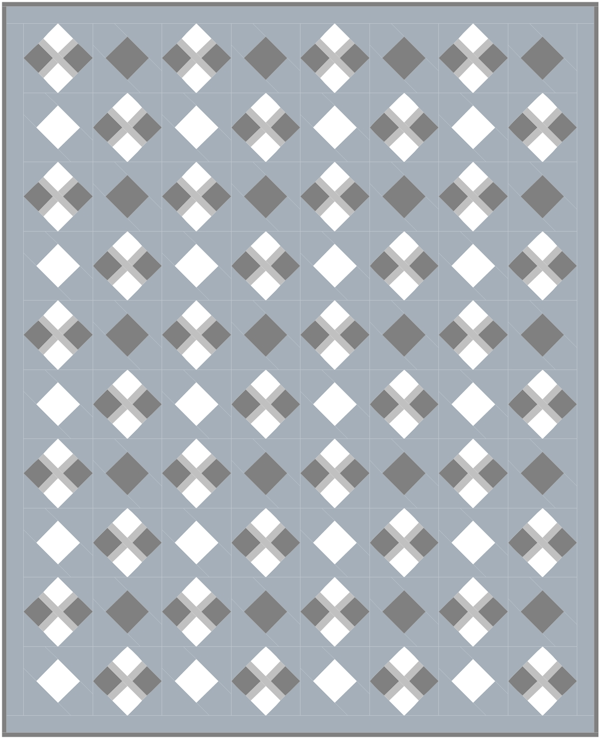 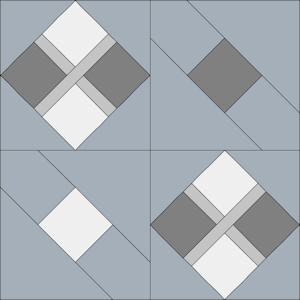 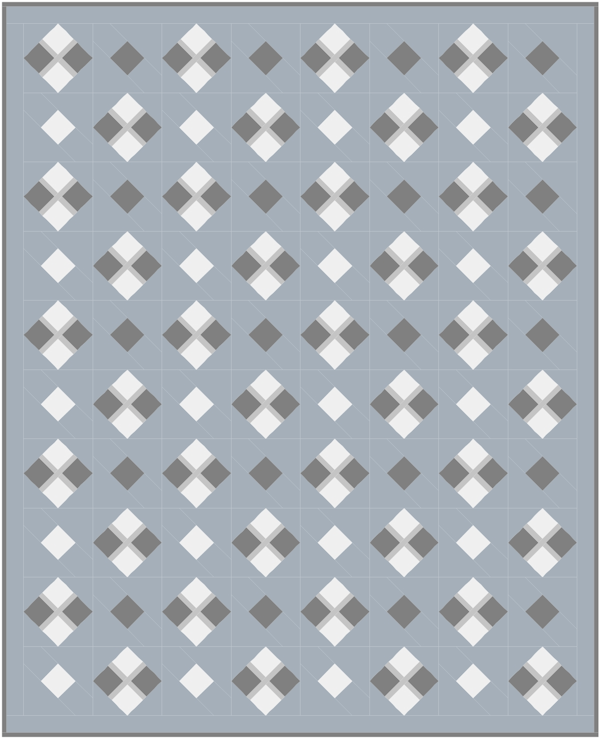 The next step in my process is to audition different fabrics into the design so that I may see what kind of fabrics that it favors. Can the fabrics used be of a large or small scale design. Also I want to discern how strong the contrast needs to be for the quilt design to have the appropriate amount of visual impact. I use the fabrics found in my EQ software fabric libraries. For this block it’s best to use smaller prints, solid and tonal fabrics. It’s also important to make sure you have a high contrast between all 4 fabrics. Here are some examples below. 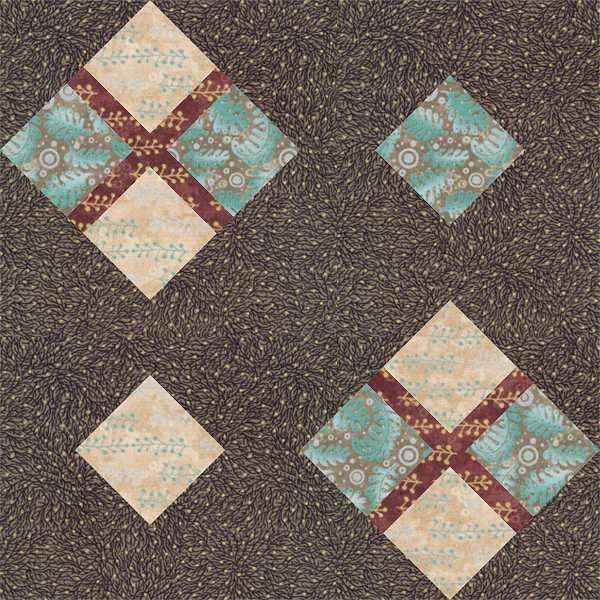 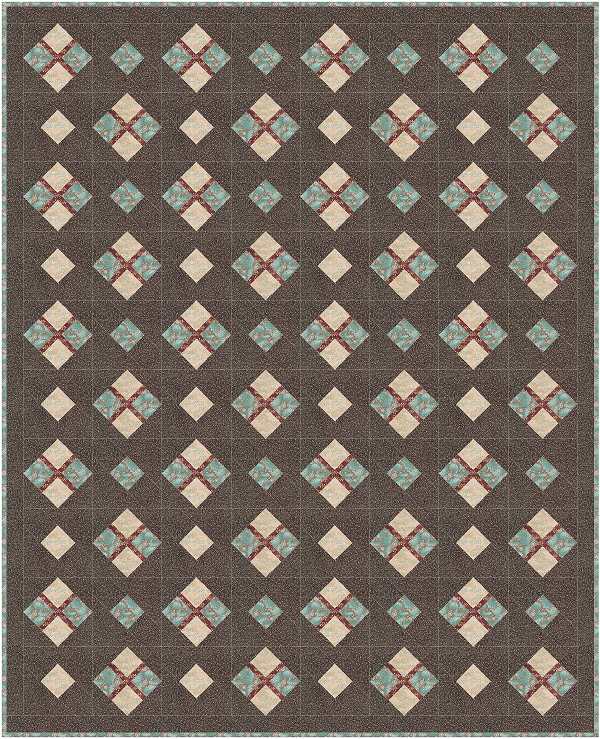 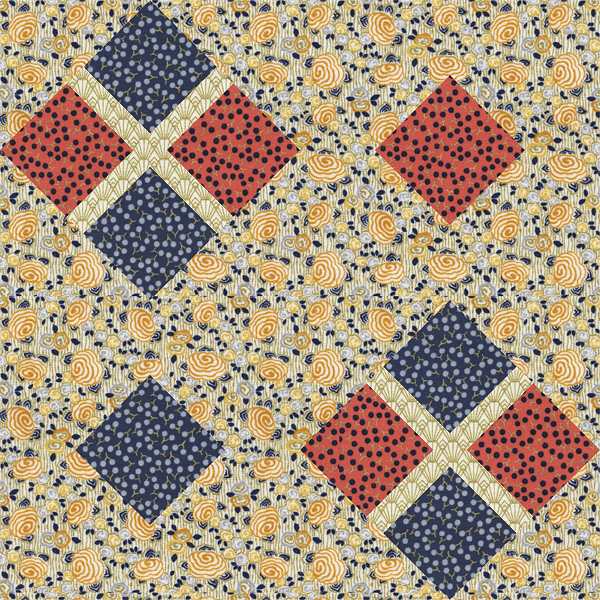   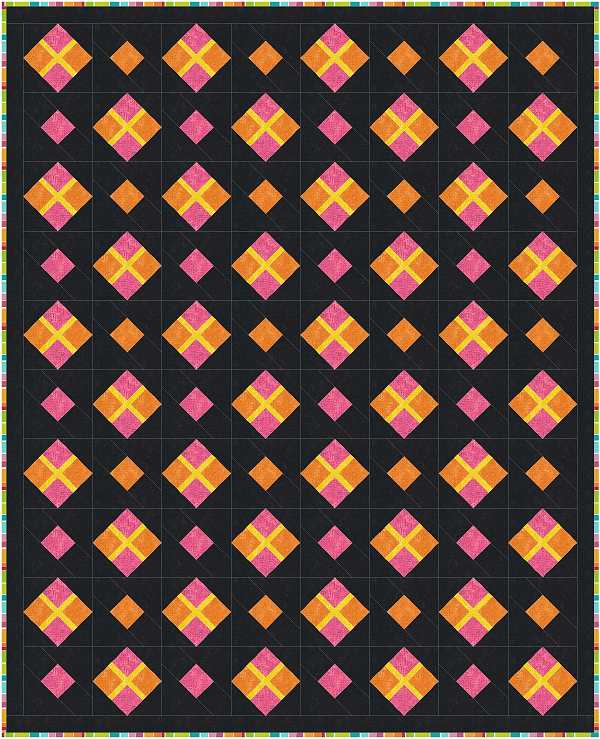 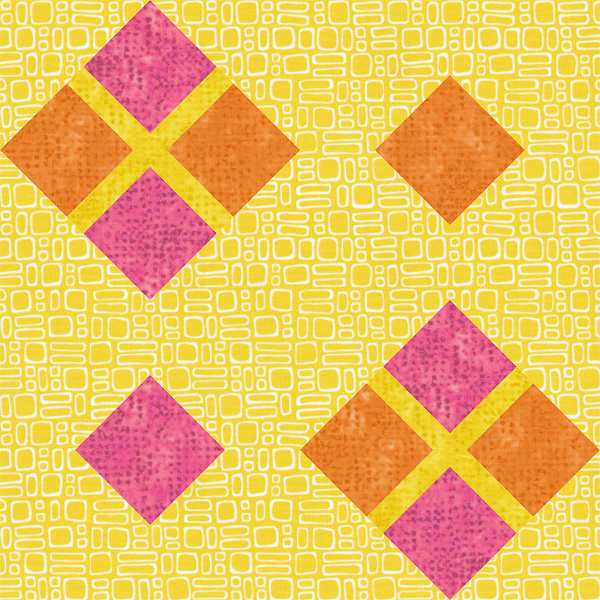 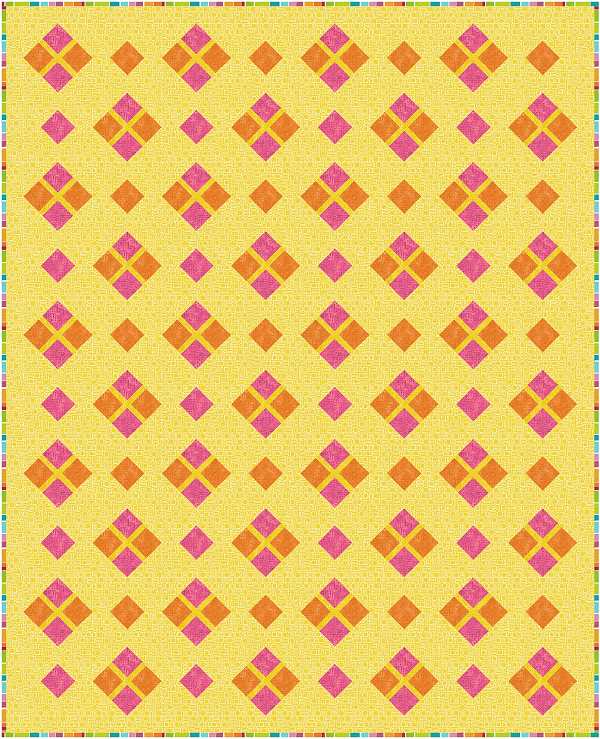  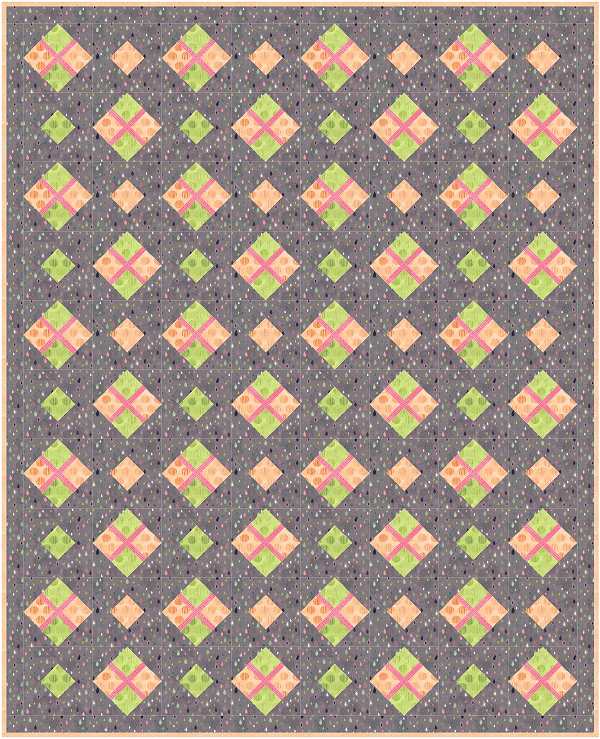 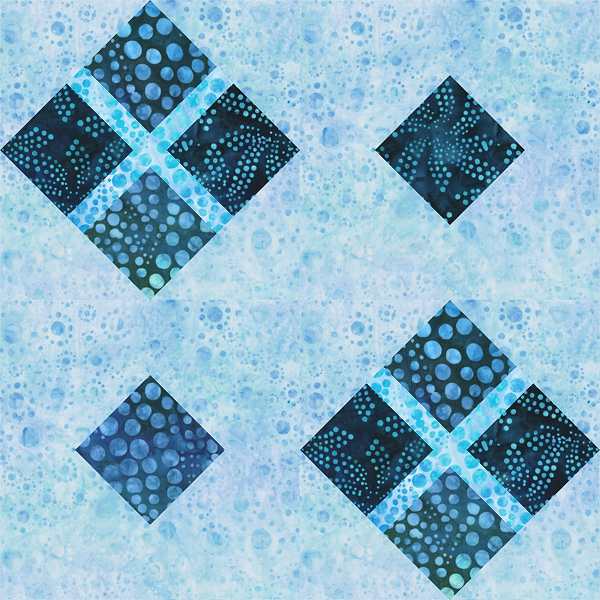 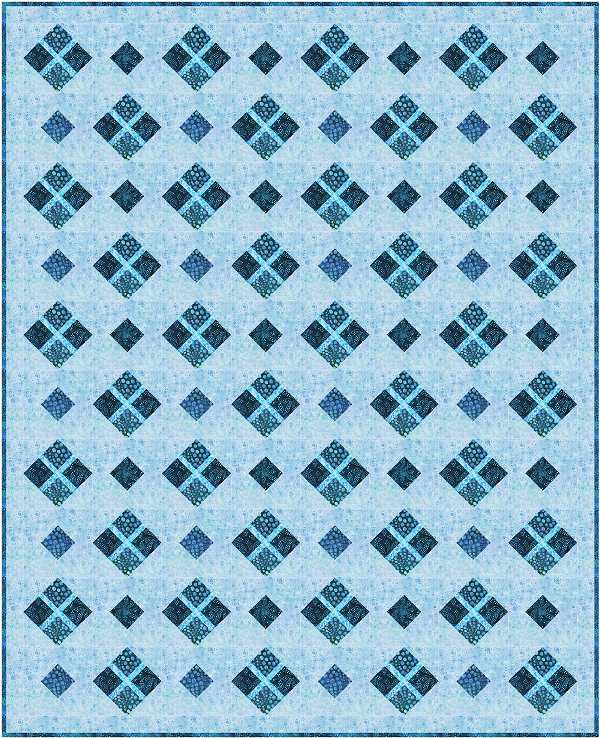 Now it was time for me to decide what fabrics I wanted to use when I made my block. I decided on dyed fabric. I hand dye fabric and had a ready supply. Next I chose my colors. Since the design needs a strong contrast, I decided to use complementary colors. I chose to use violet and it’s complement of yellow alongside orange and it’s complement of blue. I thought these would make a striking palette. I played with the solid color palette in my EQ software to find the right shades for my block design. 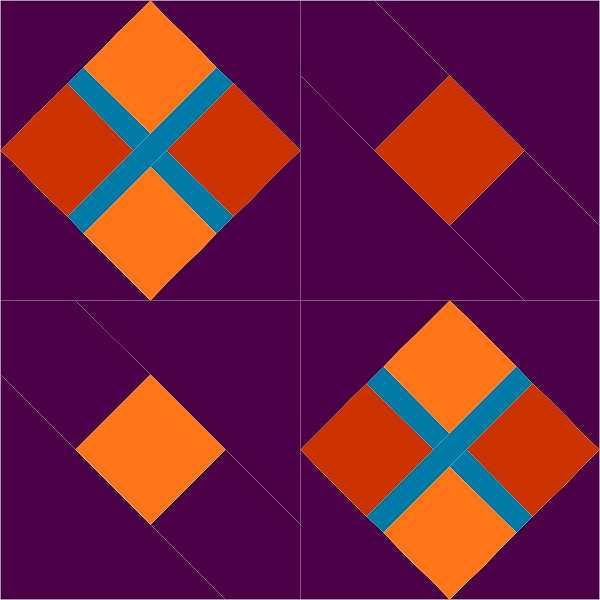 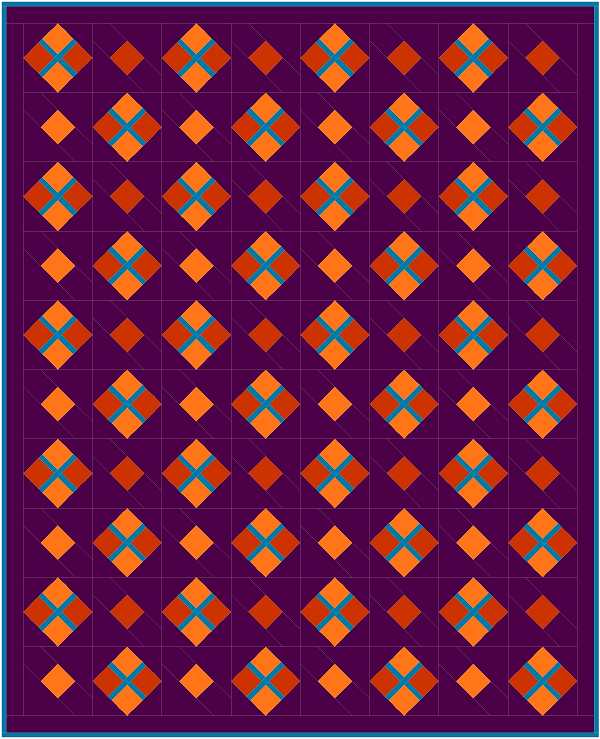 I used my 3 in 1 Color Tool from Joen Wolfrom help me find fabrics in my stash that would give me a similar result. I rely heavily on this tool as my knowledge of color is learned and not instinctual. If you are like me then I would recommend you get one for yourself. It's a worth while investment. I pulled out the cards that seemed to best match my vision. I considered Red-Violet and Purple for the violet background. For the yellow and oranges hues I compared Orange-Red, Orange-Yellow and Yellow-Orange. For the blue cross I had to choose between Aqua Blue and Cerulean Blue. I used these cards to help me search through my fabrics to find the perfect match. I pulled out my stash boxes for blue, violets, yellow and orange. 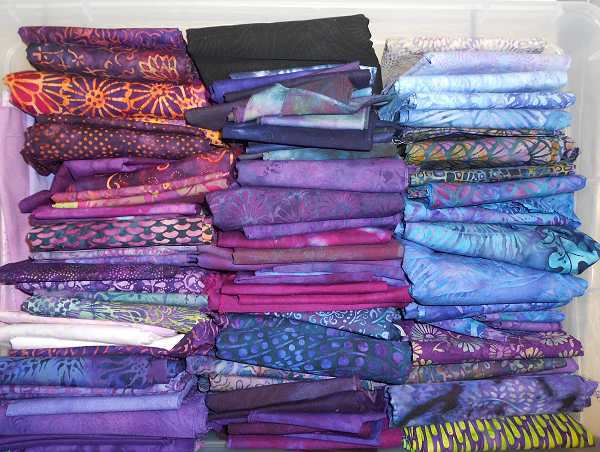 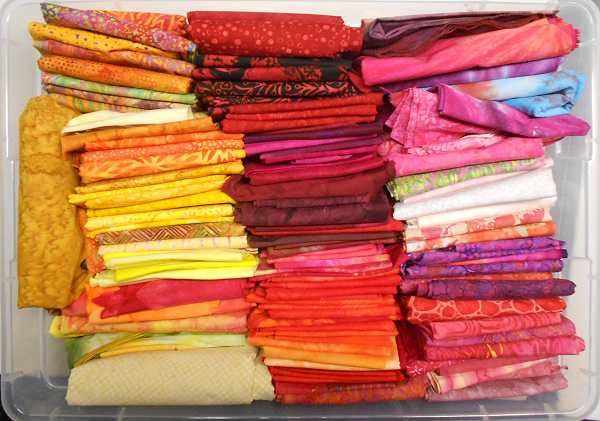  After much consideration I made my decision. These were my final choices for the orange & yellow squares, blue cross and violet background. 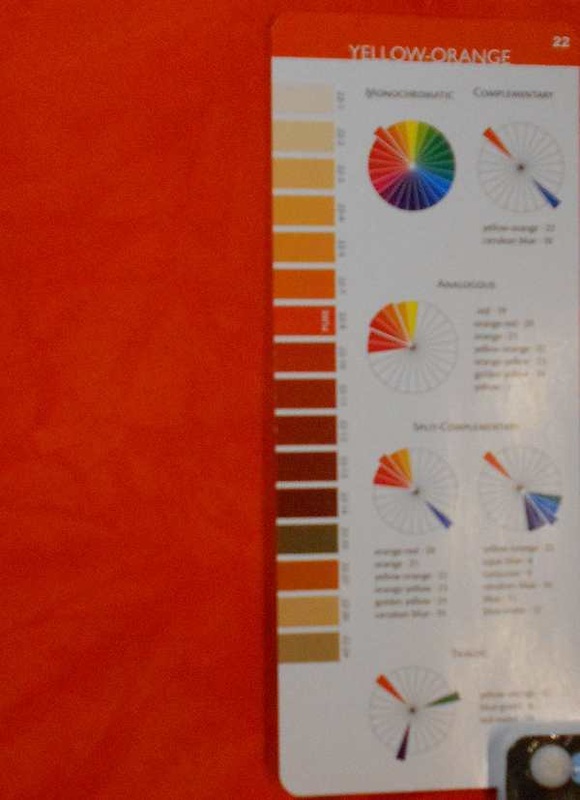    I was very pleased with how close the finished block was to my original EQ version of the design. The block on the left below is the EQ image. Next to that I have my fabric palette and finally, to the right, the finished block. I was lucky to have the right fabrics but EQ helped me to identify them.  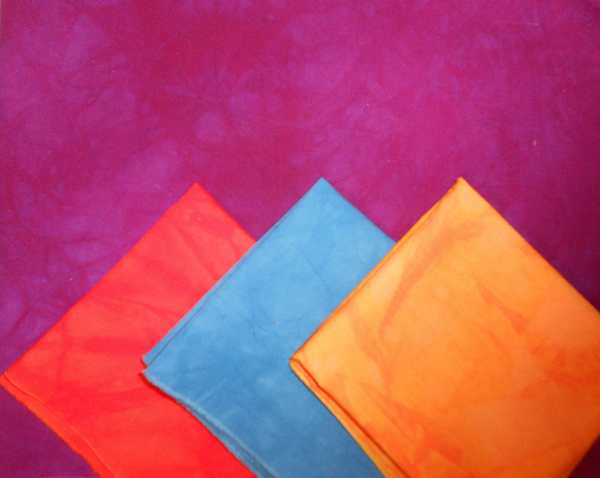 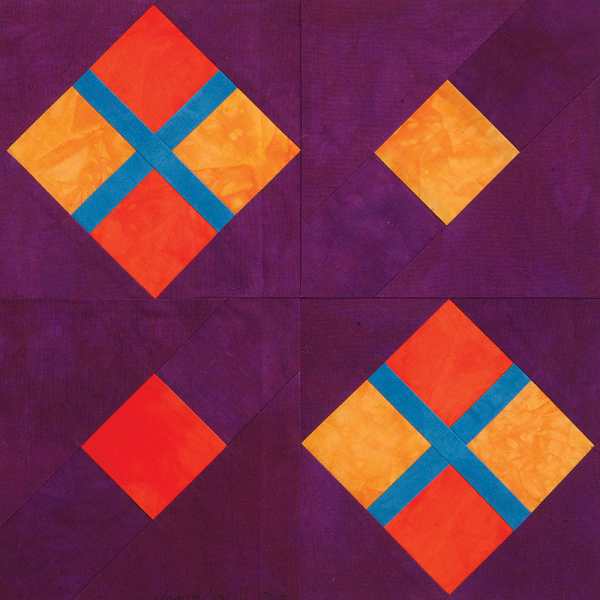 Thank you very much for taking the time to read my blog. To enter the drawing to win a free copy of Quiltmaker's 100 Designer Blocks Volume 12, please leave a comment below and don't forget, if you haven't already done it, please visit my Facebook page, Iris Quilts & Dyed Fabrics and click on the "Like" button. Happy Quilting!
I am excited about being included in the new issue of Quiltmaker’s 100 designer blocks volume 12. My block was inspired by Seminole strip piecing. The Seminole tribe is famous for their use of this technique. I found out about this technique long before I became a quilter.
In case you didn’t know, my sewing adventure making clothing. Also, I developed a love for needle work of all kinds, even though I didn’t practice any techniques myself. Along the way I was introduced to Folkwear patterns. These are patterns that have that reflect different cultures and time periods as their design theme. One of the patterns that appealed to me as a clothier was the Seminole Jacket and Skirt pattern. I never did anything with it bit it was always kicking around in the back of my mind. Which turned out to be a good thing because that’s how my journey into quilting happened. Although most of what I sewed was custom clothing, I had dipped my toes into quilting by making a couple of baby quilts for my nieces. I used techniques from Eleanor Burns log cabin and Irish quilt books. They came out decent and I considered making another quilting project. One day I happened upon a quilting book about Seminole strip piecing called Simply Seminole by Dorothy Hanisko. Typically Seminole piecing results in narrow bands of piecing measuring anywhere between 1” - 5”. What the author did was to enlarge the finished size of the pieced bands so that you didn’t need as many bands to complete a quilt top. I used this technique the way it’s presented in the book to make a few Seminole quilts I have in my gallery. I will be taking part in the Quiltmaker 100 designer block blog tour for volume 12. As part of the blog tour I will be giving away a copy of the magazine to 1 lucky tourist. On November 20th, come back and visit my blog. I’ll give you instructions on how to get your chance at owning a copy of this amazing resource. |

Janice Averill
|
 RSS Feed