Iris Quilts
  • Home Page
  • Galleries
  • Blog
  • Pattern & Tool Shop
  • About Janice
  • Contact Janice

NATIONAL QUILT MUSEUM * BLOCK OF THE MONTH

2/22/2021

3 Comments


N.Q.M. B.O.M. ROUND 3 - Block 2

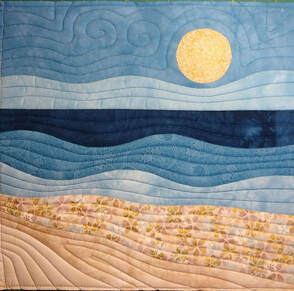
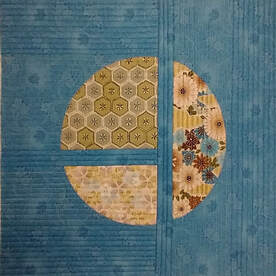
Like I said before, as if I don’t already have enough projects going, I’ve decided to take part in the block of the month program that is being hosted by the National Quilt Museum on Facebook. Here is my finished block for the second part of the block of the month program. I am not a pictorial quilter by nature so I was not super excited about this block at first but I finally wrapped my mind around it and this is the result.
Picture
Another aspect of this block that didn’t align with me was that I was put off by the free cutting of curves and trying to blindly match them back together again. My background is in dressmaking and we rely heavily upon notches or hash marks that we use to match up seams. If one does not accurately match a curved seam line you end up with pleats and wrinkles as many of you have experience. After giving it some thought I decided to create this block using techniques that I was comfortable with and felt we're more technically accurate. It's in my nature to pay attention to the details.

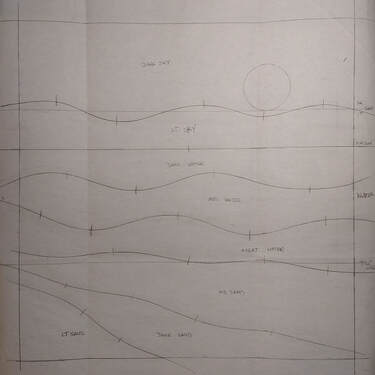
The first thing I did was break out some paper and draft a square that was 14 in. I then used the golden ratio to decide where the horizon would be. After that I again applied the golden ratio to find the shoreline. If you've never worked with the golden ratio I recommend that you spend afternoon googling it and learning about how it can improve the visual impact of your art work. 

Picture
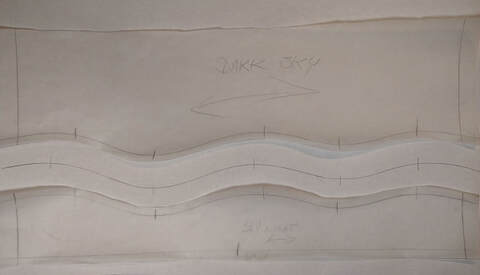
Then I broke out my flexible ruler. I used to do a lot of pattern making when I made clothes and I invested in a curve ruler to help me with drafting a sleeve that matched the armhole of a bodice. I started with a curved line in the sky to create the illusion of hazy horizon line clearing out to the broader sky. The location for this line was also found using the golden ratio. For the rest of the curved lines in the water I used the same curve that I used in the sky but flipped it and rotated it each time so that it was a new iteration of the original curve. 
Next I drafted the shoreline and the layers of the beach by giving the ruler a gentle tug so that the curved line used along the shoreline and the beach would be a gentler version of the same curve used in the water and the sky. This acts as a repeat on a theme which helps to increase the visual impact of the design. When I was done I drew registration marks at the peaks and valleys and halfway between those on all the curves. I then used my flexible ruler to trace off patterns of these same curves and add a quarter inch seam allowance at the same time because the ruler is quarter inch wide. 
Picture
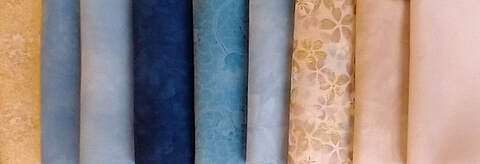
For my palette I fished through my stash of hand dyed fabrics that I had created and I utilized a couple of my focus fabrics to keep the theme consistent. Here is my selection of fabrics. 
Picture
I used each pattern piece to cut the fabrics for this block. As I did I used transfer paper to mark the seam line and the registration marks on the wrong side of the fabric. Having visible seam lines was helpful so that when I pinned the fabrics together I was able to take a very small bite of fabric right on the seam line. This helps to achieve accuracy when sewing the two curves together. It's very effective for avoiding pleats.
After piecing the whole thing together I hung it on a wall and looked at it and tried to decide what I wanted to add to the scene. I decided that I didn't want anything added to the scene because I thought that the curved lines along with the circle for the moon/sun looked like an abstract interpretation of the beach. And then use my walking foot to add echo quilting to enhance the piece. I'm very happy with how my block turned out. 

 
I'm looking forward to seeing what block is next in the for this block of the month quilt. I'm having a lot of fun!
3 Comments

National Quilt Museum * Block of the Month

1/19/2021

4 Comments


N.Q.M. B.O.M. Round 3 - Block 1

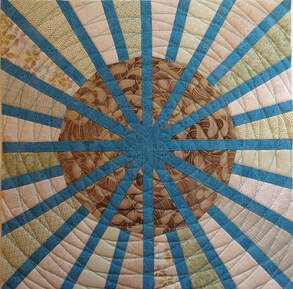
​As if I don’t already have enough projects going, I’ve decided to take part in the block of the month program that is being hosted by the National Quilt Museum on Facebook. What can I say the first block, a set in circle, looked like it would be fun to make and I decided to give a whirl? 
Picture
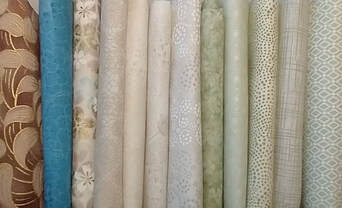
 I've seen comments from folks asking how people put together fabrics that they're going to use for this block of the month. This is my selection of fabrics for round three. I started with a collection of fabrics that I had procured many years ago when I worked at a fabric store. I'll never admit to how many years they have been in my stash. Finally they're being put to use! 
The first image shows the focus fabrics that I had from that collection. I went through my stash and pulled out all the blender and tonal fabrics that I had that went with the colors representative of this collection. The result of this is the second image. 
My next step was to go through my stash and pull out any other prints that might compliment the blenders and tonals that I had gathered together. You can see this in the first image. The second image shows all the multi colored prints that I have gathered for this project.
I’ll probably add more fabrics to my palette of fabrics before I get to the last block. It doesn’t matter how much fabric we have in our stash we can always use more light and dark valued fabrics to make block designs pop.

If you are going to take part in this project, I have some advice that I'd like to share with you. First, if you've never done a set in circle or you haven't made one in a while, you should watch some videos on YouTube about this technique before attempting it. I also recommend that you have a stylus to help you manipulate the top layer of the circle as you sew. I like to use a large porcupine quill. It's not only much more versatile than other stylus options it's also pretty cool having an 8" porcupine quill in your possession.

Next, this BOM quilt is a quilt as you go project. So if you do decide to take part in the BOM be sure to extend the dimensions of your block by at least an 1" to compensate for the shrinking that happens when you quilt.

Finally, after your done quilting you're going to want to bury your thread ends. The best tool for making this job enjoyable, yes I said enjoyable, is a spiral eye needle. This makes it quicker to thread the needle when you bury the stitches. You can find one on Google if you search. Also there are lots of videos on YouTube that show you how to bury your thread ends.

 
I hope that you feel inspired by this post. Please let me know what you’re working on or are looking forward to working on. 
4 Comments
    Picture
    Picture

    Janice  Averill
    West Haven, Connecticut, United states

    Welcome to my Blog! This is where I'll share my thoughts about quilting with you. I'll post pictures and talk about designing quilts and construction techniques. I'll also post things that inspire me. Please leave a comment and let me know that you came by for a visit..

    Categories

    All
    100 Block Challenge
    Color Theory
    Connecting Threads
    Contests
    Ct Piecmakers Raffle Quilt
    Electric-quilt-lessons
    Electric Quilt Software
    Fabric Dyeing
    Fons & Porter Magazine
    Free Patterns
    Guild Workshops
    McCall's Quilts
    New Quilt From An Old Favorite
    NQM BOM Round 3
    Published Designs
    Quilter's Gallery
    Quilting Treasures Designs
    Quilting With Jose
    Quiltmaker Magazine
    Random Quilt Adventures
    Video Appearance

    RSS Feed

    Picture

    Archives

    January 2021
    October 2018
    November 2017
    October 2017
    August 2017
    June 2017
    May 2017
    April 2017
    February 2017
    November 2016
    July 2016
    June 2016
    May 2016
    April 2016
    March 2016
    December 2015
    November 2015
    September 2015
    August 2015
    July 2015
    June 2015
    May 2015
    April 2015
    March 2015
    February 2015
    January 2015
    December 2014
    November 2014
    October 2014
    September 2014
    August 2014
    July 2014
    June 2014
    May 2014
    April 2014
    March 2014
    February 2014
    January 2014
    December 2013
    November 2013
    October 2013
    September 2013

    Picture
    Picture
    Picture
    Picture
    Picture
    Picture
    Picture
    Picture
    Picture
    Visit the shops below for kits, fabrics, notions, patterns & magazines or anything else you might
    need to make a quilt.
    Picture
    Picture
    Picture

Proudly powered by Weebly