Iris Quilts
  • Home Page
  • Blog
  • Pattern & Tool Shop
  • About Janice
  • Contact Janice

New Quilt Design, Rudeneja, in Quiltmaker Magazine September/November 2015 issue

8/14/2015

72 Comments

 
Yeah, I’m a cover girl! I have a new design in the September/November issue of Quiltmaker magazine and it’s on the cover. To celebrate, I want to give away a free copy of the issue. Leave a comment at the end of the article and you can win your free copy of this issue of Quiltmaker magazine. And if you haven’t already done so, I’d appreciate it if you could give me a “LIKE” on my Iris Quilts Facebook page. The giveaway ends September 18, 2015. Shortly after that, I’ll announce a winner.
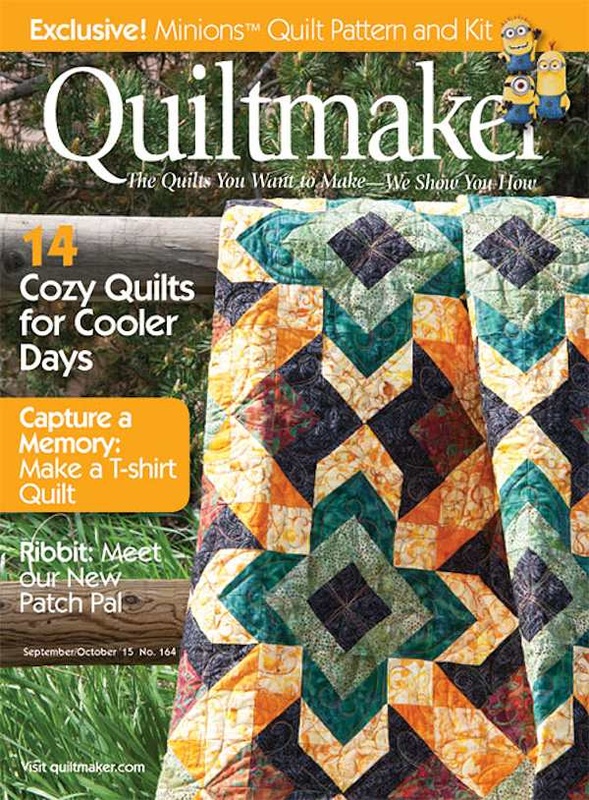
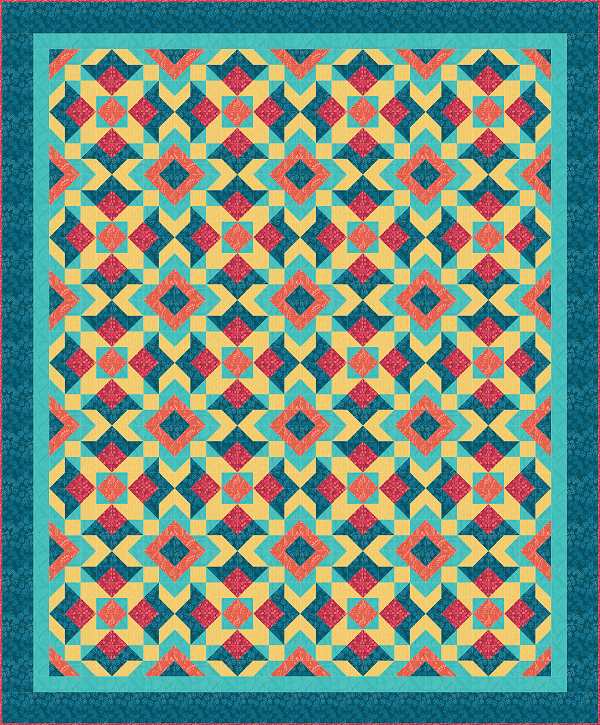
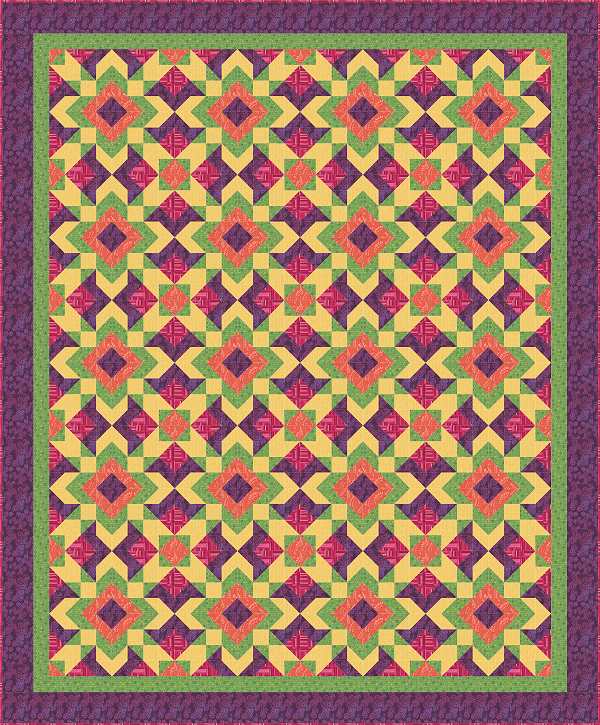
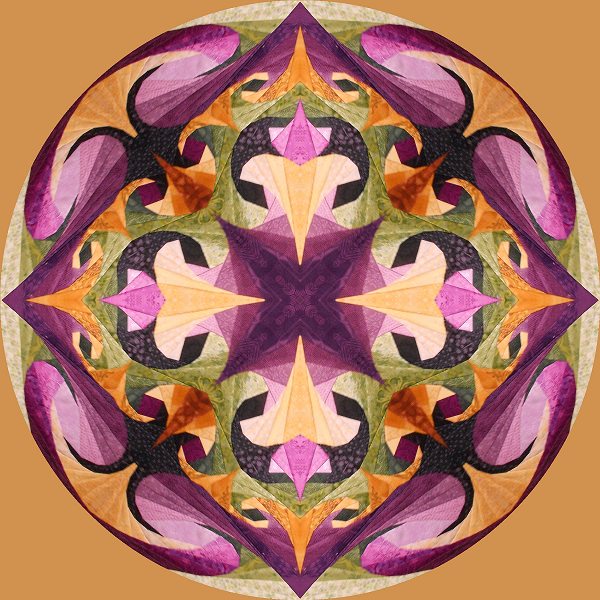
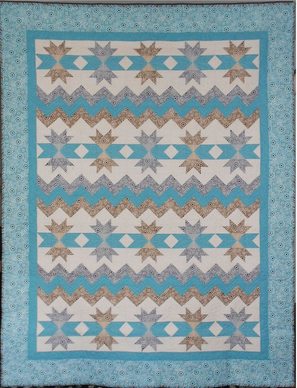
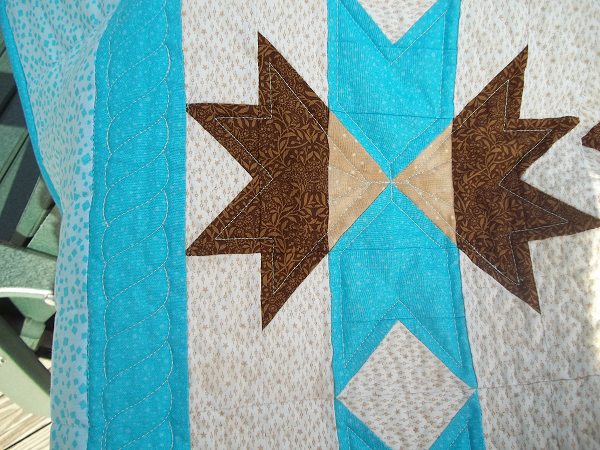
The quilt is named RUDENEJA. It a Lithuanian word used to describe the way the weather feels as it turns to autumn. I’m not of Lithuanian descent but I love autumn. So can relate to the sensation. Looking at the finished quilt, I feel the folks at Quiltmaker gave it the perfect name.
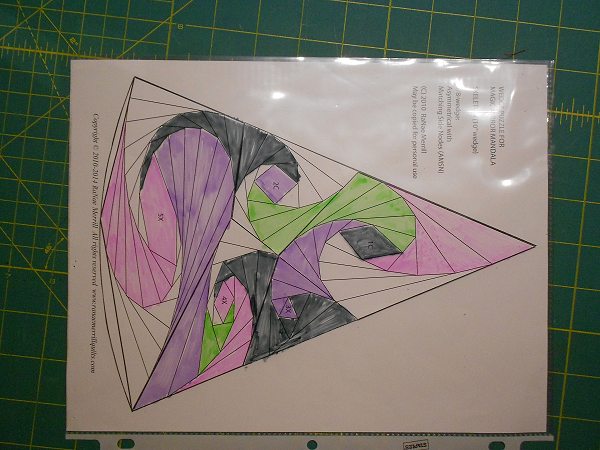
I had the working name of Tile #4 for this design. The reason for that is because last summer and fall I had a great run of inspiration and designed a whole bunch of tiled designs. The best way for me to keep track of them was using numbers. This and all of my other ideas come from time I spend with my graphed sketch pad. It keeps me out of trouble…. most of the time.
Picture
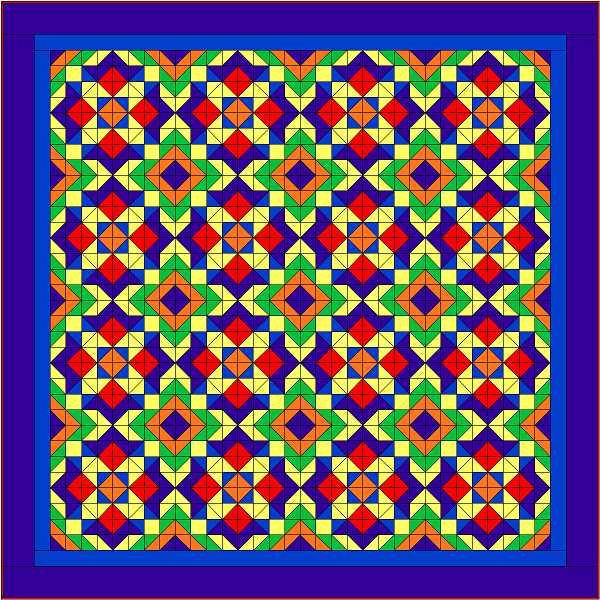
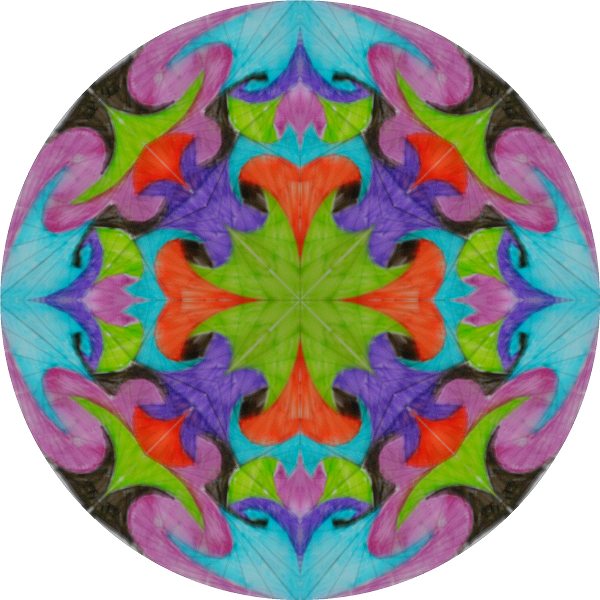
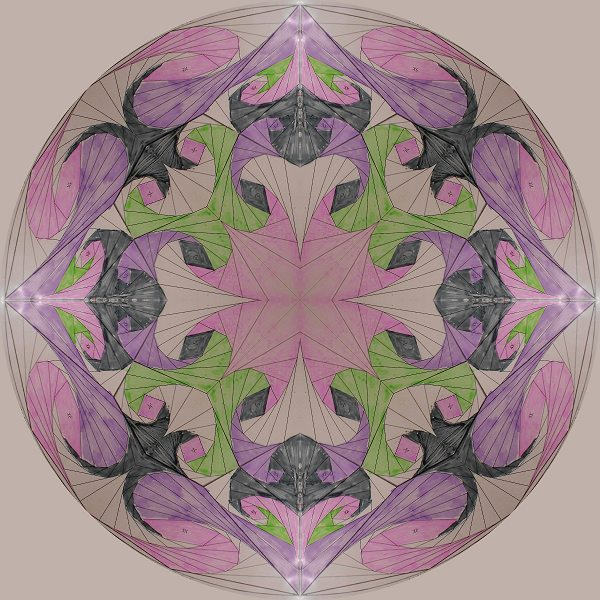
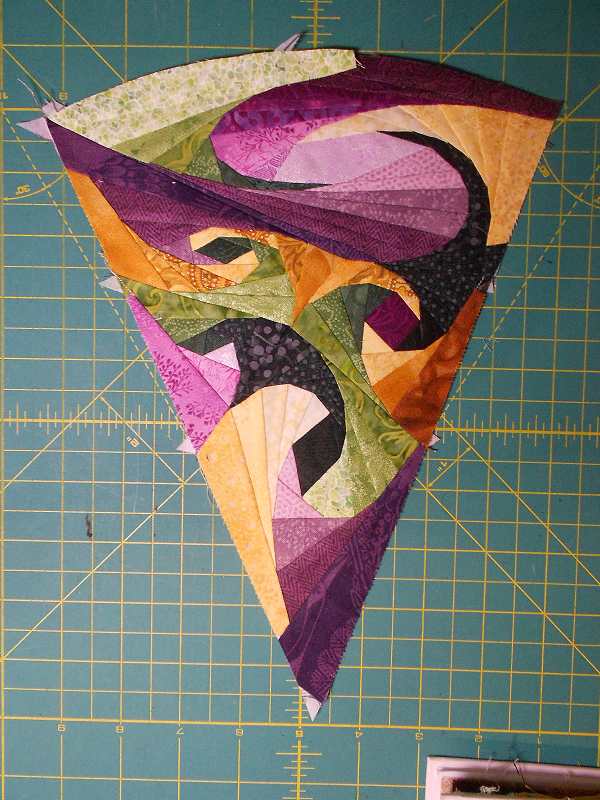
I’ve been inspired by the designs found on decorative tiles. The designs typically have a diagonal line of symmetry. When placed in a grid pattern the tiles create a design that looks far more intricate than it actually is. It creates an illusion of many different block units used together to create the final design. Click here to see an earlier blog I posted about tile designs.

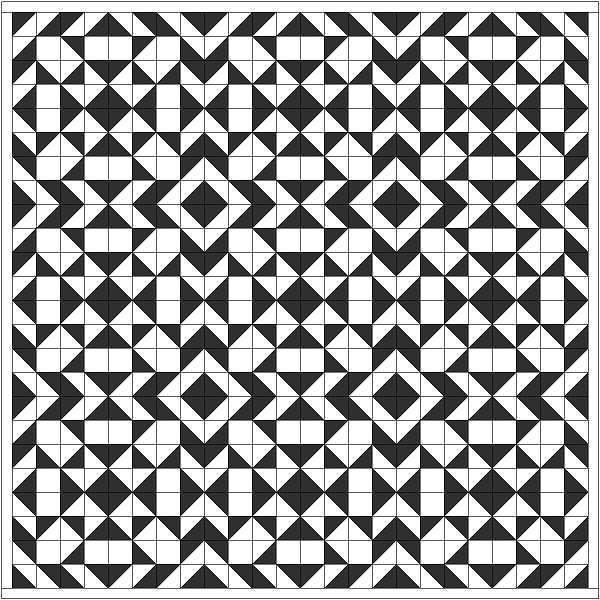
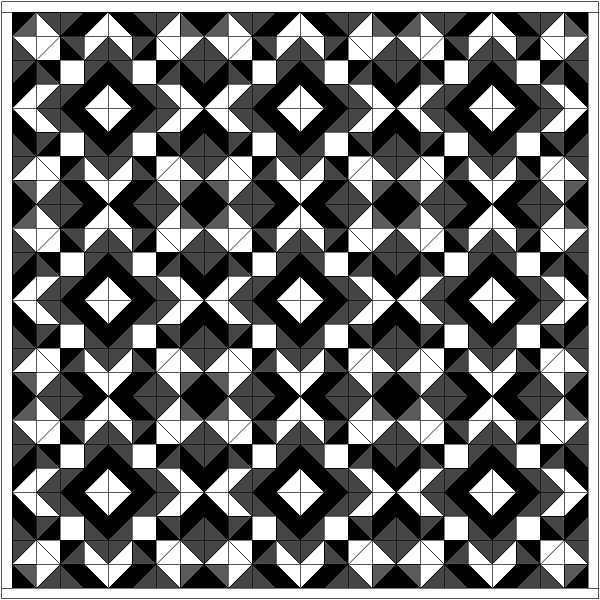
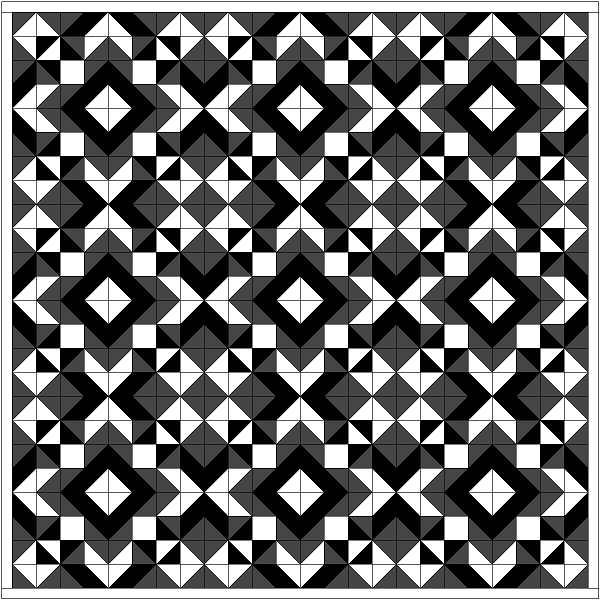
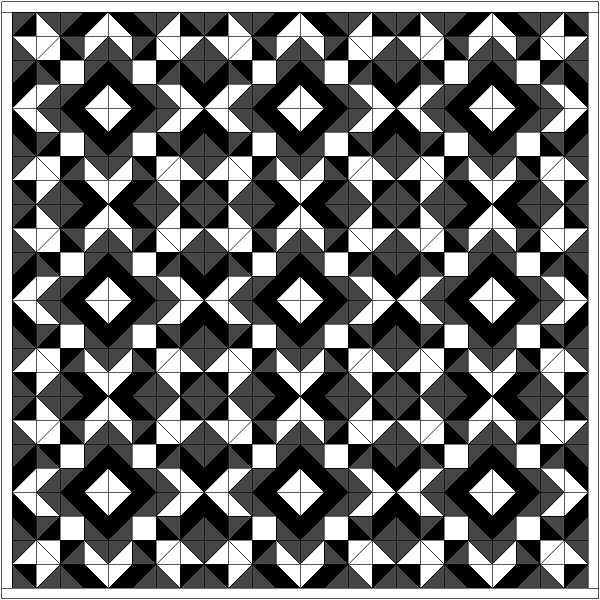
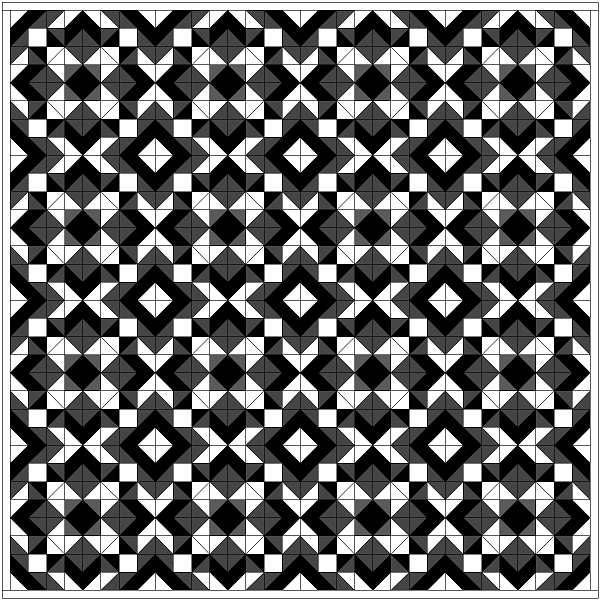
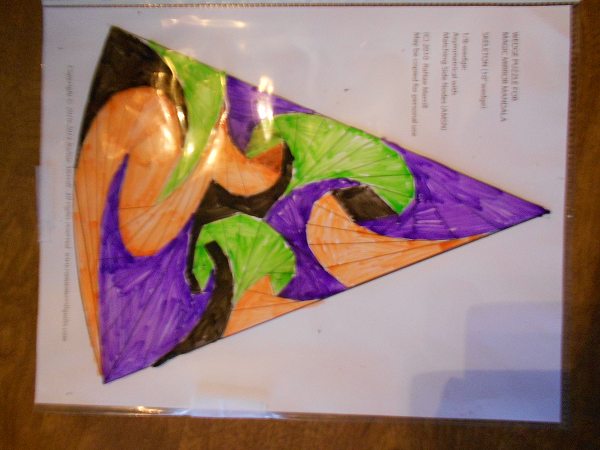
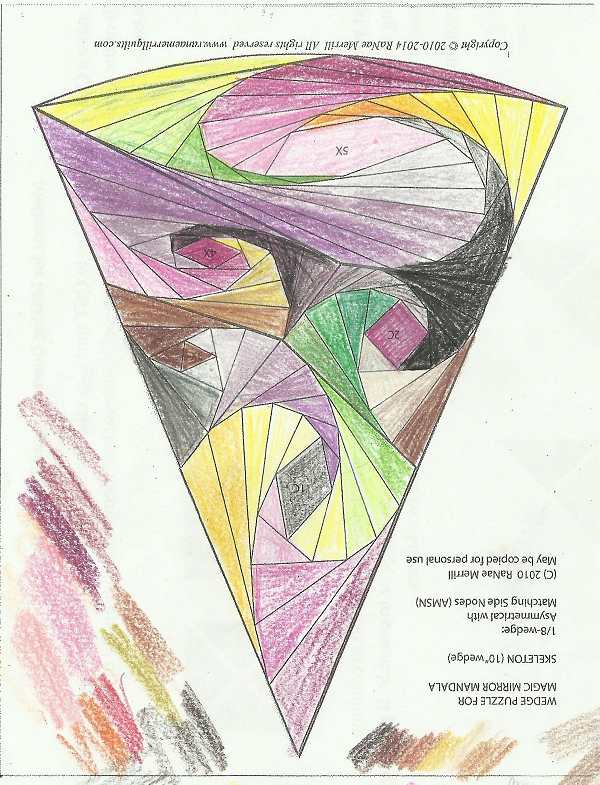
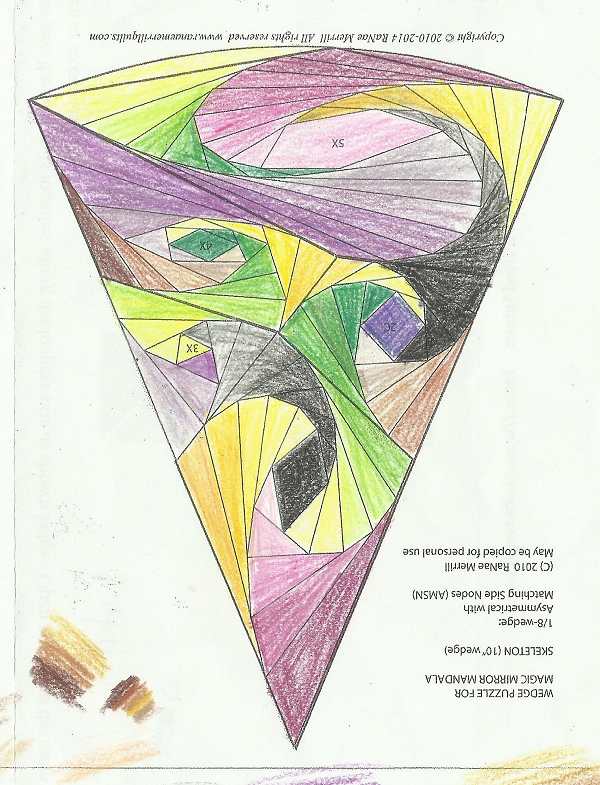
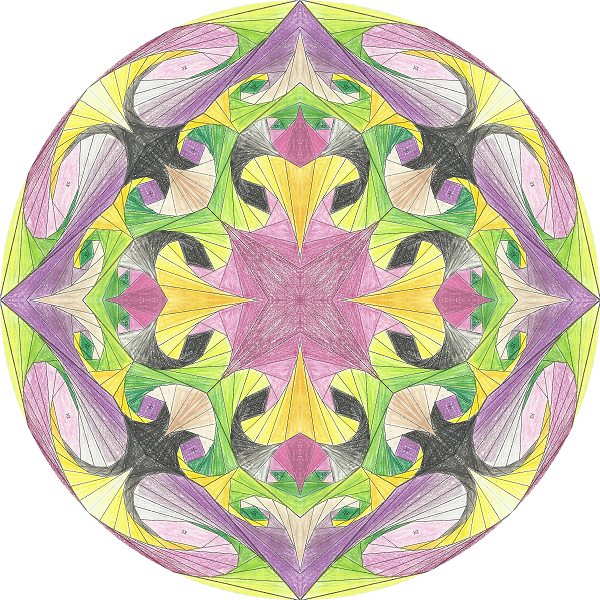
As I have done with my other designs, I come up with a block idea and then I sketch it out in a grid pattern to see what it looks like. For this design I started with the block rotated in one direction and then tried it out with the opposite rotation. When I’m happy with the result, I go to my Electric Quilt software to play with it some more. First I try the design out in black and white. Then I start to add dark greys to subtly contrast with the black. Once I see an interesting pattern, I then add lighter grey values to the design to make the design visually pop. About half way through the process I returned the blocks to their original rotation. I realized I liked it best that way.

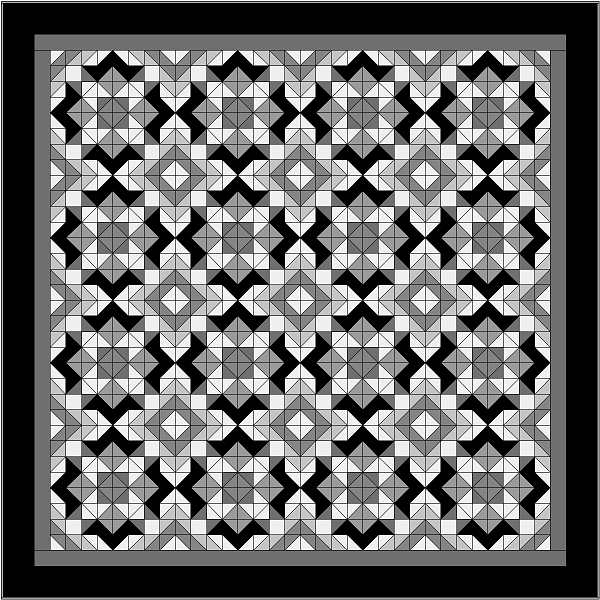
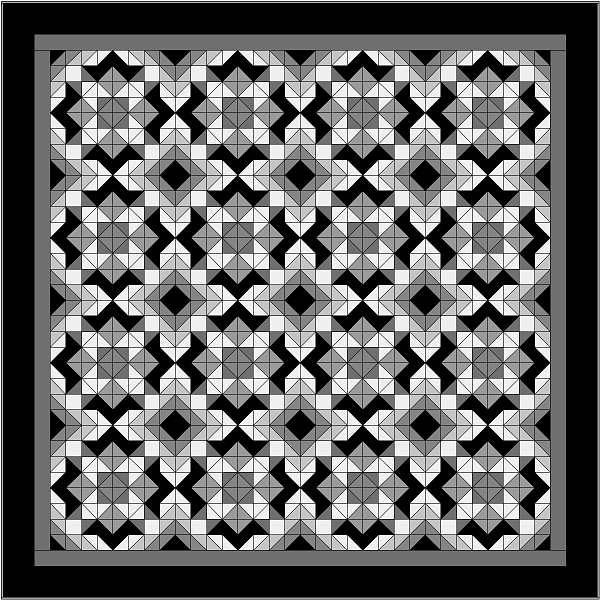
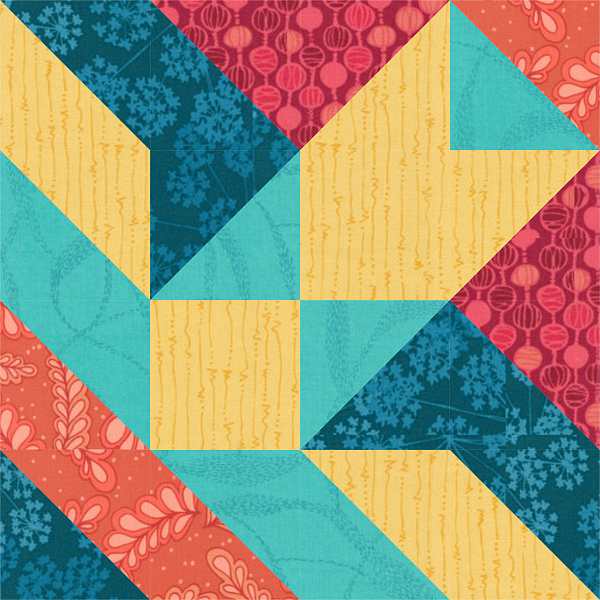
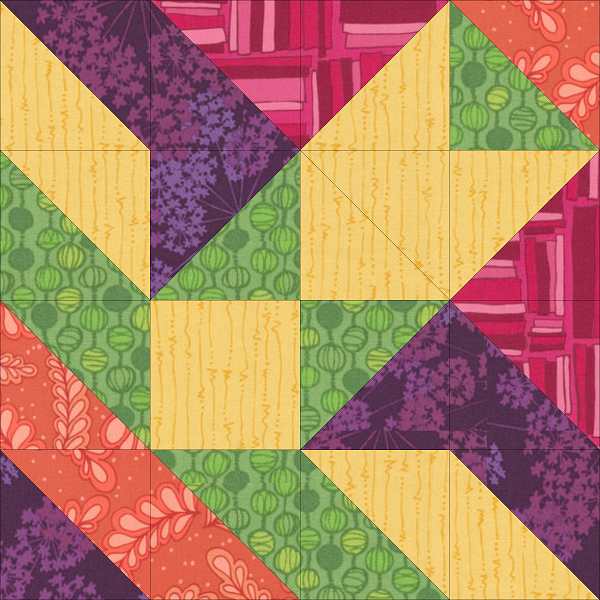
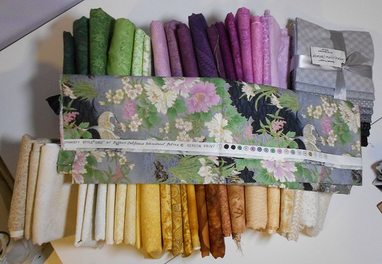
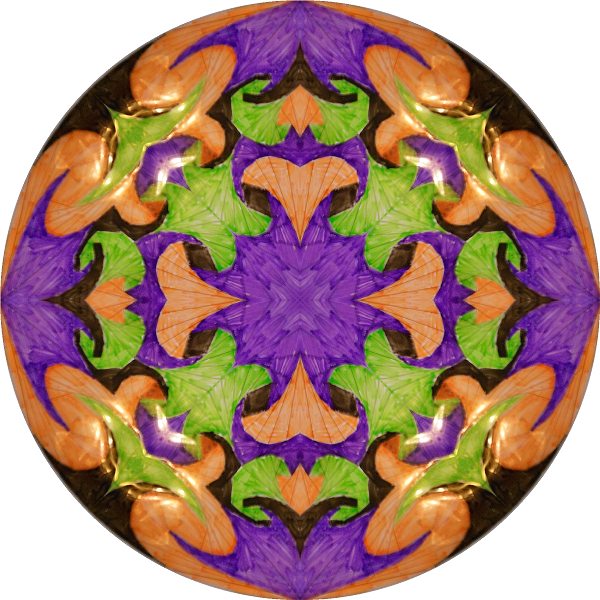
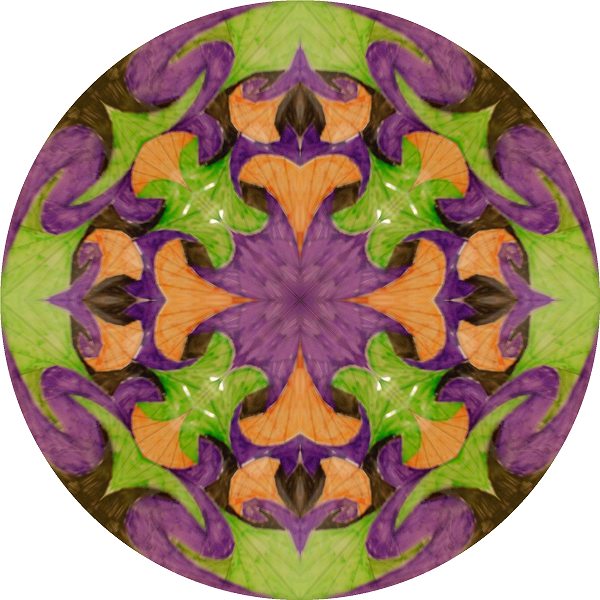
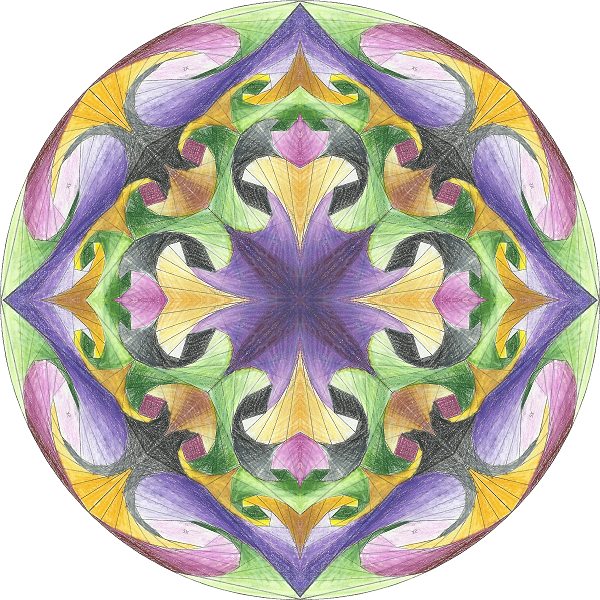
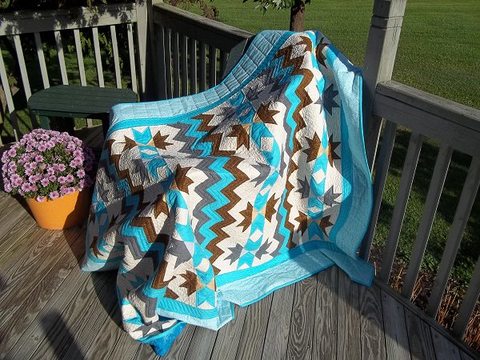
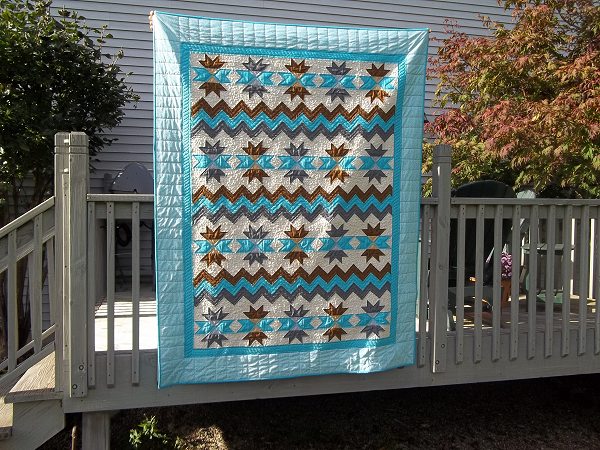
Once I have a layout and a coloring that I like, I’ll try it in various fabric collections that I find in my Electric Quilt software. Here are a few.
Please take time to leave a comment below for a chance to win a free copy of this issue. Also, remember to visit my Facebook page and give me a “LIKE”, if you please.

Happy Quilting, Janice

72 Comments

An Adventure with Making a Spiral Mandala Quilt

8/9/2015

4 Comments

 
In January, of this year, I had the pleasure of taking a workshop with Renae Merrill. Renae Is a self-professed “spiral-maniac” who has written two books about making spiral quilts; Simply Amazing Spiral Quilts and Magnificent Spiral Mandal Quilts. I bought Magnificent Spiral Mandal Quilts many years ago and never got around to trying it out. Then Renae came to our guild to give her Magic Mirror Mandala workshop.

I prepared for class by putting together a palette with gradient values from light to dark. I started by finding an inspiration fabric. This could also be considered a theme fabric but there is no guarantee that it will be included in the final piece. It was simply a crutch for putting together a cohesive palette of colors.
Picture
During the class we used the clockwise and counterclockwise spirals supplied to us to draft a wedge. This wedge represents one eighth of the whole pie.
Picture
Next we placed the wedge in a plastic sleeve and used dry erased markers to flesh out a pattern from the units. After you colored in your pie slice, you place a mirror on it to see what the whole thing will look like. At home I would load an image of the wedge into my kaleidoscope program so that I could see what it would look like as a whole.

At first I tried to match the markers to the fabrics I had. This strategy didn’t work for me as they were not exact matches to my fabric colors. The marker colors were too bright. Also I planned on using dark to light values with the color and I found this hard to convey with the dry erase markers.
After my first three attempts with bright markers I decided to try toning the colors down and reducing the number of colors. This helped me to see how they related to each other better. Another issue was that I couldn’t find a yellow dry erase marker and I felt that the orange marker was too bright. It was competing with the other colors in my marker palette. The other colors should appear darker than the yellow/orange. That’s about as far as I got in class. Later in my sewing room I decided to leave the parts that were to be yellow blank. This helped me to conceptualize it better. I was very satisfied with the result. But I had other “quilting” fish to fry so I had to set the project aside.
Recently I was able to make time further the progression of this project. Now that I had decided on a layout, I used colored pencils to make a colored draft that would include the gradient values for each color.  It took three tries before I came up with a design that I liked. Then I realized that I had included a green/yellow in my green palette to represent the lightest value. This was a problem because I don’t have any yellow green fabric in my palette.
So I made one more version that used a very pale green tor represent the lightest value. I also changed which purple I was going to use in the center. After I finally had what I thought was an awesome sketch it was time to make it in fabric. This took some time as I had to be careful not to mix up the little pieces. After a week and a half I had finished my wedge and I love it! Again, I loaded an image of the wedge into my kaleidoscope program so that I could see better see what it would look when finished. I think it looks awesome.
I have to put it away for a while and work on some other things. But now that I have the one finished wedge for reference the other seven will go much quicker. It may be a while but I definitely plan on finishing this project.

4 Comments

Squash Blossoms quilt pattern now available online from connecting Threads

8/1/2015

4 Comments

 
Hi everyone! I’m excited to tell you that I have my first pattern available for download on the Connecting Threads website. Click on the quilt image to the right for a link to their quilt patterns page.

You may remember this design called Squash Blossoms that was published in the March/April 2014 issue of Fons & Porter’s Love of Quilting. I really love the colors and the design for this quilt.


The fabric was from the Quilting Treasures' Cow girl up collection. The colors remind me of the geological formations called The Book Cliffs. I saw them on the border between Colorado and Utah along Highway I-70.

Picture
The Book Cliffs are represented by the zig zag horizontal rows. The alternating rows contain a traditional block known as squash blossom. I've had my mind on this block for a long time. This seemed like the right time for including it in a design. This quilt was finished with long arm quilting by Janice Roy.

I’ve posted some pictures sent to me by Katherine Kohler of her version of the Squash Blossom quilt design. It looks beautiful! I especially love the glamour shot. Katherine put together her own group of tonal prints for the grey, brown and turquoise palette. I love her fabric choices. She also sent detail shots of the quilting. Nice work, Katherine!

Picture
4 Comments
    Picture
    Picture

    Janice  Averill
    West Haven, Connecticut, United states

    Welcome to my Blog! This is where I'll share my thoughts about quilting with you. I'll post pictures and talk about designing quilts and construction techniques. I'll also post things that inspire me. Please leave a comment and let me know that you came by for a visit..

    Categories

    All
    100 Block Challenge
    Color Theory
    Connecting Threads
    Contests
    Ct Piecmakers Raffle Quilt
    Electric-quilt-lessons
    Electric Quilt Software
    Fabric Dyeing
    Fons & Porter Magazine
    Free Patterns
    Guild Workshops
    McCall's Quilts
    New Quilt From An Old Favorite
    NQM BOM Round 3
    Published Designs
    Quilter's Gallery
    Quilting Treasures Designs
    Quilting With Jose
    Quiltmaker Magazine
    Random Quilt Adventures
    Video Appearance

    RSS Feed

    Picture

    Archives

    May 2021
    March 2021
    February 2021
    January 2021
    October 2018
    November 2017
    October 2017
    August 2017
    June 2017
    May 2017
    April 2017
    February 2017
    November 2016
    July 2016
    June 2016
    May 2016
    April 2016
    March 2016
    December 2015
    November 2015
    September 2015
    August 2015
    July 2015
    June 2015
    May 2015
    April 2015
    March 2015
    February 2015
    January 2015
    December 2014
    November 2014
    October 2014
    September 2014
    August 2014
    July 2014
    June 2014
    May 2014
    April 2014
    March 2014
    February 2014
    January 2014
    December 2013
    November 2013
    October 2013
    September 2013

    Picture
    Picture
    Picture
    Picture
    Picture
    Picture
    Picture
    Picture
    Picture
    Visit the shops below for kits, fabrics, notions, patterns & magazines or anything else you might
    need to make a quilt.
    Picture
    Picture
    Picture

Proudly powered by Weebly