I belong to the Connecticut Piecemakers Quilt Guild of Trumbull Connecticut. Click here to visit our website. Our guild hosts a quilt show which is held biannually. Among the usual features of the quilt show we include a guild block challenge. For the guild block challenge a chairperson is chosen and that person settles on a set of guidelines to be used for a creativity challenge resulting in a submission of blocks from the membership. Each member who contributes a block has a chance at winning the finished quilt top. If a member makes more than one block they have a chance for each block that they contribute to the project.
I volunteered to be the guild challenge chairperson and I quickly decided that flower motifs would be the first requirement for the blocks challenge. As for the size of the blocks I referred back to what I remembered from past challenges. From what I remembered most of the blocks have been blocks of the same size. Although I do remember one year when the blocks only had to be the same height, 12”and for the width the block; it could be 6”, 9” or 12”. That turned out to be a beautiful quilt and the one I remembered most.
I volunteered to be the guild challenge chairperson and I quickly decided that flower motifs would be the first requirement for the blocks challenge. As for the size of the blocks I referred back to what I remembered from past challenges. From what I remembered most of the blocks have been blocks of the same size. Although I do remember one year when the blocks only had to be the same height, 12”and for the width the block; it could be 6”, 9” or 12”. That turned out to be a beautiful quilt and the one I remembered most.
The main inspiration for block size in my challenge came from the book Simply Dynamic Sampler Quilts by Marianne Hatton. Her designs include blocks that use a 2 inch multiple base in many combinations such as 2” x 2”, 2” x 4”, 4” x 4”, 4” x 6” and so one up to 24“x 24”. I haven’t completed my quilt using this design arrangement but I have a few blocks completed. Click Here to visit her website and see her quilts.
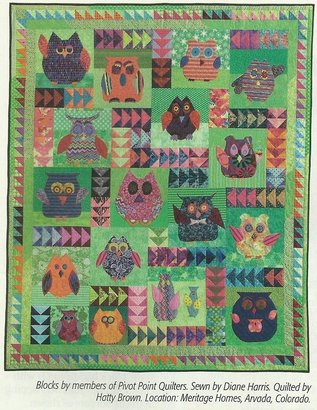
Another source of inspiration was a quilt I saw in my issue of Quiltmaker Magazine March/April 2016. The quilt was called "The Swoopers" and it was designed by Diane Volk Harris. This pattern featured a layout that incorporated blocks of various rectangular dimensions. To create unity the background for the blocks were all the same color but as the blocks were made by different individuals the backgrounds were not of the same fabrics in the chosen color. This gives the quilt a bit of movement without being overwhelming. As a result of the varied block dimensions used in the layout, there were gaps in the block arrangement. This problem was cleverly solved by placing runs of Flying Geese units where the gaps appeared. I would use that as my jumping off point.
Another source of inspiration was a quilt I saw in my issue of Quiltmaker Magazine March/April 2016. The quilt was called "The Swoopers" and it was designed by Diane Volk Harris. This pattern featured a layout that incorporated blocks of various rectangular dimensions. To create unity the background for the blocks were all the same color but as the blocks were made by different individuals the backgrounds were not of the same fabrics in the chosen color. This gives the quilt a bit of movement without being overwhelming. As a result of the varied block dimensions used in the layout, there were gaps in the block arrangement. This problem was cleverly solved by placing runs of Flying Geese units where the gaps appeared. I would use that as my jumping off point.
Here were the final challenge rules I gave to my guild members;
12 – 6 “ x 6” blocks
2 – 6” x 9” blocks
4 – 6” x 12” blocks
20 – 9” x 9” blocks
4 – 9” x 12” blocks
17 – 12” x 12” blocks
- All flowers must be on a light blue background of cotton broadcloth
- The motif can be applique or pieced as desired.
- Blocks size could be 6” x 6”, 6” x 9”, 6” x 12”, 9” x 9”, 9” x 12” and finally 12” x 12” inches for each block.
12 – 6 “ x 6” blocks
2 – 6” x 9” blocks
4 – 6” x 12” blocks
20 – 9” x 9” blocks
4 – 9” x 12” blocks
17 – 12” x 12” blocks
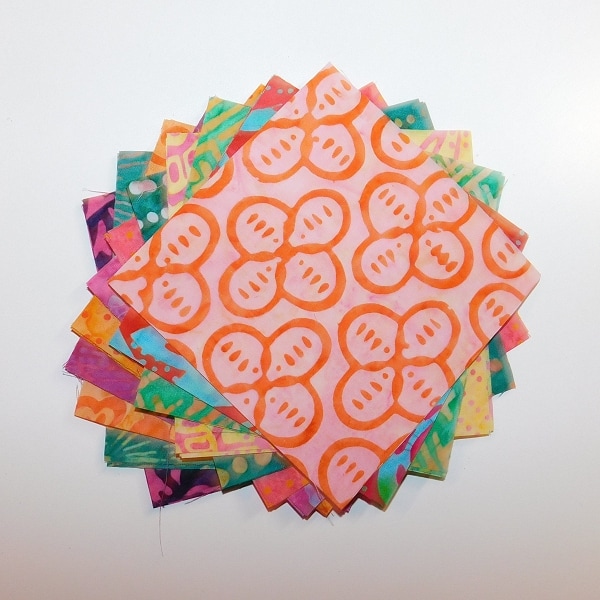
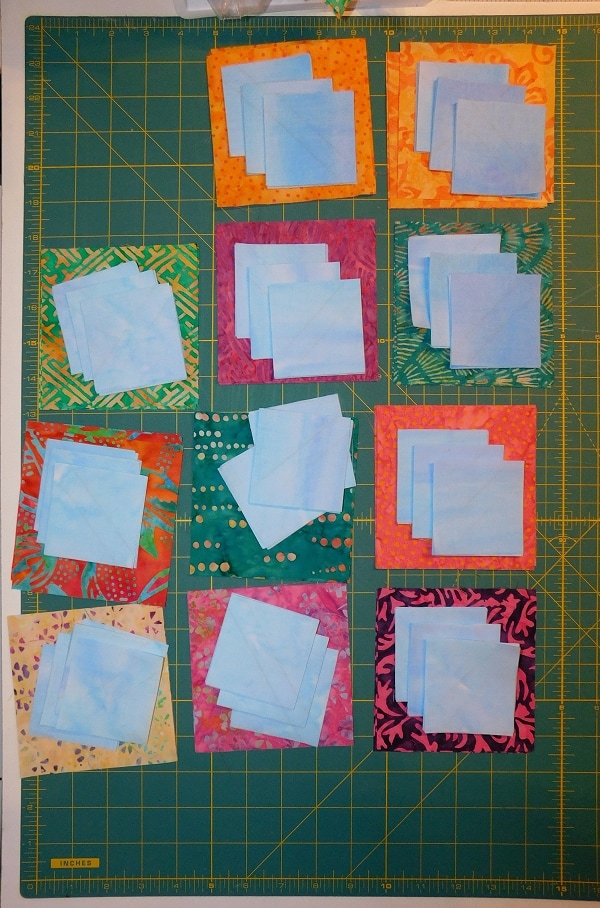
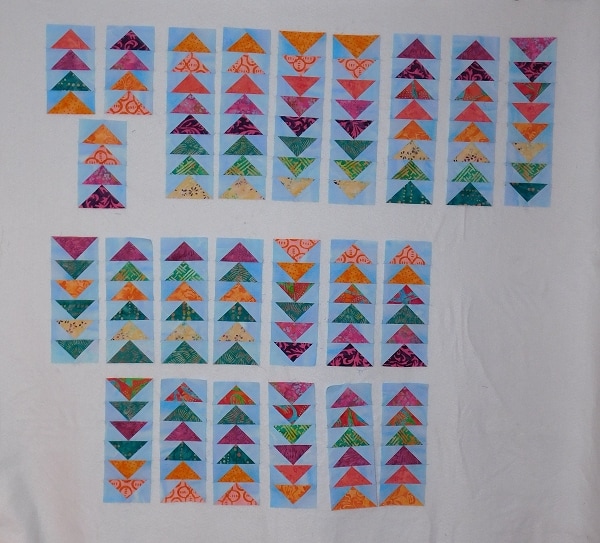
To contribute to a bit of unity in the finished quilt I decided that the Flying geese would be bold, bright colors like those used in the flowers and that the background triangles for the flying Geese should be a light blue just like the sky background. I had received many different ideas defining sky blue for the background of the blocks given to me. At first I thought that I would have to gather and mix up various light blue blenders from my stash to use for the Flying Geese.
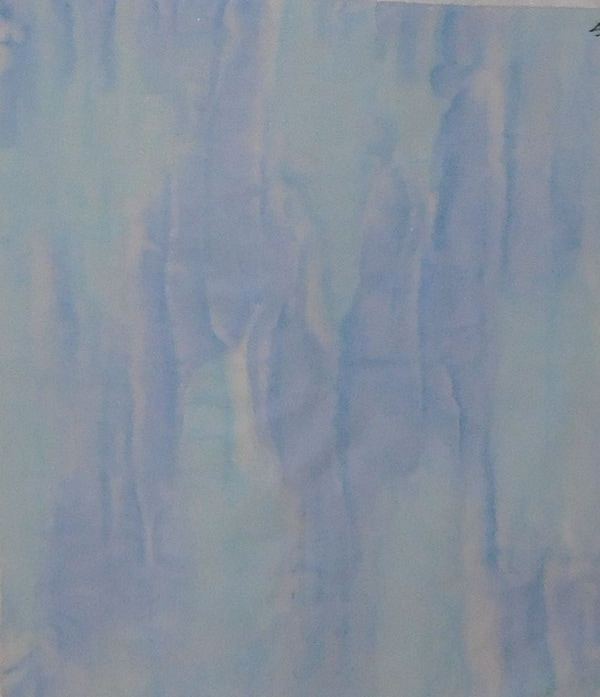
Then one day I had the great idea to use “Sky Blue” fabrics I painted using Mickey Lawler’s technique for the small triangles on the Flying Geese. Our guild has hosted Mickey Lawler the author of Sky Dyes a couple of times.
Her method of painting a sky utilizes a combination of turquoise and ultramarine with amazingly diverse results. This I decided would be the perfect solution. You can see the color I’m describing on her website. Even better many guild mates who took the class still had their sky fabric and donated it to the project.


Now that I had inventoried all of the blocks it was time to work on the placement for the blocks. Ideally I wanted to work in Electric Quilt (EQ) with the actual blocks but unfortunately I could not do this because of the inconsistency of my camera distance to the blocks. That variable meant that the final jpegs were not in proportion to each other. When I tried to set the blocks to their finished sizes in EQ, I couldn’t see the whole flower motif on the block. Instead I used stock block designs found in EQ to come up with a layout because of the programs “snap to” function which speeds up the process of aligning the blocks to each other.
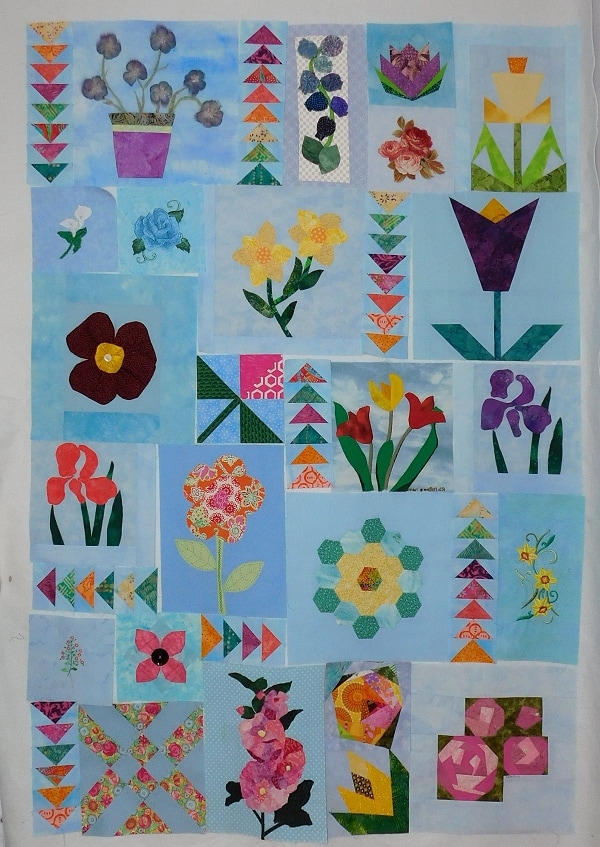
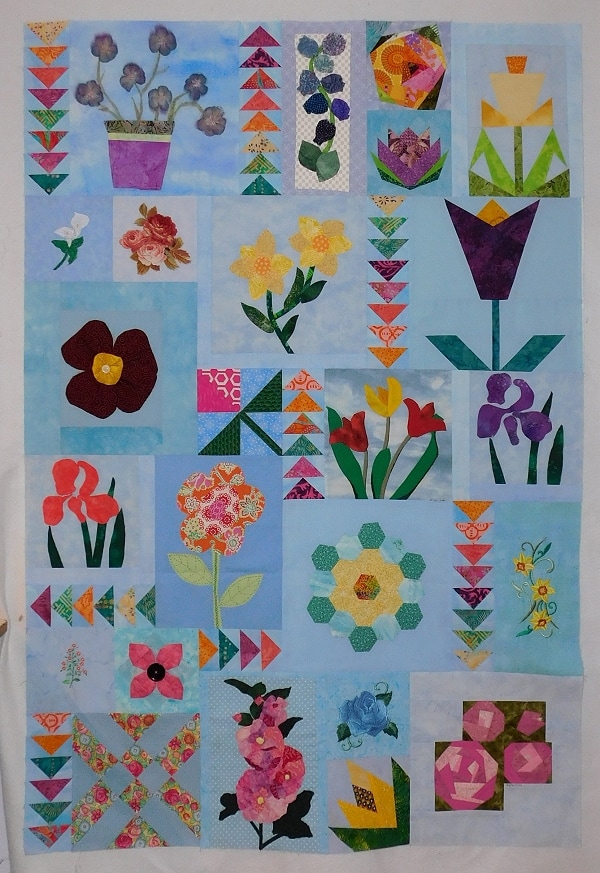
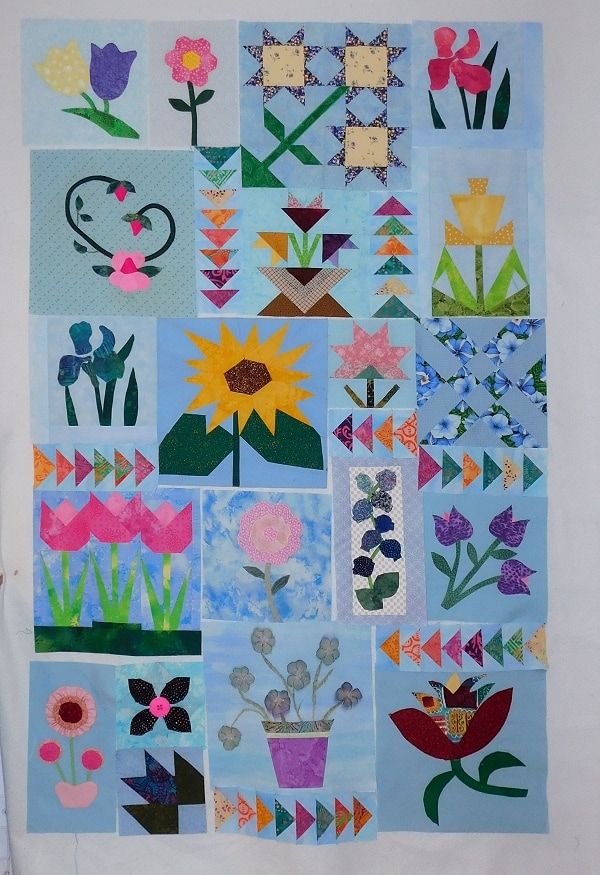
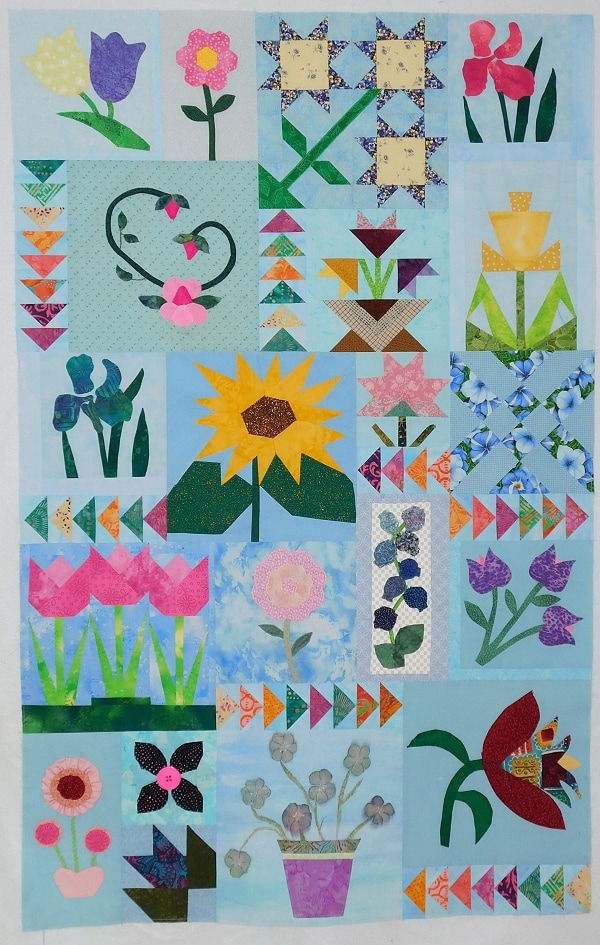
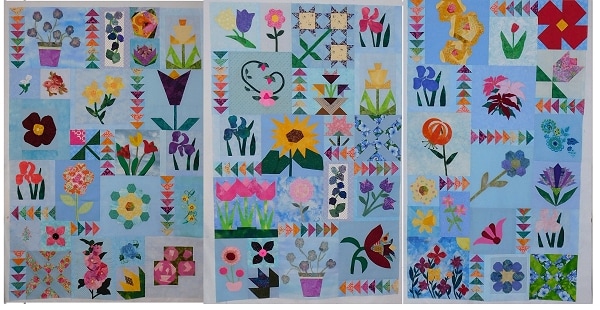
Staying with the general layout idea used in "The Swoopers" design I focused on random groupings of different dimensioned blocks. This resulted, as I knew it would, with gaps where I could place runs of flying Geese. I also wanted to keep similar blocks made by one individual away from each other in the layout to create diversity in the design. I also tried to keep the geese spread around the quilt in an asymmetrical fashion. To further this imbalance I placed the runs of flying Geese in opposing directions to create visual interest.
Staying with the general layout idea used in "The Swoopers" design I focused on random groupings of different dimensioned blocks. This resulted, as I knew it would, with gaps where I could place runs of flying Geese. I also wanted to keep similar blocks made by one individual away from each other in the layout to create diversity in the design. I also tried to keep the geese spread around the quilt in an asymmetrical fashion. To further this imbalance I placed the runs of flying Geese in opposing directions to create visual interest.
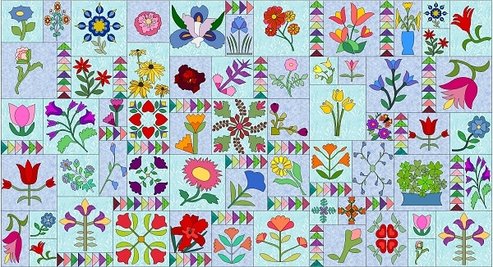
After designing the layout in EQ, I used Microsoft Publisher 2013 to manipulate the blocks images to match the layout. In publisher I was able to give each block a measurement proportional to its finished size and still see all of the flower motif on the block. I moved the blocks around until they matched the layout I had created in EQ. This gave me the guide I needed to complete the desired design layout.
Microsoft Publisher 2013 is not ideal for designing, at least not for me, as I don’t know how to make images snap to each other and have to manipulate everything with my hand. Which can be painful after extended periods of time. If you know how to “snap” objects to each other in Publisher 2013 please let me know
Microsoft Publisher 2013 is not ideal for designing, at least not for me, as I don’t know how to make images snap to each other and have to manipulate everything with my hand. Which can be painful after extended periods of time. If you know how to “snap” objects to each other in Publisher 2013 please let me know
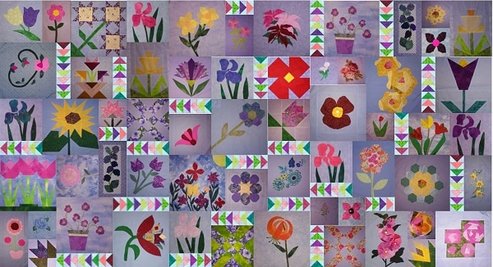
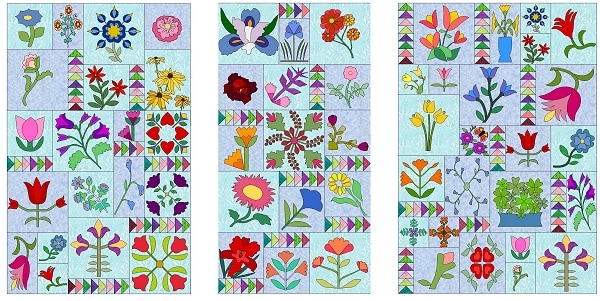
As you can imagine a quilt that contains 59 blocks is fairly large. The size of my final design was 57’ x 105”. Whoa nelly! Who’s going to be able to display that in their house? Certainly not Moi. To deal with the size of this behemoth I decided to turn it into a triptych. I learned about these in my college art classes. The format was used for a lot of Renaissance religious art. This was also a great solution because now more than one person can own a part of the design and display it easily. Some members made more than one block, so I divided their blocks among the three panels.

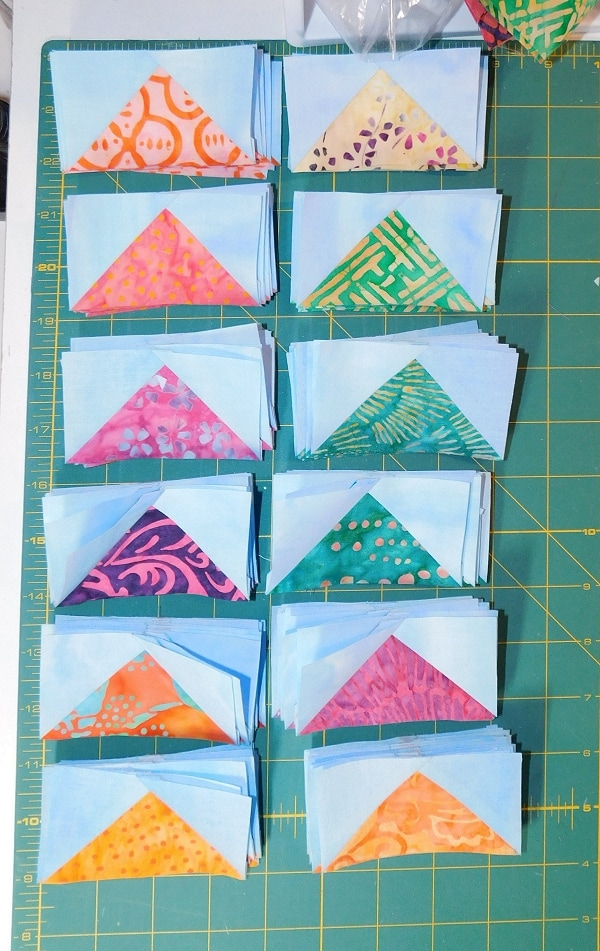
To make the Flying Geese units I had volunteers help with making the flying geese; Bev S, Betsey S, Connie S, Kathy C. Thank you ladies! I sorted the geese into sets and tried spread the different colored fabrics around as evenly as I could. I sewed them together into the desired of runs; 4, 6 or 8 Flying Geese each.
Some blocks weren’t the exact size I needed. That meant that I had to I needed have fabric that blends as much as possible with the existing background fabric. I would use this to make them bigger. If the blocks were more than ¼” off from the desired size, the block had to be made smaller before adding fabric. A decision had to be made about how much to cut from the block and from which sides. Another thing to consider is that the strips needed to be bigger than the desired size so that I could trim them down to size. For some blocks the fabric strips were added to all for corners and for others it was to two adjacent sides. This was dependent on how much space the flower took up within the block. Thank you Rita P. for help with this task!
For blocks that were almost the right size, within a ¼”; I cut a piece of freezer paper at least 1“ larger than the size of the block needed. I ironed this to the back of the block while keeping the block in the center of the freezer paper. Once it cooled I would turn the block over and square up the block cutting through the freezer paper. Now I had straight edges and square corners for joining to neighboring blocks.
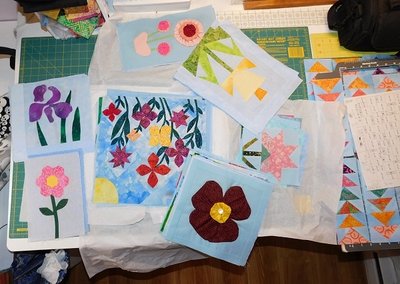
As I placed the blocks on my design wall for the first panel I wanted to work on I had a discovery. “Hey! Where did this block come from?” I found out that I had a 6” square block that I forget to include in my layout. I don’t know who made it. Somehow the name tag disappeared. I know I’ll find out who made it eventually but for now what am I to do with it? Oh and another thing “Marge’s block is only 9 inches square and I need a 12 inch square block in that space!” No problem about Marge’s block, I’ll just add strips to it to make it bigger.
For blocks that were almost the right size, within a ¼”; I cut a piece of freezer paper at least 1“ larger than the size of the block needed. I ironed this to the back of the block while keeping the block in the center of the freezer paper. Once it cooled I would turn the block over and square up the block cutting through the freezer paper. Now I had straight edges and square corners for joining to neighboring blocks.
As I placed the blocks on my design wall for the first panel I wanted to work on I had a discovery. “Hey! Where did this block come from?” I found out that I had a 6” square block that I forget to include in my layout. I don’t know who made it. Somehow the name tag disappeared. I know I’ll find out who made it eventually but for now what am I to do with it? Oh and another thing “Marge’s block is only 9 inches square and I need a 12 inch square block in that space!” No problem about Marge’s block, I’ll just add strips to it to make it bigger.

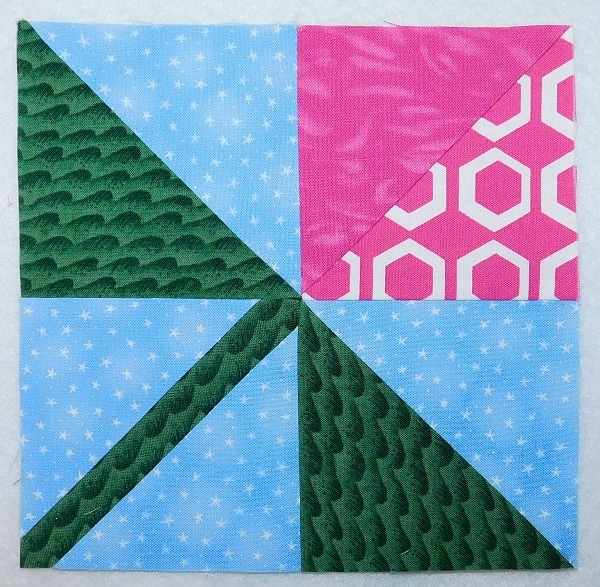
As for the extra block it time to go back to the drawing board. My solution was to create a new layout for one of the panels and make more blocks and geese if needed for the new lay out. The process took longer to procrastinate than to actually do! How about that? In the end I only would need to add two 6” x 6” blocks. I could get that done no problem. EQ to the rescue! EQ has an endless supply of blocks. I found two that I liked made a few changes and added them to the quilt design.
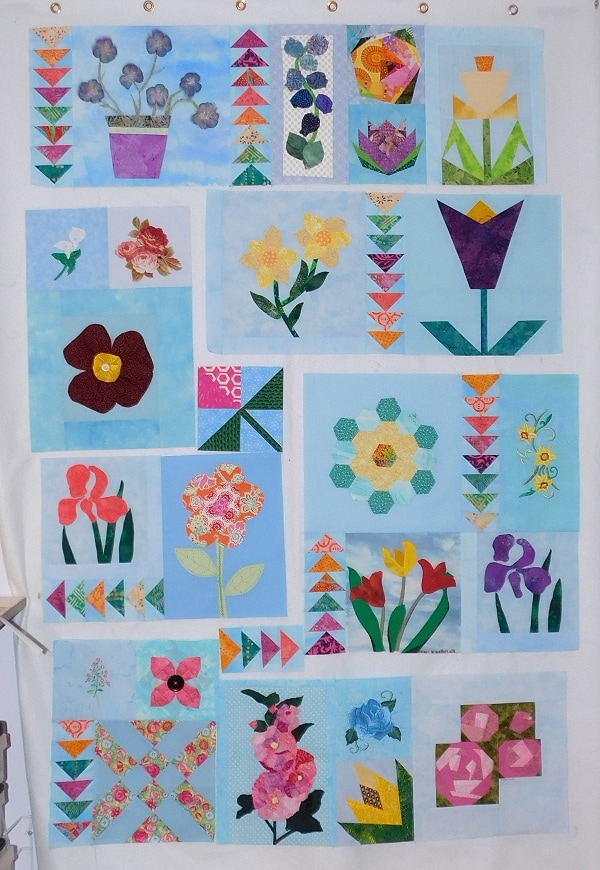
Now it was time to construct the quilt top panels. For each panel I would arrange the blocks and Flying Geese on the wall to match the layout I had printed from my EQ design. Next I would move the blocks into sub groups to reflect the sequence I planned to use to assemble the panel. I almost mixed up the block placement on panel three but I caught it before it was too late to rip out and fix. All in all things went well for the first two panels I worked on.
Now it was time to construct the quilt top panels. For each panel I would arrange the blocks and Flying Geese on the wall to match the layout I had printed from my EQ design. Next I would move the blocks into sub groups to reflect the sequence I planned to use to assemble the panel. I almost mixed up the block placement on panel three but I caught it before it was too late to rip out and fix. All in all things went well for the first two panels I worked on.

When I finished sewing the third I realized that something had gone awry. Somehow I had changed the placement of the blocks so that two similar blocks would be next to each other when the panels are hung together as a set. The blocks I refer to are the pieced ones at the bottom right corner of the second panel and the bottom left of the last panel. Oh no! I couldn’t have that! How did I mix up these blocks?! Rather than obsess about how I had made this mistake I tried to focus on a solution.
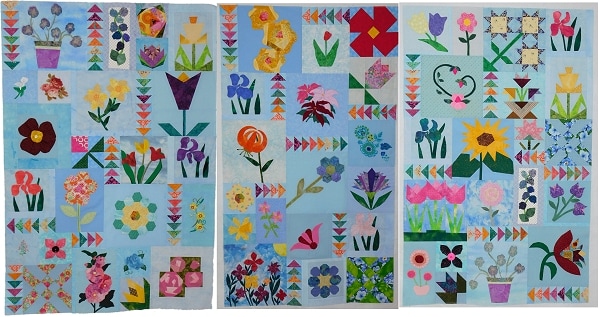
My solution to my quandary, a quilting “shell game”. I switched the sequence of the panels for the triptych design. The first time I rearranged them I ended up with the iris blocks next to each other. So I switched them around one more time. This time I had two sets of Flying Geese runs connecting and creating an "l" shape. I wasn't too thrilled with this but quickly overcame my bias when I thought of the other option which would be ripping stuff apart and re-sewing.
One last complication - My iron died on the last panel. But fortunately I don’t live in rural America and that problem was quickly solved.
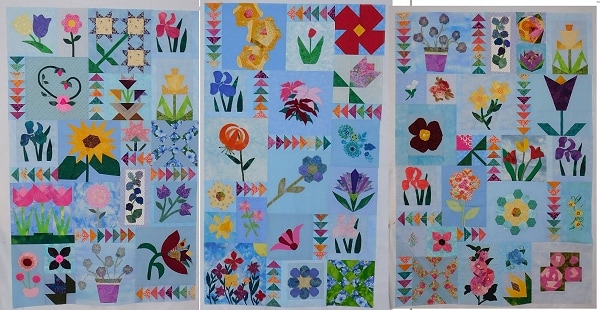
I really like how the panels came out. Hopefully I can find a generous guild mate that is willing to put a stippling stich through the panels. If I can, then I’ll finish the panels with a facing and a hanging sleeve. I’ll be sure to post the finished quilt when that happens. Anyway that's how my guild's quilting challenge turned into my quilting challenge. Just remember that quilting can be a bit like engineering and problem solving is part of the process. Be in the moment and enjoy the challenge! It's a experience that helps you to grow as a human being.
Finally, if I were to do this again here are a few things that I would do differently;
Tips for future guild challenges
Happy Quilting to all!
Tips for future guild challenges
- Impress upon guild mates the importance of using short stitches for all piecing 2.0 or 14 stiches per inch and shorter still for foundation piecing.
- Try to have a buffer of background for applique or narrow sashing for pieced blocks. This way the block can be squared up to the exact size without disrupting the elements in the design. Also points will not disappear when sewn.
- For applique blocks start with a square at least 2” larger than the desired size. Do not trim before handing off to guild challenge chairperson.
- No 3 dimensional applique. All applique of this sort will most likely be subject flattening as the project is constructed.
- Explain that any block not meeting these guidelines will be returned to the maker for improvement.
Happy Quilting to all!

 RSS Feed