Iris Quilts
  • Home Page
  • Galleries
  • Blog
  • Pattern & Tool Shop
  • About Janice
  • Contact Janice

QUILTMAKER'S BLOG TOUR - 100 DESIGNER BLOCKS VOL. 16

11/17/2017

130 Comments


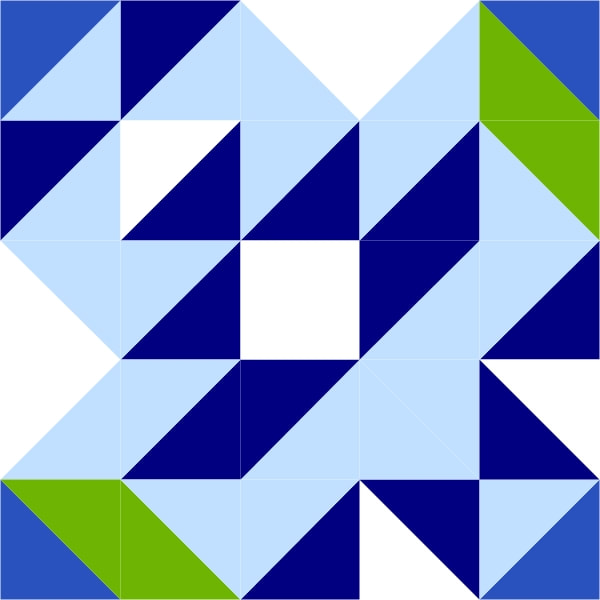
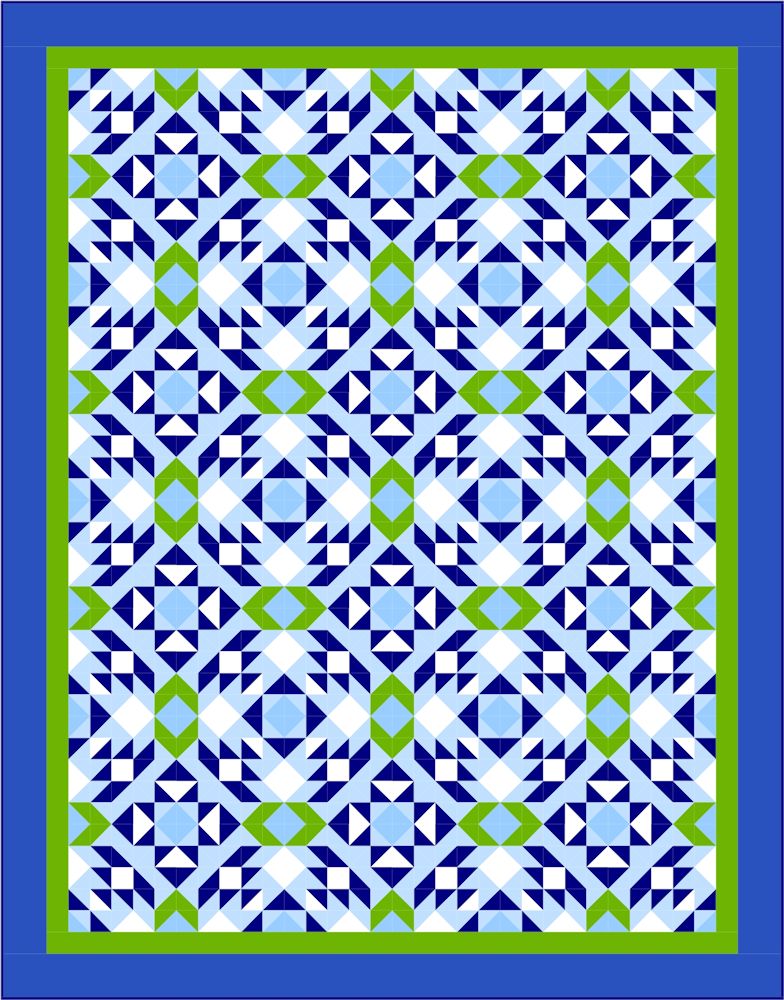
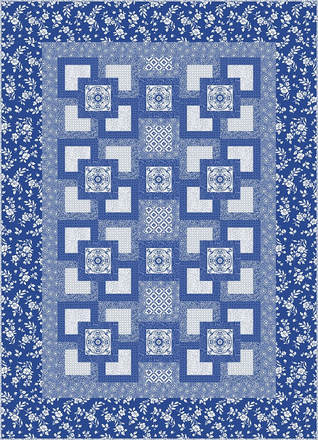
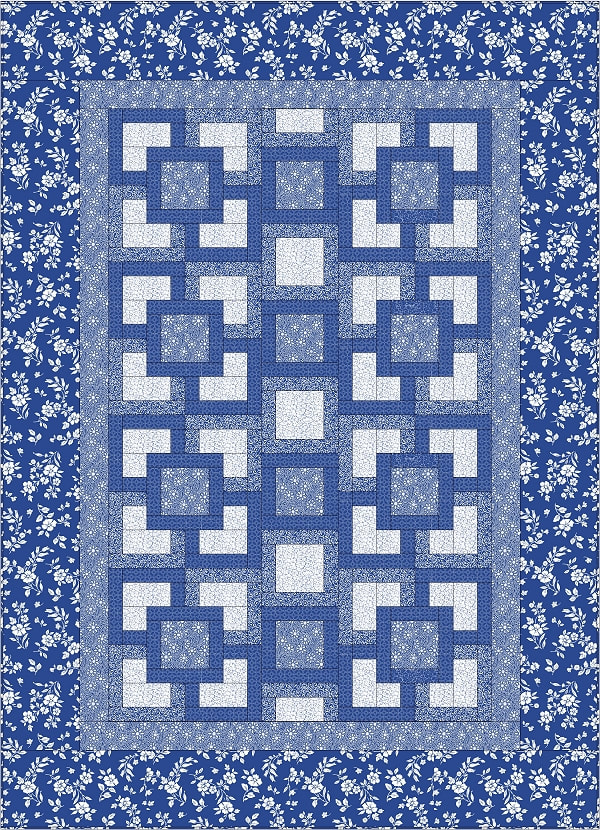
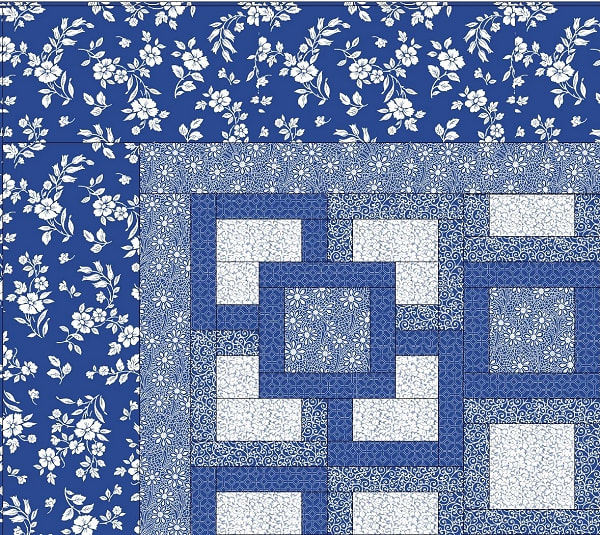
Block # 1553       Crossroad Pyramids

Picture
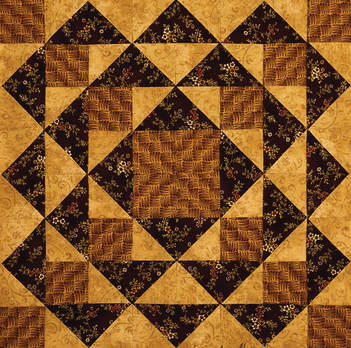
Hello my quilting friends and welcome to another stop on The Quilting Company's  Quiltmaker 100 Block Road Rally Blog Tour! I'm glad you have managed to travel this far and come visit my blog. I hope you're not too dusty from your travels. Here's my block, Crossroad Pyramids. I’m very excited to have a block featured in Volume 16 of Quiltmakers 100 Block Challenge!

I'm also excited to tell you that you can become the proud owner of your very own copy of this wonderful resource courtesy of the folks at Quiltmaker. I hope you're as excited as I am. Please read to the end to find out how you can get your copy. This offer has ended. Congratulations to Renee A.!

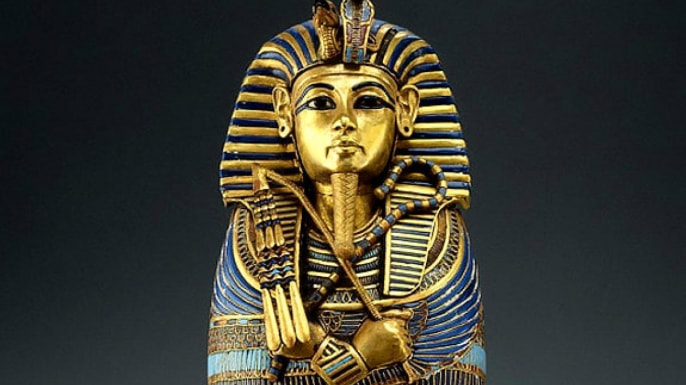
The inspiration for this block is fairly obvious, it’s the pyramids of Giza found in Egypt. I’ve always have been fascinated with Egypt ever since the King Tutankhamun exhibit came through the United states when I was a kid.

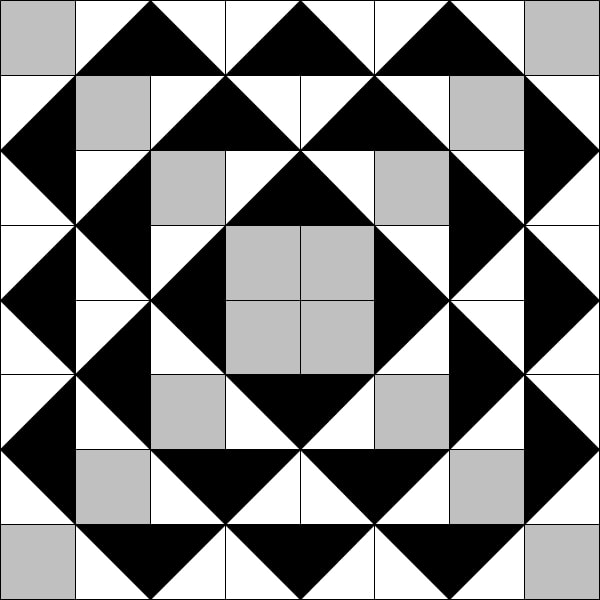
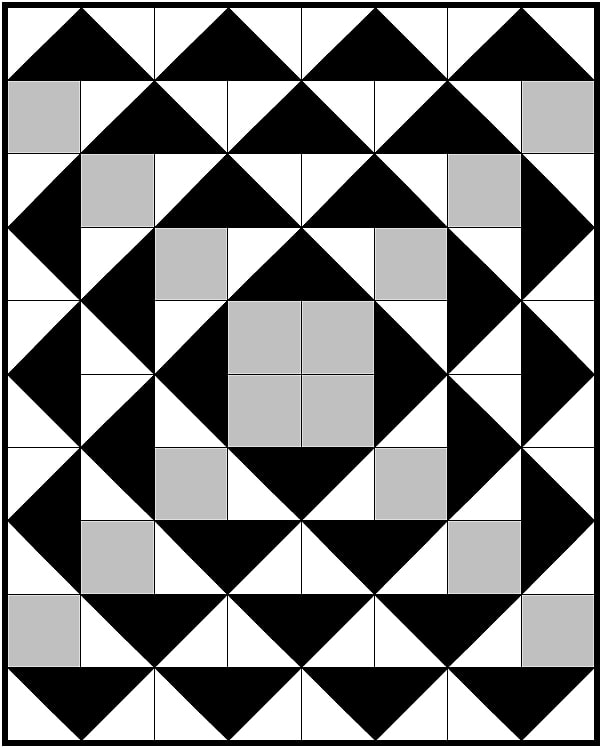
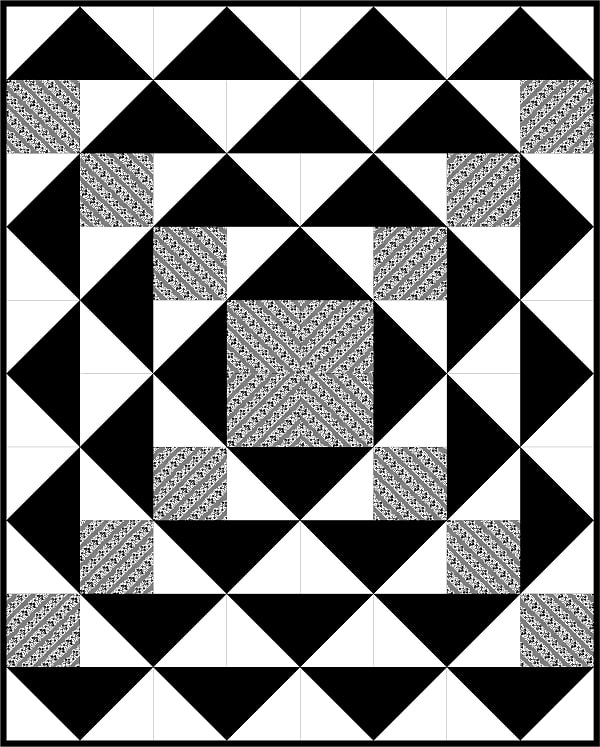
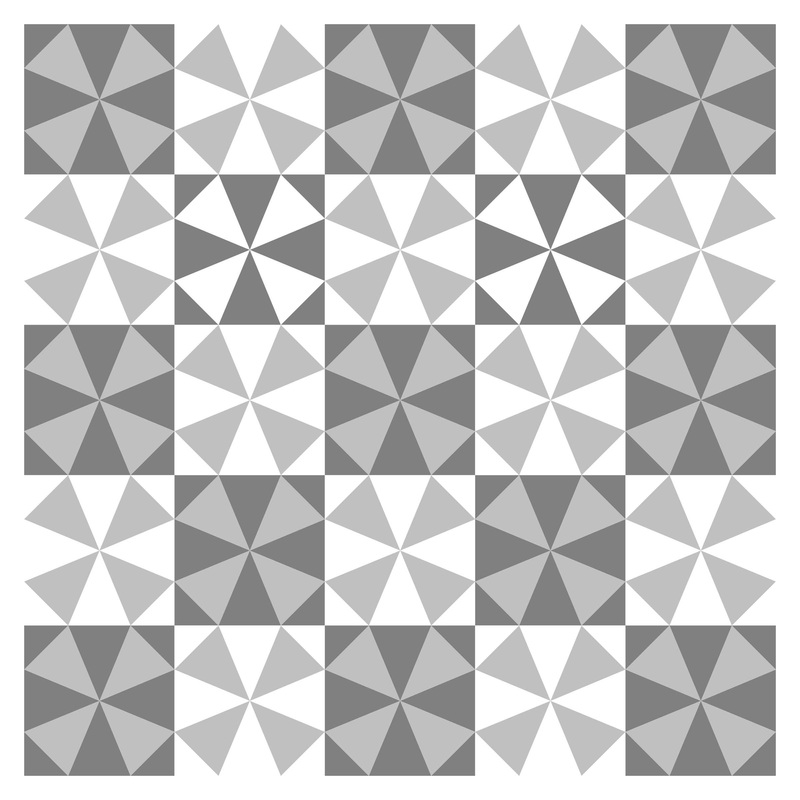
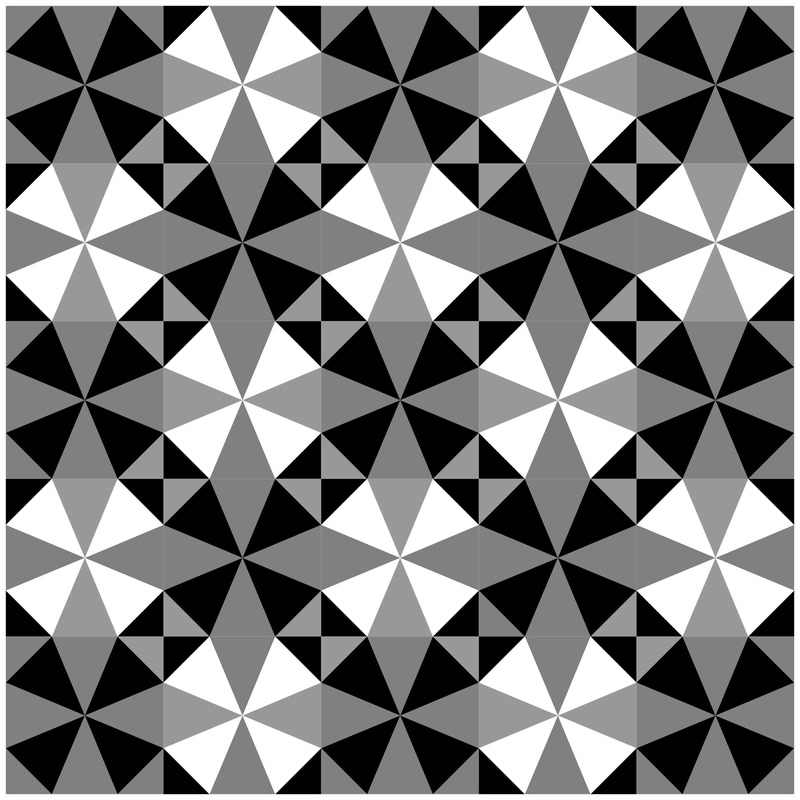
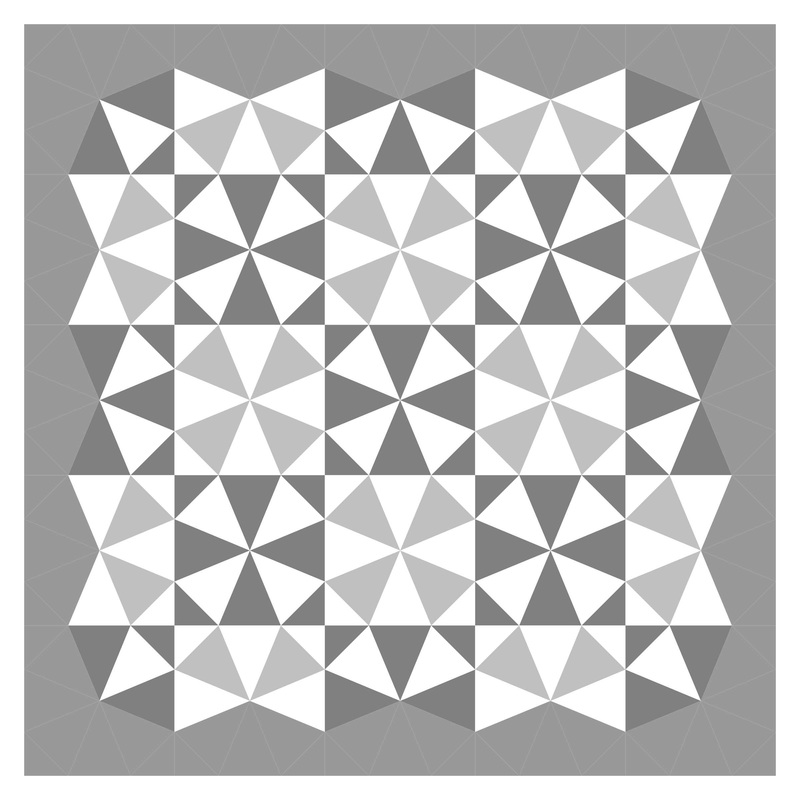
As usual I turned to my trusty EQ quilt design software to get things started and the block below on the left is what I came up with. Then I took another look at the block and I wondered what would happen if I used striped fabric in the place of the medium value. The block below on the right is the result. I rotated the stripe so that they all met in the middle. Now that things were moving along nicely it was time to pick out some fabrics to use.
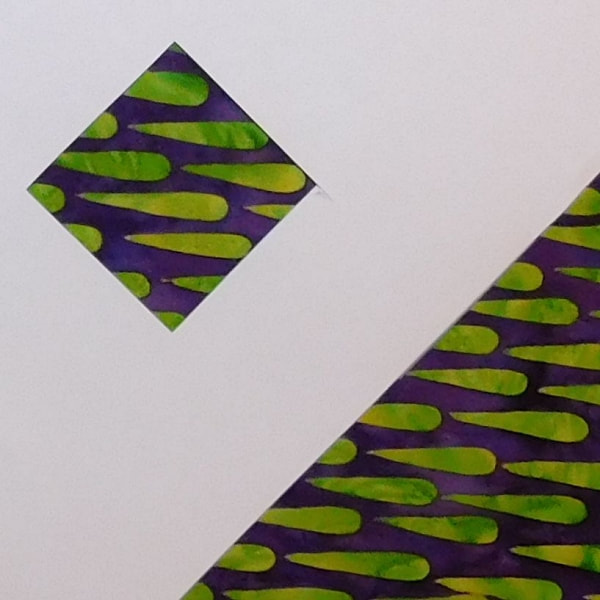
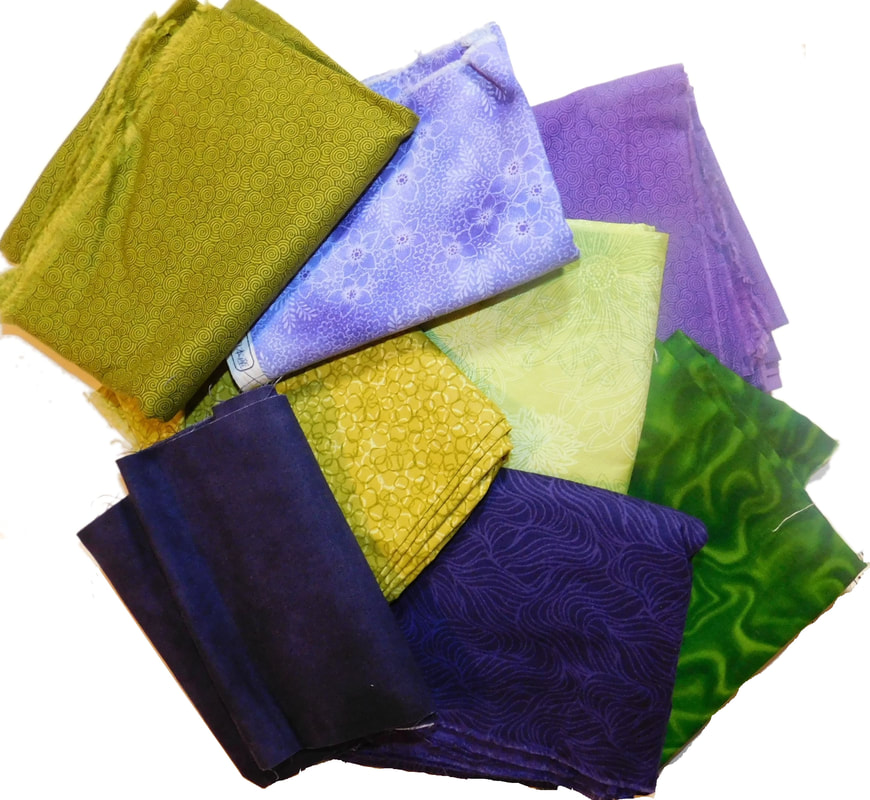
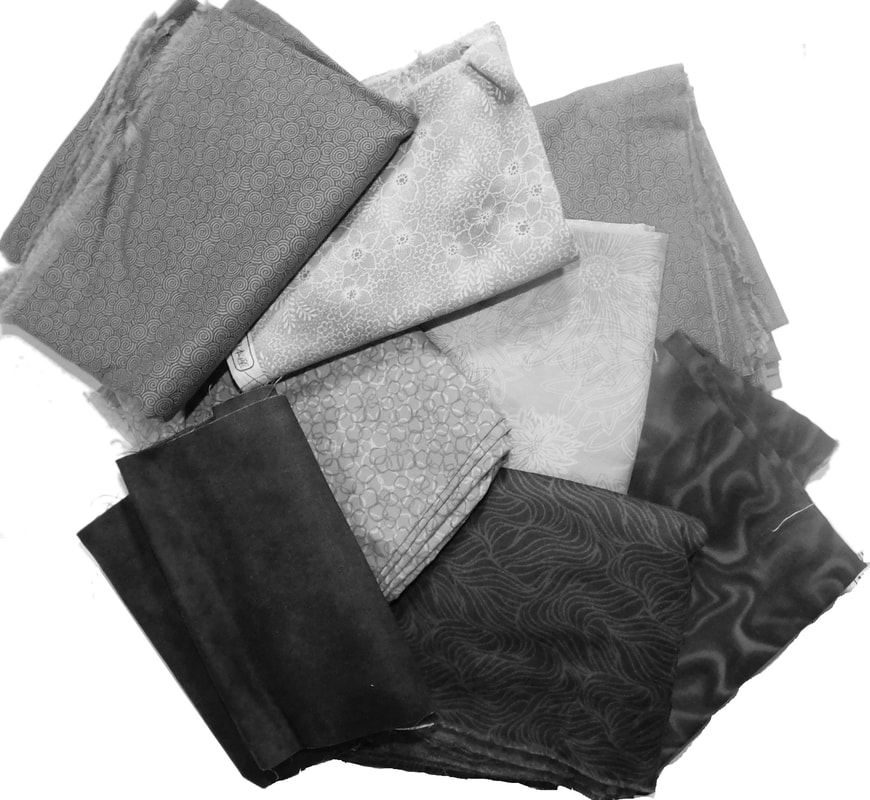
I dug out a bunch of directional and striped fabrics from my stash to audition for the block. It was important to consider the scale of the printed fabric in relation to the size of the finished unit. The block wouldn't look the way I intended if the texture of the print is too large to fit into the finished unit.

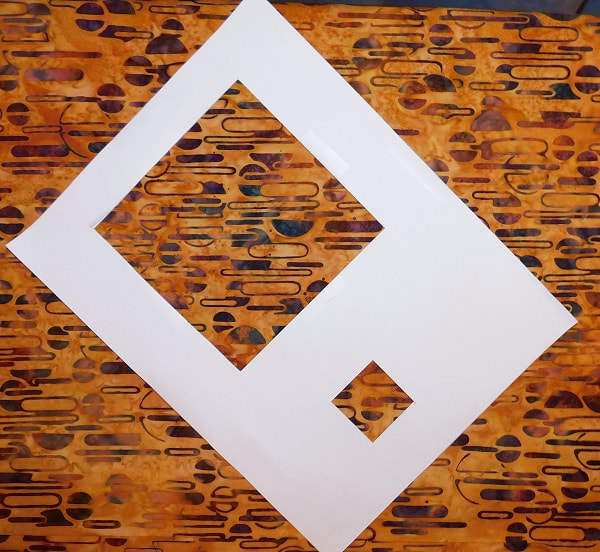
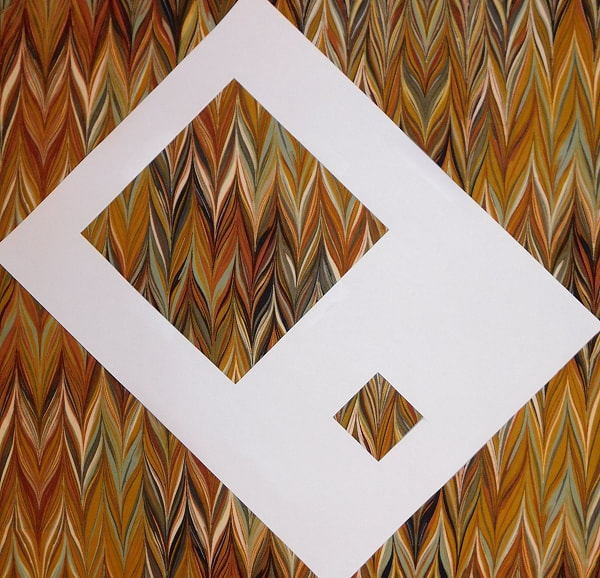
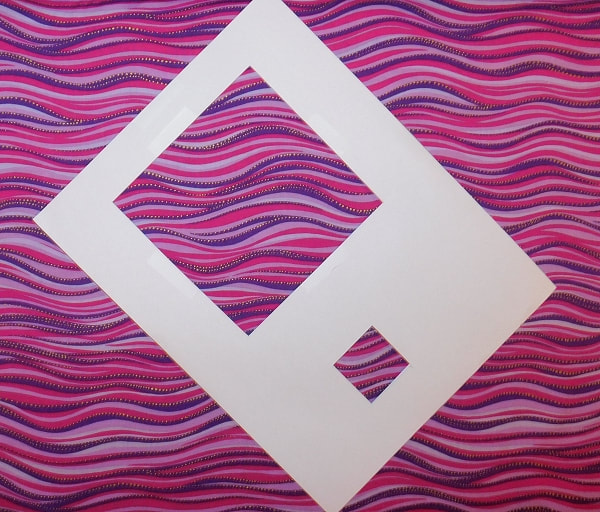
To help me make that decision I had to cut an audition window from a piece of white paper at the finished size. Since this was going to be a 12” block the unit's the finished size would be 1 ½” x 1 ½”. Here are the contestants for the block as seen through the audition window.
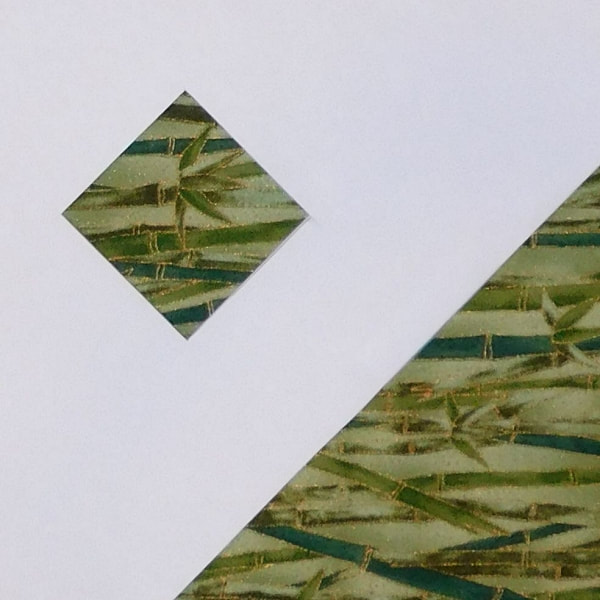
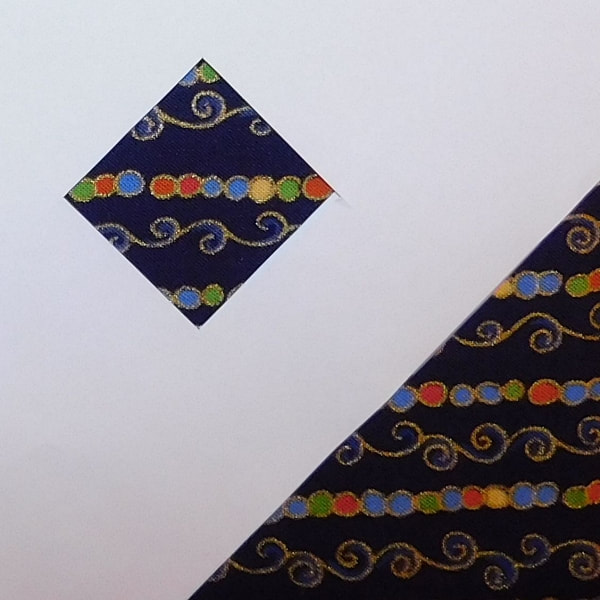
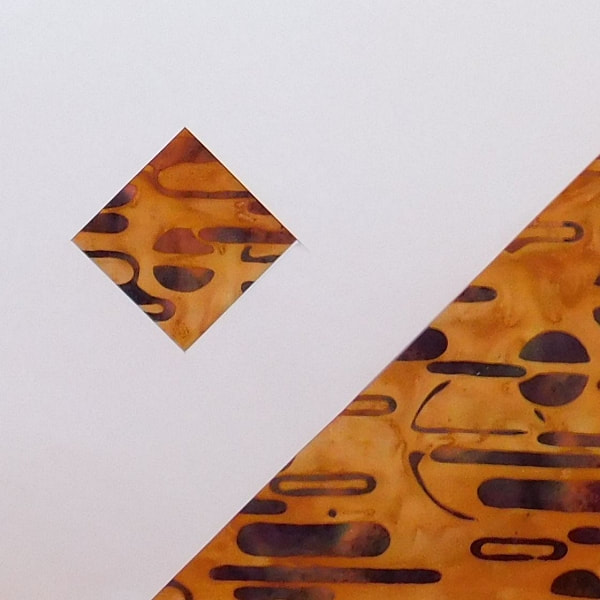
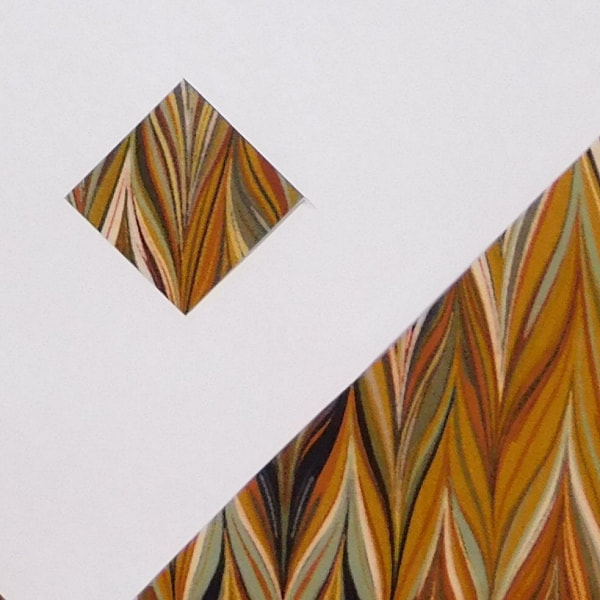
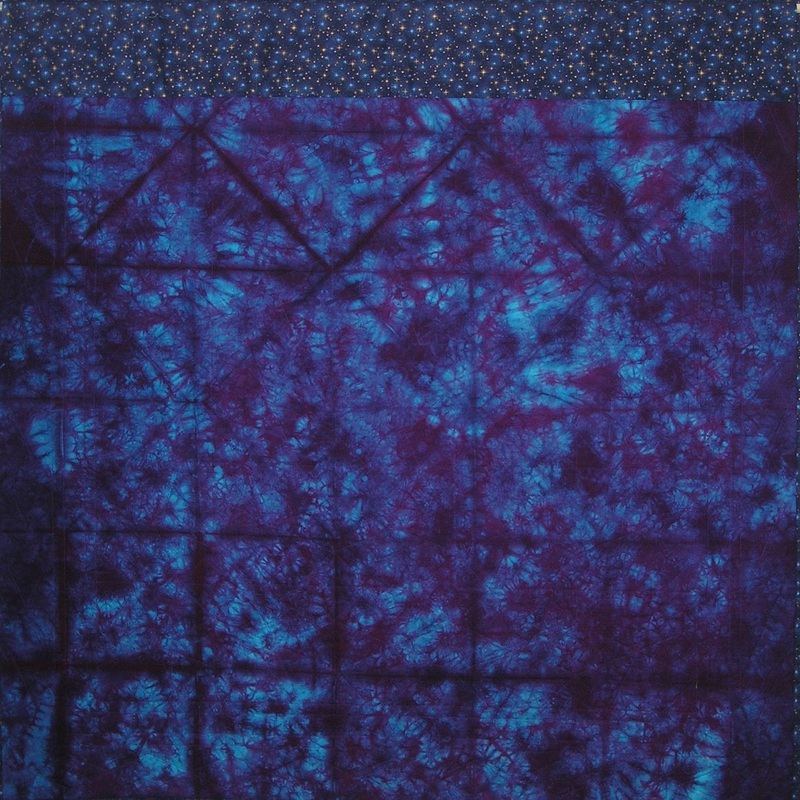
As you can see some of the other choices would have worked out well others not so well. I decided to use the brown stripe for the block. If you use a stripe it’s important to starch the heck out of the fabric before cutting into it. This will help you to control the bias. If working on the bias freaks you out then try to find a stripe that is printed on the diagonal. That way the sides of the square will be on the straight grain when you cut your units out.

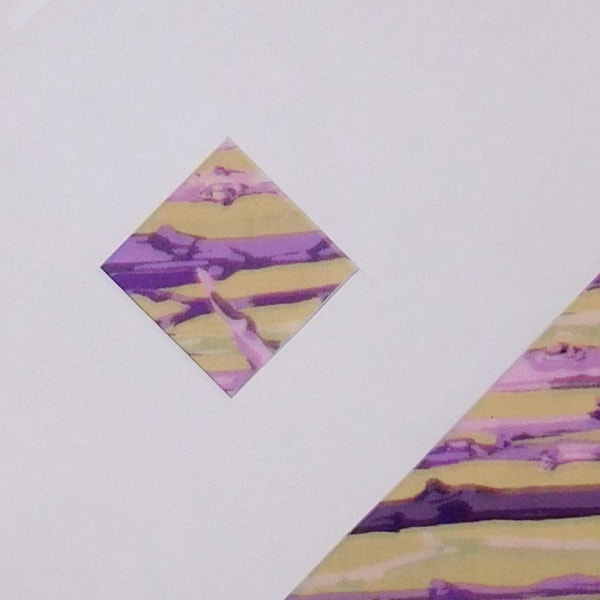
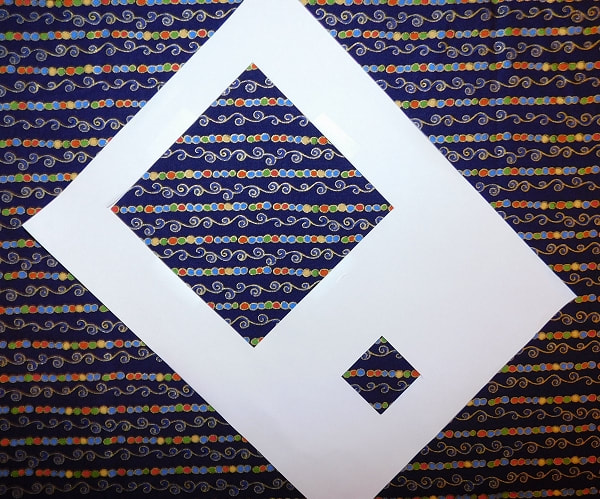
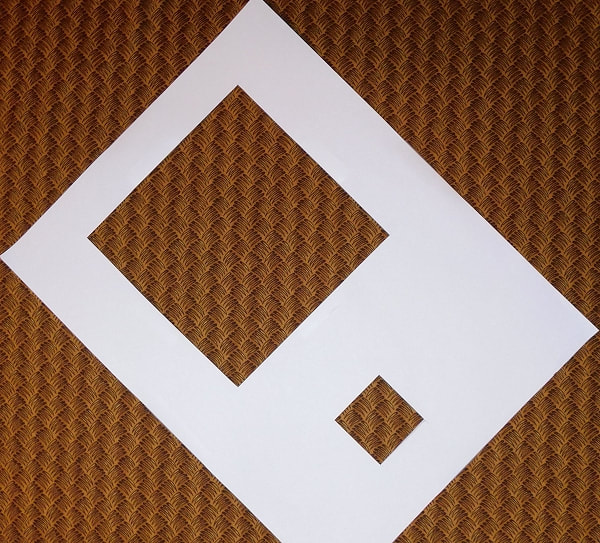
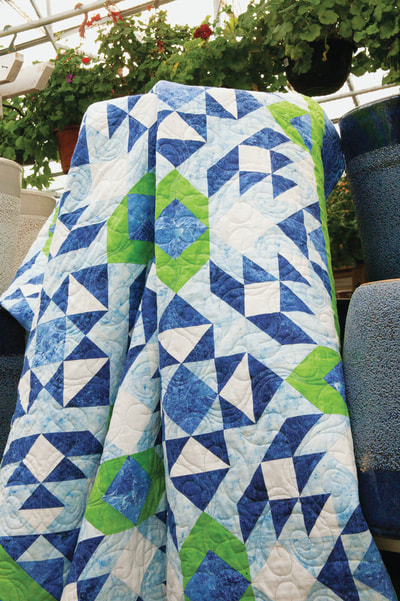
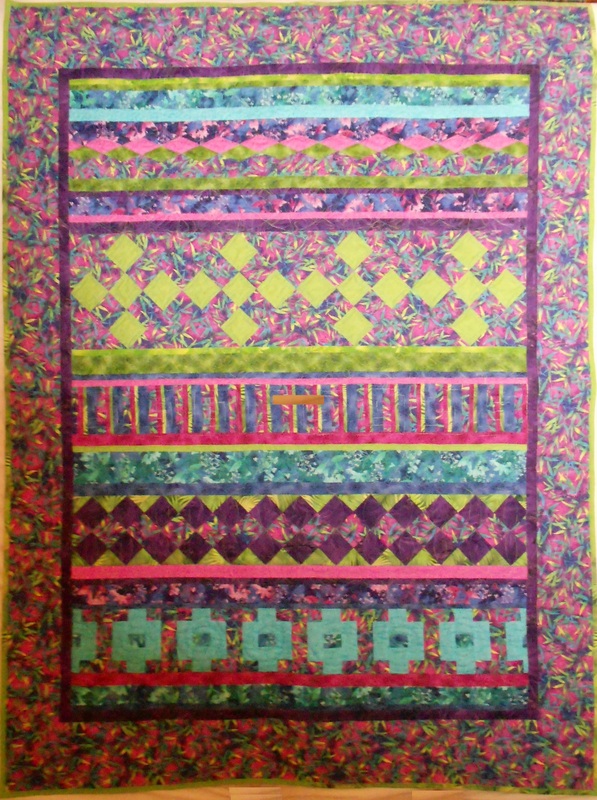
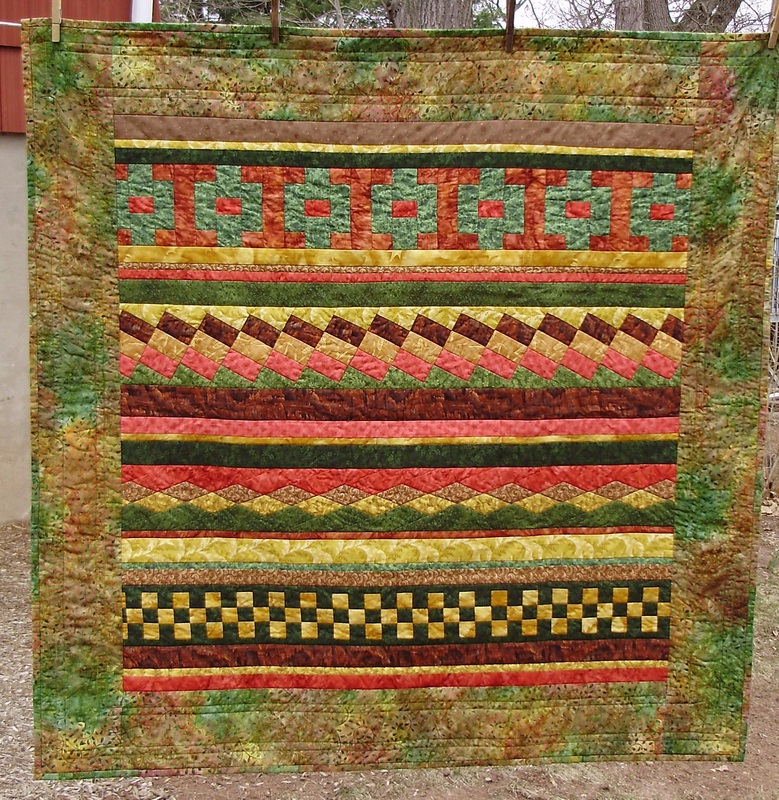
Let’s talk some more about scale. I knew that I would need to make up a baby quilt for a shower this past July. I decided to use this block, made at a larger size, for the quilt. My idea was that the block would be enlarged to 40” x 40”, which gave me a finished unit size of 5” x 5” for the square containing the stripe. Let’s go back and see what these fabrics would look like in a 5” square unit. I cut both a 5” and 1 ½” square so that you could see the difference between the two at the same time.
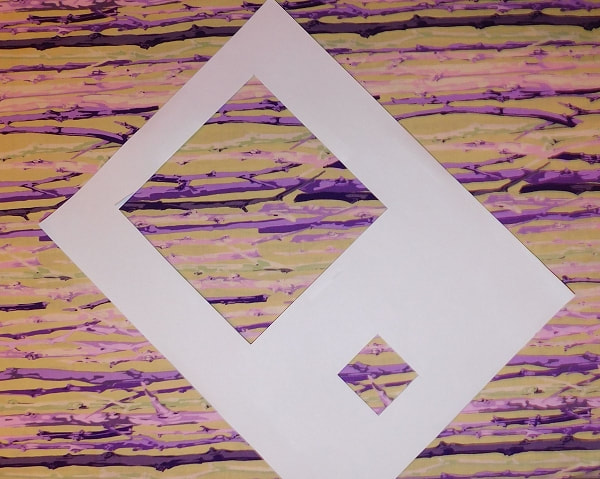
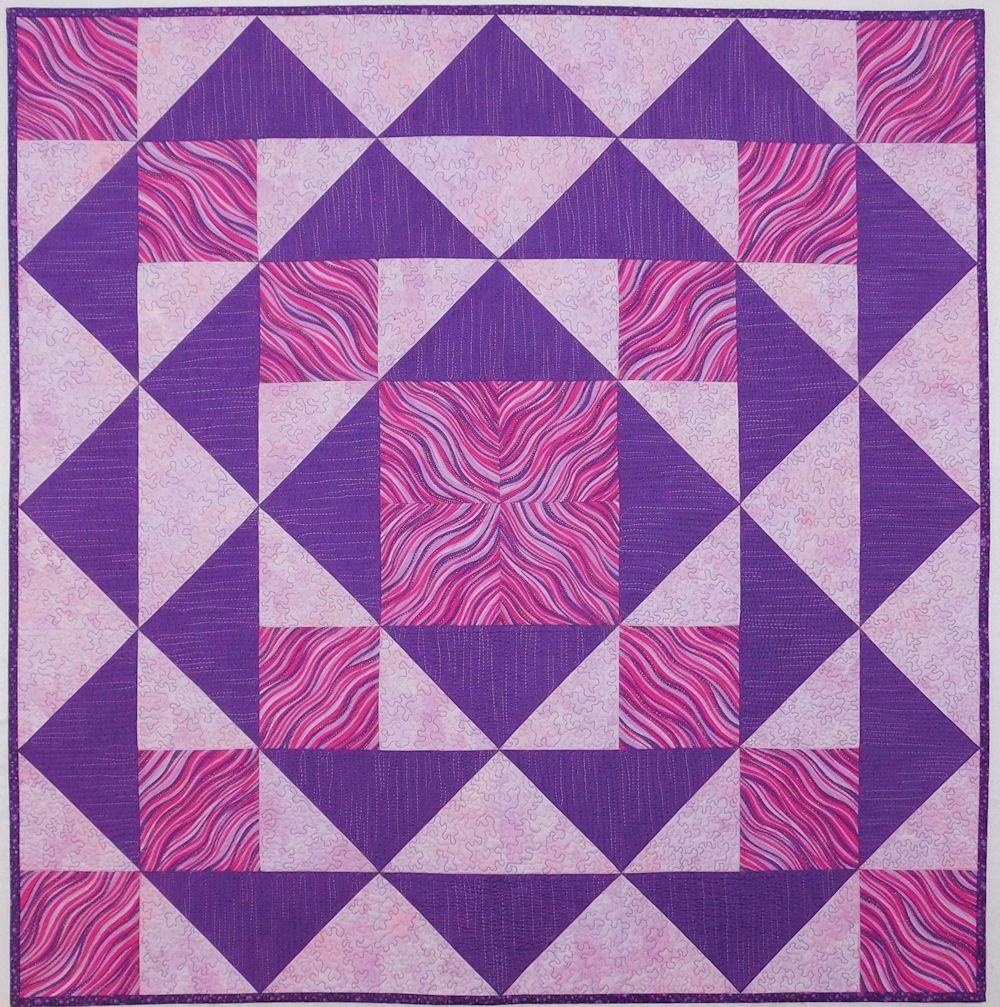
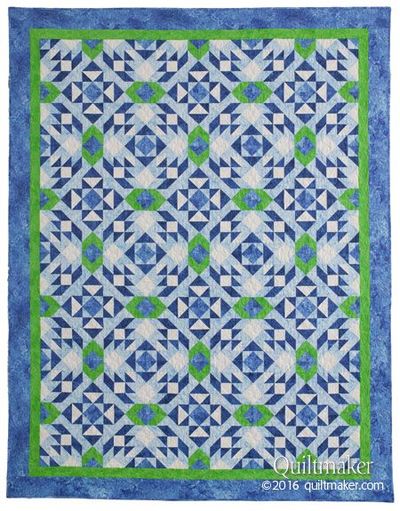
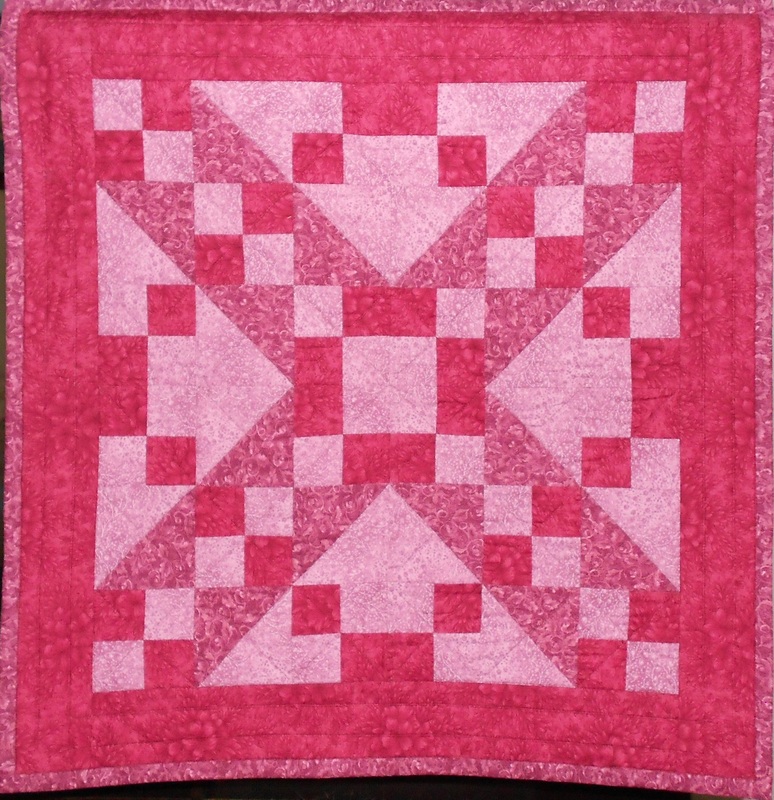
I decided to use the pink wavy stripe for the baby quilt. Even though it’s not a true linear image I thought it would make a funky quilt for a bay to stare at. I even did a mock up  of the quilt in EQ before making the quilt. Here they both are; the EQ representation and the finished quilt.
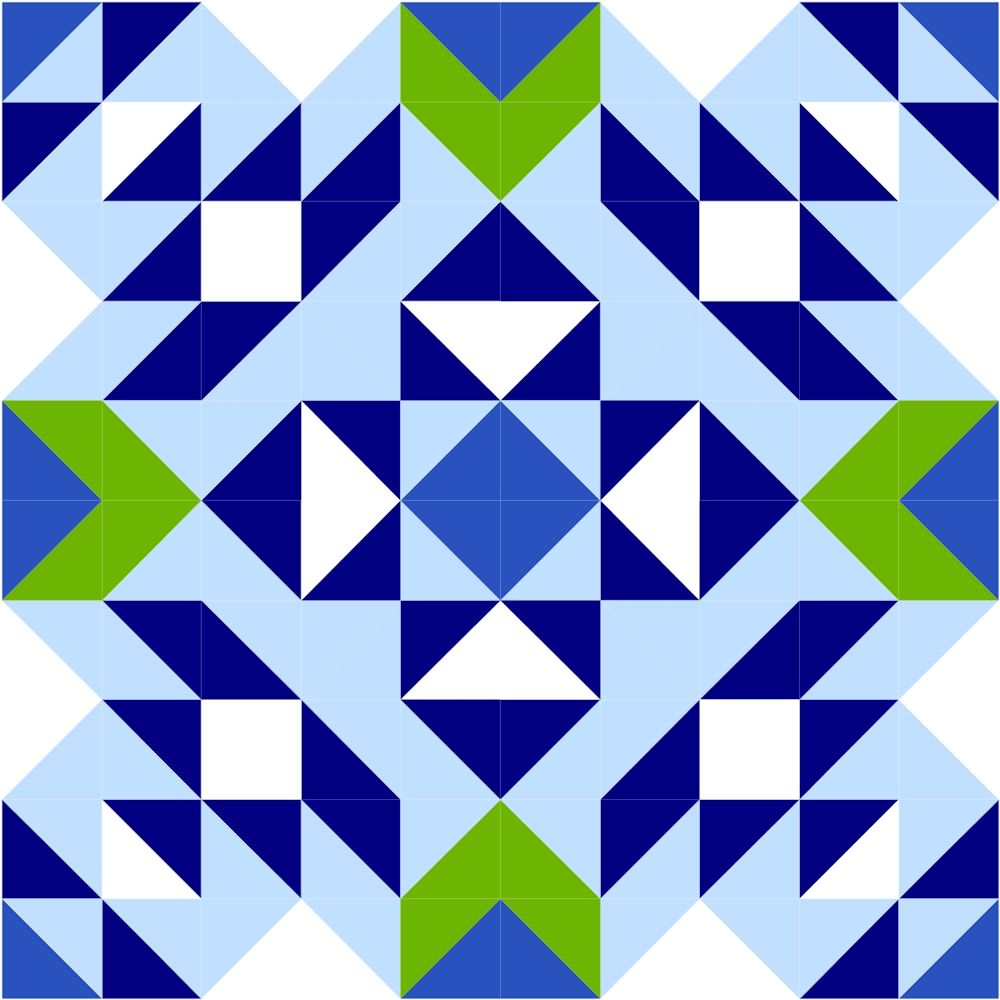
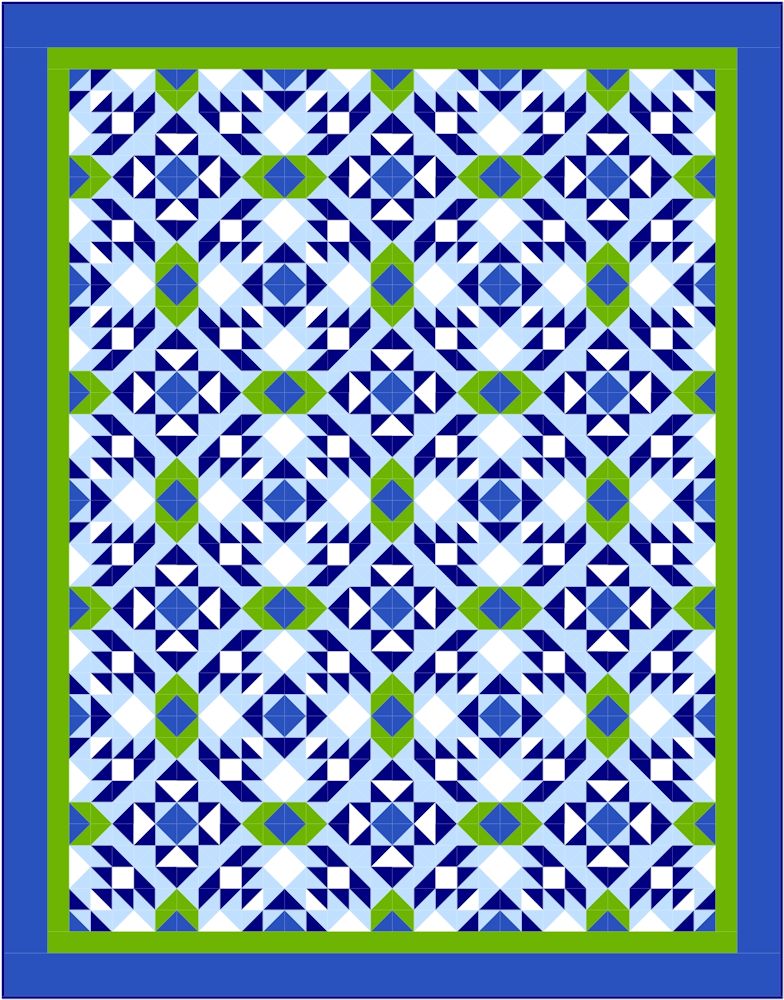
Alright now that we have gone over all the choices for the stripe and I’ve shown you the finished quilt, let’s talk about turning this into a rectangular quilt. If you add a row of Flying Geese across opposite ends of the quilt/block we end up with a lovely rectangular design. It’s just that easy!
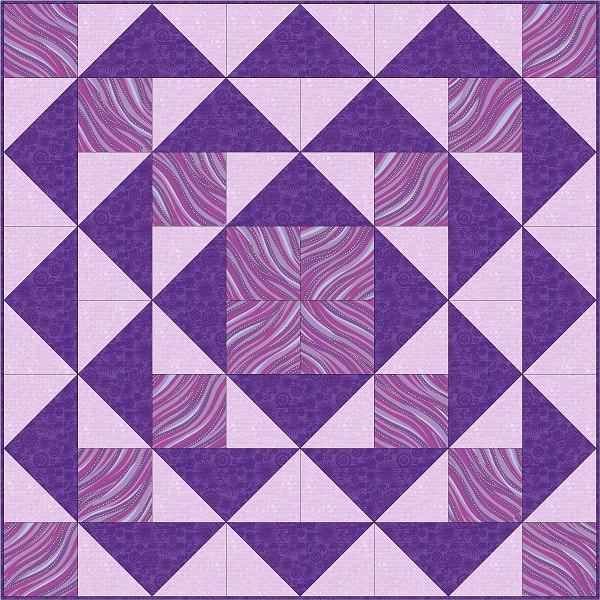
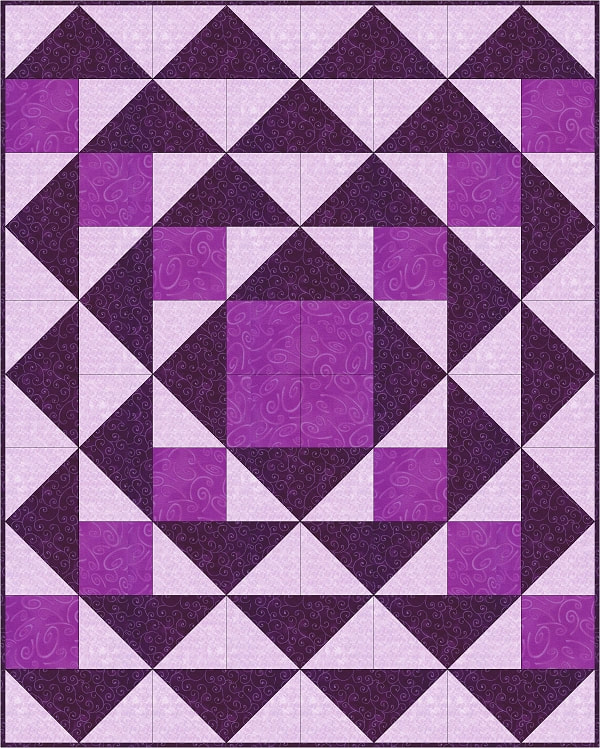
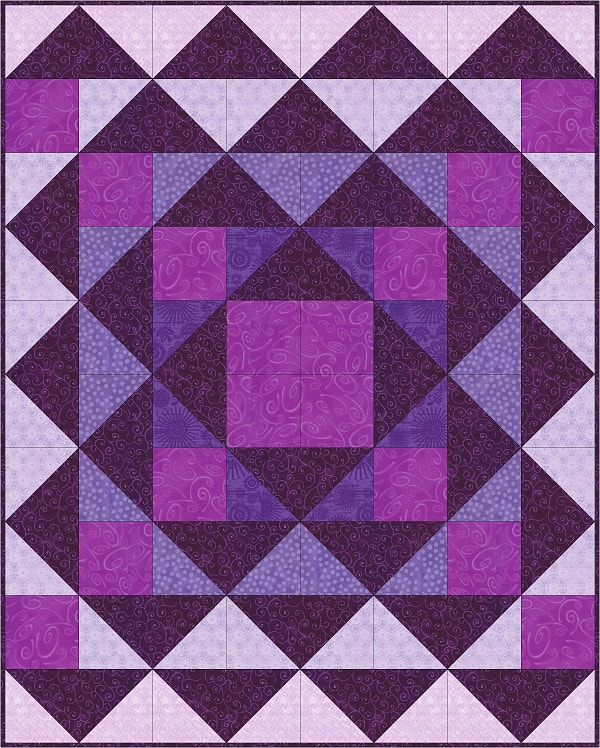
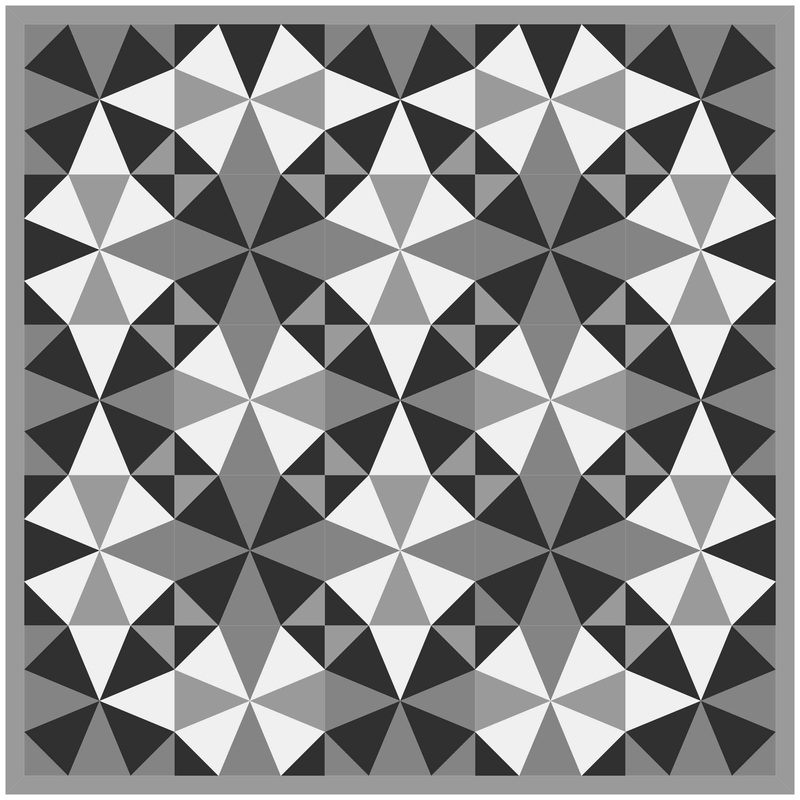
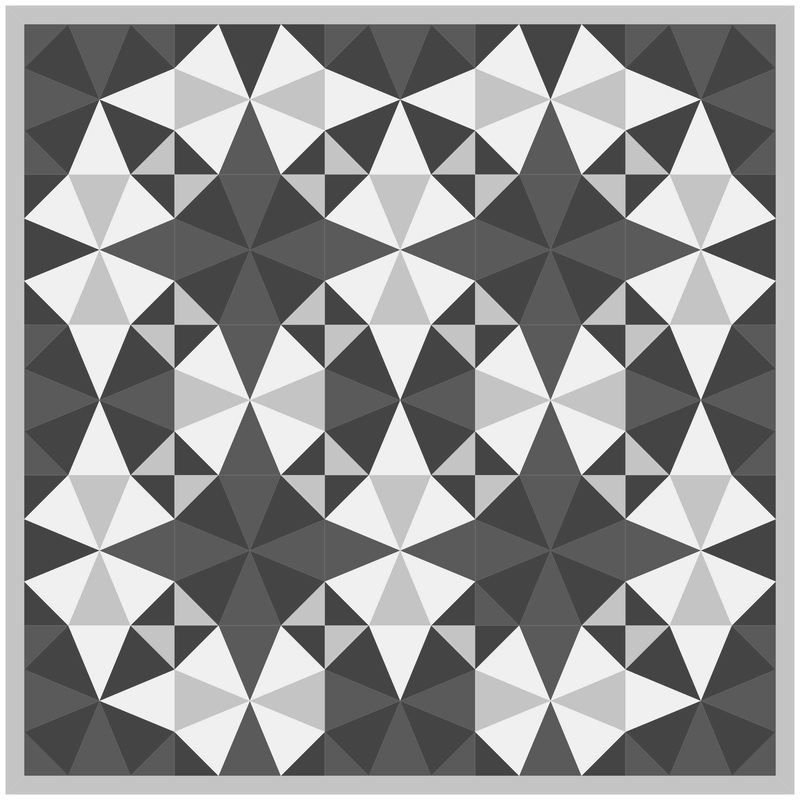
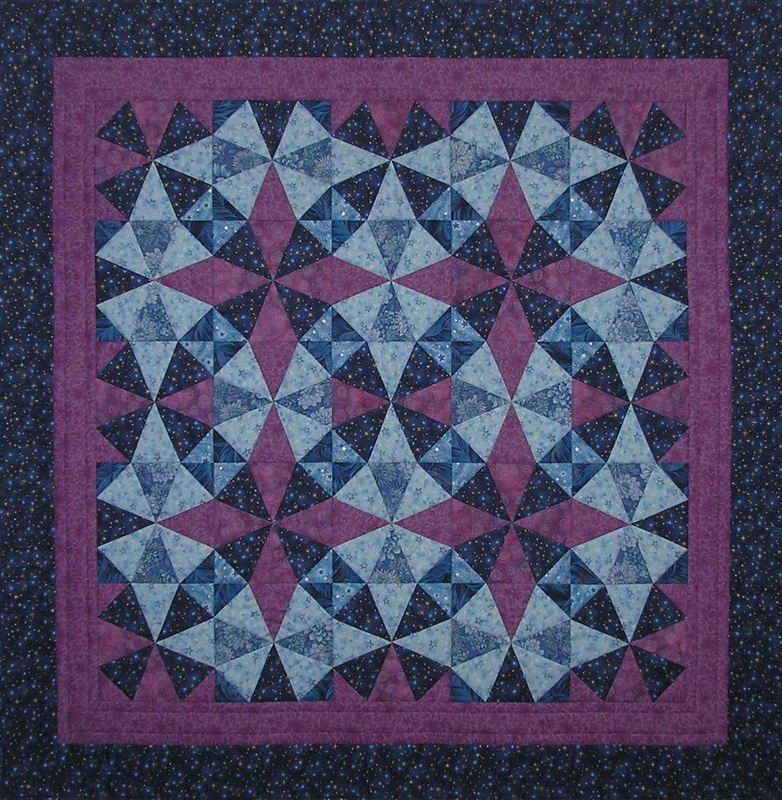
Now let’s travel a little farther down the road and see what else we can do with this design. Here is the design using a palette of purple tonals and blenders from the EQ library. The first design, starting on the left, uses just three values. If we add some gradient values of purple, for the wings of the geese, to the palette we can get a gradient affect starting with dark valued center and lighter values when we get to the outer edges. The last example shows the reverse gradient.
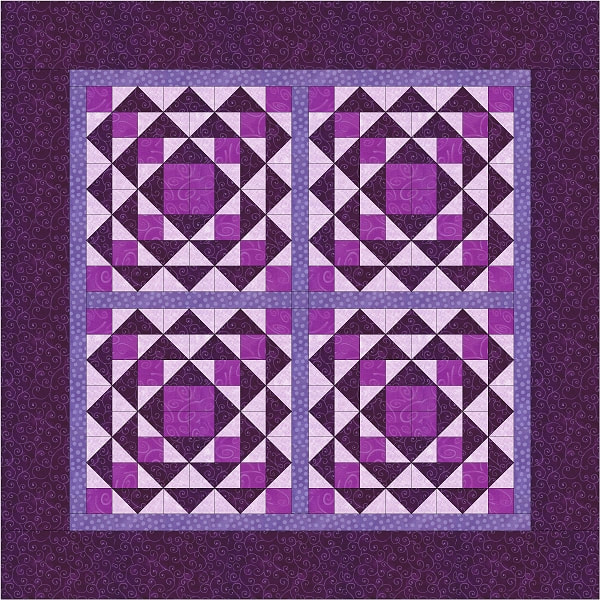
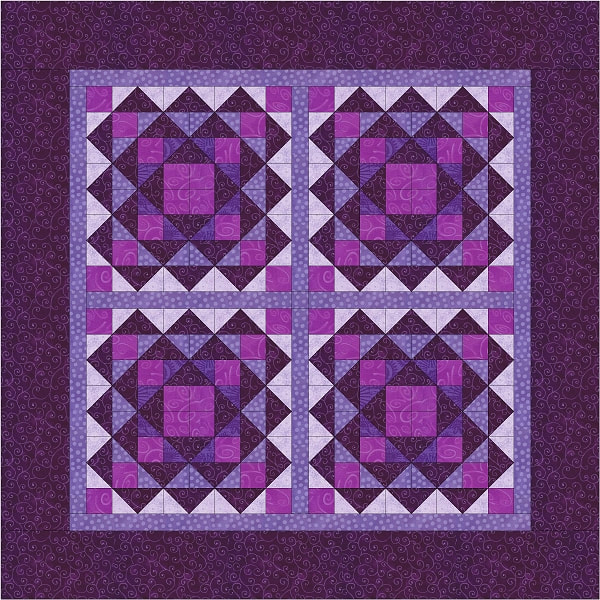
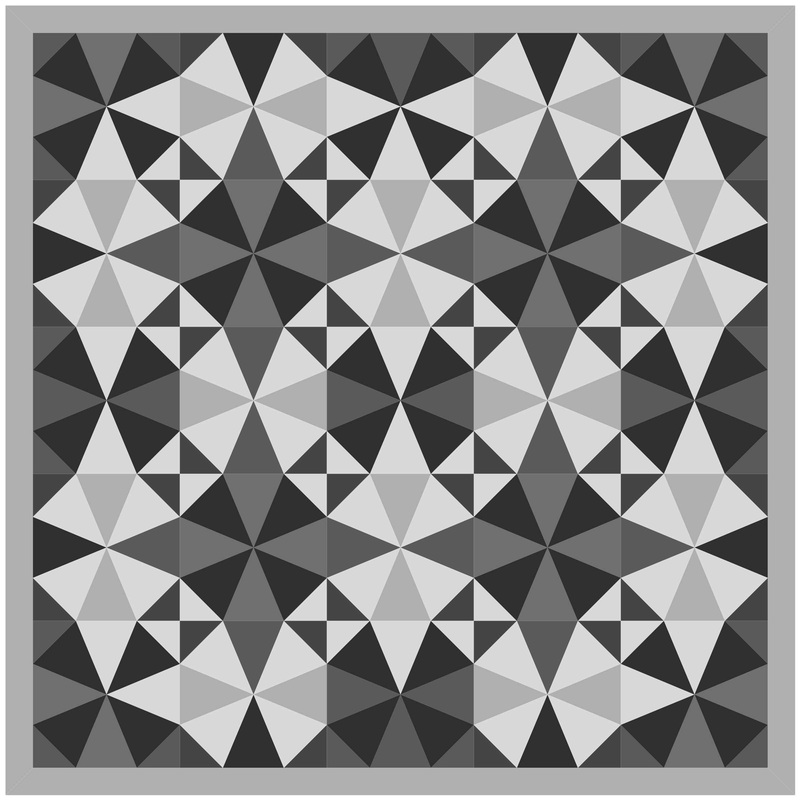
Alright, you have traveled with me this far, how about one more variation of what you can do with this block. Here’s a four block quilt shown in the purple palette. One has the three valued block and the other uses the gradient block option. Both quilts have sahing to set off the blocks.
Well, I hope you found this blog interesting. For a chance to win a copy of Quiltmakers 100 Block Challenge Volume 15, please leave me a comment below. Let me know how you feel about working with fabric cut on the bias or what you think of my post. I always try to respond to comments but there are so many during the blog tour that I don’t always accomplish my goal. So please forgive me in advance.

I’d also appreciate it if you would visit my Facebook page and click like. Also, please consider signing up for my email list. I promise that the email list is for my use only. I send out emails when I have something exciting to share with you, like a new blog post or a free pattern.
This offer has ended. Congratulations to Renee A.! Thank you for visiting! 

Happy Quilting, Janice


130 Comments

FREE PATTERN FRIDAY - OCTOBER 2017 - WHIRLPOOLS

10/20/2017

3 Comments

 
Hello Quilting Friends,

Here is the next offering for my special give away, Free Pattern Friday. I am offering this pattern for free and it will be available until I post the next one. Then it's gone! So make sure you get your copy.

You may also want to sign up for my mailing list. That way you’ll never miss an update to my blog. I promise never to sell your name to anyone. I will only ever use it to let you know about what’s going on at my website.

Here is this month’s free pattern, Whirlpools. This design was originally published in Quiltmaker magazine for May/June 2016. Click on either of the images below if you would like to read about how this design was developed.

In this blog I want to discuss value some more. I want to talk about why it’s important to have the right combination of fabrics values for your quilt design. By taking the extra time to find the right fabric values for your design you will be able to make a quilt that has the right amount of contrast between the light, medium and dark fabrics so that the finished design has the good visual movement.

If the values are too close between adjoining patch work pieces then the design will be washed out. You will lose part of the visual element that would have created the movement within your design. For the Whirlpools quilt design you need three values of Blue; light, medium and dark plus a green and a white accent. All three of the blue fabrics come in contact with each other therefore good contrast is very important. 

In the sample below we have the original block with the correct amount of contrast between the three blues. There is enough definition for you to see the visual movement that I desired. You can see new elements come to life when the blocks are joined and rotated.

Now let’s make the medium blue a bit lighter in value than it is and see what happens when we look at the quilt. As I see it, the loss of contrast between the medium and light blue patch work pieces affects the motif that is created at the center of four blocks when they are joined. As you can see the element isn’t as defined as it was when the medium blue was a deeper value. We also lose the dynamic between the medium blue and the green accent fabric.
If we make the medium blue even lighter, we completely lose the element where the four blocks join and therefore the reason for having a medium value in the first place. The same is true in relation to the pairing of the medium blue with the green accent. You almost can’t tell the light blue from the medium.
Here is a comparison of the three examples as you would see them in the finished quilt. This should drive home the importance of good value contrast.
There are tools that will help you to discern the value of a fabric. You need a color filter and a gray scale value card. The color filters come in green and red. You use the red filter when working with cool colors and the green when you are working with warm colors. Since most of us work with a combination of the two, you will probably want to have both filters.

As you look at the fabric through the filter you place the value card near the fabric and move it around the values until you find the one that matches yours. The great thing about working with these tools is that eventually you will start to discern the value of the fabric without the red or green filter. I have these tools available at my ETSY shop for purchase. Click here to visit my shop.
I hope you’re excited and feeling inspired by my post and the pattern I have offered you. I can’t wait to see what your version will look like! Please send me a photo of it when you have completed yours. And don’t forget to leave a comment. You can find the link for this pattern below.

Please share this pattern with your friends by giving them the link so that they can visit my website and download it themselves. I've worked hard to give you this gift, so I kindly ask that you do not copy this pattern in hard copy or as a digital file.

I hope you have a happy day full of quilting! Namaste my quilting friend, Janice


whirlpools_tile_5_directions_rev_3.pdf
File Size: 2121 kb
File Type: pdf
Download File

3 Comments

FREE PATTERN FRIDAY - AUGUST 2017 - BLUE WILLOW QUILT DESIGN

8/18/2017

1 Comment

 
Hello Quilting Friends,

Here is the next offering for my special give away, Free Pattern Friday. I am offering this pattern for free and it will be available until I post the next one. Then it's gone! So make sure you get your copy. You may also want to sign up for my mailing list. That way you’ll never miss an update to my blog. I promise never to sell your name to anyone. I will only ever use it to let you know about what’s going on at my website.

Here is this month’s free pattern, Blue Willow. This design was originally published in Fons & Porter's Love of Quilting March/April 2014 issue. In this blog I want to discuss the importance of value placement within your design. An understanding of value placement will help you to make a quilt that has the light, medium and dark fabrics where they need to be to achieve the look that you desire.
Picture
 This quilt was made with fabric from Quilting Treasures Blue Moon collection. This group was great to work with because it consisted of a full scale of 10 values from light to dark. This was accomplished through the clever distribution of the texture used in the motif of each fabric print. The visual texture was achieved with blue printed onto white fabric.
Picture
Usually I work with a standard grey scale progression from black through a variety of greys to white when I design. Whenever I work on a new design I always consider value placement carefully. The placement of light and dark is what creates the pattern that our eyes perceive. I can’t stress enough how wonderful it was to work with a group of fabrics where someone took the time to create a near perfect progression of printed fabric textures ranging from light to dark.
Picture
For this design I used 10 values (10 fabrics) in total. It may seem like a lot of fabrics to gather together, but when you see what it looks like with less values you’ll understand why you will want to take the time to collect all the values you’ll need to complete this quilt as designed. I’ll go through a few variations where I decrease the number of fabrics used so that you can understand how more values (fabrics) can improve the look of a design.

The original design uses 10 values. I’ll start by changing the binding to match the last border. It may seem like a little thing to change but having a binding that contrasts with the last border adds a nice accent to the overall design. The next thing I’ll tweak are the light valued fabrics. In this design there are three light valued fabrics. I’m going to replace two of them with the third. This results in a design that uses 7 different values. Here is a look at both the original design and the new variation. I’ve also included a close up for detail.
Next I’ll tinker with the medium values used in the interior of the quilt. There is a swirl and a floral used to frame the light value portions. I’m going to change the floral one to match the swirl. I’m still using the floral in the border but not the interior. This creates a flatter image. The depth created by the use of the second medium valued fabric is missing. Here is the result below.
The design has two dark fabrics used in the blocks that create depth just like the medium valued fabric did. I’m going to remove the second dark fabric and use only one dark fabric in the design. We are now down to 7 values used in the interpretation of this design. Here is what that looks like.
Finally I’ll change the tile motif in the middle of the block to match the inner border. Now we are down to 6 values used in the design. I think that the design loses some of its sparkle when the palette is pared down to almost half of the number we started with. Here’s the result. You can decide for yourself how it makes you feel when less fabrics are used to interpret the design.
There are tools that will help you to discern the value of a fabric. You need a color filter and a gray scale value card. The color filters come in green and red. You use the red filter when working with cool colors and the green when you are working with warm colors. Since most of us work with a combination of the two, you will probably want to have both filters.

As you look at the fabric through the filter you place the value card near the fabric and move it around the values until you find the one that matches yours. The great thing about working with these tools is that eventually you will start to discern the value of the fabric without the red or green filter. I have these tools available at my ETSY shop for purchase. Click here to visit my shop.

I hope you’re excited and feeling inspired by this pattern I have offered you. I can’t wait to see what your version will look like! Please send me a photo of it when you have completed yours. And don’t forget to leave a comment. That way I know I’m not alone here. : )  
 
This pattern is available from download from my ETSY Shop. Click here to purchase this pattern.

I hope you have a happy day full of quilting! Namaste my quilting friend, Janice


1 Comment

Seminole quilts

10/11/2013

0 Comments

 
These quilts were made using the book Simply Seminole by Dorothy Hanisko. This book is a great resource for color theory, cutting techniques and Seminole piecing. This style of piecing was started by the Seminole Tribe, who were originally from Florida. 

    Seminole piecing is a technique that involves cutting the fabric into strip sets, cutting them apart and sewing them together again to make a new pieced strip an interesting pattern. Traditionally, these decorative strips of fabric were used in garments. Therefore the finished strips would be of a small scale. In Simply Seminole, the author enlarges the patterns to make them suitable to quilting.

    Making a Seminole quilt is a great opportunity to experiment with color and value. I like to start with a theme fabric and gather other fabrics to support it. This is a great project for seeing what values or hues are missing in your fabric stash. I've found that I don't have enough light values. To remedy this, whenever I go to a fabric shopping, I look for a pastel fabric to bring home with me.
 
0 Comments

Value Play with Kozmic results

10/5/2013

0 Comments

 
    The quilt I want to show you today, named Kozmic Blues, was the result of utilizing Electric Quilt software for color and value study. I started with a simple kaleidoscope pattern and then tried different value placements to create a focal design. 

    The design is visible to you because of the values of the fabrics that were chosen. When I finally had a design that I liked I went to my stash with a copy of the design and a value finder. A
value finder can be a very handy tool to have, especially if, like me, you are not a natural when it comes to understanding color and value. I used the value finder to help me find the fabrics in my stash that would fit the design. If I didn't have the color/value that I needed in my stash I went shopping for it later. 

        Try to keep an open mind when it comes to selecting fabrics. Always start with more choices than you will use. Once you place the fabrics together on a table, they will tell you who they want to "play with" and who they don't. Some of the fabrics that I thought would work at first didn't play well with their subsequent partners and had to be replaced with more compatible choices.

    I used my EQ design program to audition some of the fabrics before cutting them up and placing them on my design wall. I scanned the fabrics into my computer as JPEG files. Then I loaded them into my EQ program to use as fabrics in the computer program.

    When I had finally selected the fabrics that I thought would work for the
design I cut out the block pieces from all my choices and placed them on my design
wall to make sure they worked. I stared at these from near and far and changed what didn't work until the fabrics combined to give life to my design. In the end I was very pleased with my choices.
Picture
This is the finished quilt. I named it Kozmic Blues in honor of the song by Janis Joplin.
Picture
I dyed the fabric for the back of the quilt using MX reactive fabric dyes.
0 Comments

Value Study

9/19/2013

0 Comments

 
If you find yourself becoming intimidated by the concept of value relationships,
try an exercise like the one below. I don't have a natural ability for color
theory. So I've spent time playing with fabric trying to attain some skill
with color. Working with a monochromatic palette makes it easier to
understand.

For this project I chose a quilt block that had three colors. I replaced the colors
with Grey Scale equivalents; the lightest color becomes white, the darkest color
becomes black and the remaining color becomes grey. Now chose a color to
work with and find three values in that color, light medium and dark. Make
a few samples to see the results of your selection. Don't forget to play
with the borders. 

The proportion of the border width in relation to the block size can make or
break a design. I'll talk about proportions another time.
0 Comments
    Picture
    Picture

    Janice  Averill
    West Haven, Connecticut, United states

    Welcome to my Blog! This is where I'll share my thoughts about quilting with you. I'll post pictures and talk about designing quilts and construction techniques. I'll also post things that inspire me. Please leave a comment and let me know that you came by for a visit..

    Categories

    All
    100 Block Challenge
    Color Theory
    Connecting Threads
    Contests
    Ct Piecmakers Raffle Quilt
    Electric-quilt-lessons
    Electric Quilt Software
    Fabric Dyeing
    Fons & Porter Magazine
    Free Patterns
    Guild Workshops
    McCall's Quilts
    New Quilt From An Old Favorite
    NQM BOM Round 3
    Published Designs
    Quilter's Gallery
    Quilting Treasures Designs
    Quilting With Jose
    Quiltmaker Magazine
    Random Quilt Adventures
    Video Appearance

    RSS Feed

    Picture

    Archives

    January 2021
    October 2018
    November 2017
    October 2017
    August 2017
    June 2017
    May 2017
    April 2017
    February 2017
    November 2016
    July 2016
    June 2016
    May 2016
    April 2016
    March 2016
    December 2015
    November 2015
    September 2015
    August 2015
    July 2015
    June 2015
    May 2015
    April 2015
    March 2015
    February 2015
    January 2015
    December 2014
    November 2014
    October 2014
    September 2014
    August 2014
    July 2014
    June 2014
    May 2014
    April 2014
    March 2014
    February 2014
    January 2014
    December 2013
    November 2013
    October 2013
    September 2013

    Picture
    Picture
    Picture
    Picture
    Picture
    Picture
    Picture
    Picture
    Picture
    Visit the shops below for kits, fabrics, notions, patterns & magazines or anything else you might
    need to make a quilt.
    Picture
    Picture
    Picture

Proudly powered by Weebly